|
|
Post by timberwolfmadcat on Dec 3, 2005 21:13:07 GMT -5
Hmm, well, off to CT in a little bit then, hopefully the owers manual gives some idea of what the thing does......
|
|
|
|
Post by timberwolfmadcat on Dec 3, 2005 21:17:38 GMT -5
Just one last quick ?, im curious as to if crankcase vapours get into the carb, any possible damage, because heres how everything looks right now Hose on the right is #4, hose on the left is #5  |
|
|
|
Post by ace1969 on Dec 3, 2005 21:27:07 GMT -5
pm'ed you
|
|
ZoomZoom
Ruckster
 '05 Ruckus, '97 Polaris 400L 4X4
Posts: 251
|
Post by ZoomZoom on Dec 4, 2005 8:53:26 GMT -5
That's looking pretty good and a very informative thread also. ;D
|
|
|
|
Post by timberwolfmadcat on Dec 4, 2005 9:50:01 GMT -5
Alright the last question before i seal everything up still remains, IS IT OK IF VAPOURS FROM HOSE #4 GET INTO HOSE #5, is everything set up right, will be back at around 4 pm MST, so if you could answer me before that would be awesome, ill just leave the par valve in place, which means a quick run to CT afterwork
|
|
|
|
Post by chanito on Dec 4, 2005 13:52:59 GMT -5
 Great job, you are doing it perfect ;D ;D You want the engine to burn the crankcase vapors, that is why you route them back into the intake track
|
|
|
|
Post by Dandy Dan on Dec 4, 2005 14:30:15 GMT -5
I'm pretty sure you can get the tiny filters at CT.....someone said that once. You can really use any filter but the tiny ones are best cuz the air demand is very low so big = overkill. Ace: If you fail the emissions test in Ontario you have 30 days to get it fixed or something like that. However, the emissions test is only for cars. Motorcycles won't be regulated any time soon. Mine was tested because I have a friend who works at Cdn Tire and he does the test and I ran into him there once so we threw my scooter on. I'm not really sure what all we tested but the main thing (hydrocarbons?  ) I was about 600 (units???) and Cars like a Civic are normally in the 40-60 range. However that's not adjusted for volume if a civic pumps out 10x the volume of exhaust we'd actually be the same. |
|
|
|
Post by chanito on Dec 4, 2005 14:40:57 GMT -5
 No, hydrocarbons are measure in ppm (parts per millions) so it does not matter how big your engine is, the unit are the same so your scooter is polluting 10 times more than the civic
|
|
|
|
Post by timberwolfmadcat on Dec 4, 2005 17:01:38 GMT -5
Awesome, thankers Chanito, DD, ZoomZoom, and everyone else, will post a good ol install guide for it as soon as all is done, it wasnt even that hard, heck, for $20 best money i ever spent
|
|
|
|
Post by timberwolfmadcat on Dec 4, 2005 17:48:49 GMT -5
Ok, one last question, can i completely remove hose #3, it isnt doing a whole lotta good, from what i can tell it just runs to the frame,doesnt seem to do anything.....
|
|
|
|
Post by chanito on Dec 4, 2005 22:38:15 GMT -5
You can install a pcv filter from a mid 80's american car (the ones that go in the air filter housing) and just use the little rubber hose that attach the pair control valve to the air filter housing
|
|
|
|
Post by timberwolfmadcat on Dec 4, 2005 23:14:32 GMT -5
huh so confused |
|
|
|
Post by timberwolfmadcat on Dec 4, 2005 23:16:50 GMT -5
CT has squat for filters, so i just cut the hose, took the foam outta the stock box, and glued it in, fits right on the original Pair valve intake, and what about hose #3, it has no suction potential, as its not hooked up to anything, can i just leave it out
|
|
|
|
Post by timberwolfmadcat on Dec 5, 2005 0:14:01 GMT -5
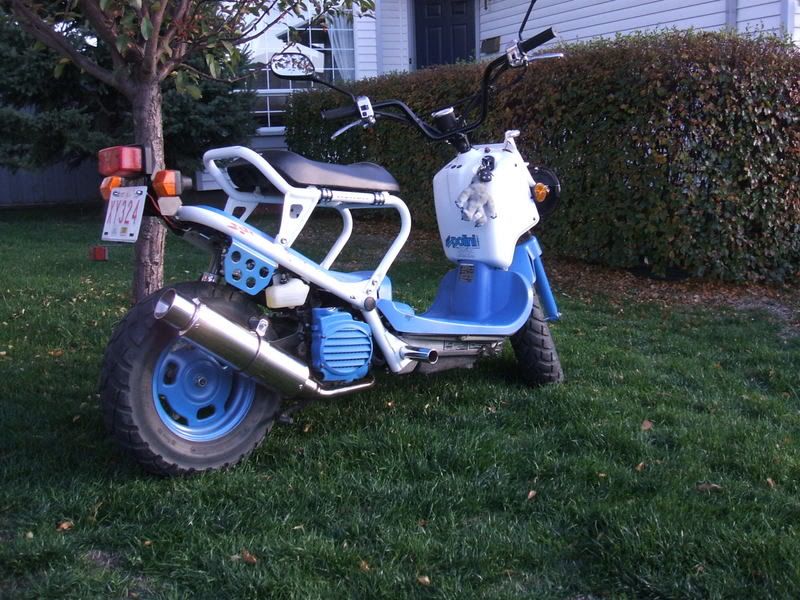
TADAH!!!!!!  will have to work on jetting the carb later, it bogs huge right at the start, making a very nice growl though, i like it..... |
|
|
|
Post by Dandy Dan on Dec 5, 2005 9:23:19 GMT -5
No, hydrocarbons are measure in ppm (parts per millions) so it does not matter how big your engine is, the unit are the same so your scooter is polluting 10 times more than the civic I don't understand. My scooter is polluting 10x more than the civic per litre of exhaust emissions but the Civic is still pumping out way more litres of exhaust so we should end up similar. If hydrocarbons are measured in PPM like you said than it seems that the total volume of exhaust should matter. My Ruckus puts out way more hydrocarbon parts per million (600) but the Civic is pumping out way more total parts so even though it's lower per million it could work out similar. For example: Ruckus: Total Exhaust Volume = 1 Million parts per second. Hydrocarbons = 600 PPM (Parts for every million parts) Civic: Total Exhaust Volume = 15 Million parts per second. Hydrocarbons = 100 PPM Therefore total hydrocarbon emissions: Ruckus: 600 Parts per Million X 1 millions parts = 600 parts of hydrocarbons per second Civic: 60 Parts per Million X 10 million parts = 600 total parts of hydrocarbons per second Basically the way I'm thinking of it is that my Ruckus is pumping out small quantities of very nasty emissions and the Civic is pumping out very large quanties of pretty good emissions so in terms of total pollutants released we wind up similar. |
|
|
|
Post by Dandy Dan on Dec 5, 2005 12:55:56 GMT -5
Timber: If you replaced your unmodified stock airbox with this filter you'll be lean, not rich cuz way more air is getting in. Likely it tears 0-1mph and the dies hard.
What did you use (if anything) to oil the filter?
|
|
|
|
Post by timberwolfmadcat on Dec 5, 2005 18:10:56 GMT -5
used gear oil on it, and if i just punch it, yes that does happen, but if you go very slowly up, you can get er revving nice, i can go slowly up to 30 km/h, after that nothing, just cuts out
|
|
|
|
Post by timberwolfmadcat on Dec 5, 2005 18:12:06 GMT -5
Now onto step #2, jetting the carb, anyone wanna fill me in on whats involved, do i have to disconnect everything, or can i just change it with most of the hoses connected?
The less i take off the better is my way of thinking, i put the new filter on with just removing the others from the airbox, left everything else in place... maybe i should go see my local motorcycle shop, see if they do courses on carb jetting???
|
|
|
|
Post by Dandy Dan on Dec 5, 2005 20:21:11 GMT -5
Jetting the carb is a bit daunting if you just dive in uneducated but it's really not that bad. Here's how you do it:
1) Remove the front battery cover (4 screws + 2 more in the front of the floorboard), seat frame (6, 12mm bolts), and the floorboard (8, 10mm bolts) so you can get at things.
2) The main hose coming from the airbox is held on by a screw tightened band. Just loosen the screw and wiggle the band off. It's actually harder to wiggle it off then it is to get it back on so don't worry about getting it back on. Do the same thing for the main hose coming out the front of the carb. These steps go smoother if your Ruckus is in a warm place.
3) Take the large hose on the left side of the carb off. There's just a wire clip you squeeze and then wiggle the hose off.
5) Disconnect the bank of wires to the throttle positon sensor (front thing) and the start enrichment valve (rear thing). You just squeeze the sides and the plastic parts click apart. Don't screw off the throttle position sensor or you'll need to reset the ECM.
6) Disconnect the fuel line which is the small hose at the back on the right side of the carb. You'll need some pliers (needle-nose) for this. Set the hose somewhere where gas won't run everywhere.
7) Lift the back of the carb up so you can reach underneath and disconnect the 2 coolant hoses. They are at the front, bottom of the carb. The coolant goes in the left side and out the right. It's pretty simple.
8) Now you should have everything disconnected except for the throttle cable. The throttle cable is the hardest one to disconnect but it's still not that hard. However, you don't need to disconnect it. There is enough slack that at this point you can just set the carb upside down and start working away at the bottom. The total time to disconnect all the hoses etc should be 2-5min. I know there's a lot and it might seem daunting but it's really not possible to put any hoses back on wrong. Once you've done it once you won't think anything of it.
9) Ok so you've got everything disconnected but the throttle cable and the carb is upside down. At some point during the last couple steps the gas probably started to spill out. I generally just slide a rag under the carb before I start tearing the hoses off but you can attach a hose to a nipple on the bottom and loosen a screw to drain it. Anyways, with the carb upside down take the 3 screws out that hold the bottom on and then lift the bottom off. Now in front of your eyes will be the main jet and the slowjet amongst other things. The main jet is pretty obvious cuz it's the big one in the middle. You need a flat bladed screwdriver to remove the jet. Just screw it out and screw the new one in. I'd say an 85 jet would be a good start but it depends on how well your new filter flows.
10) Put everything back together in the reverse order. The only thing you need to know is that it'll take a bit to start up because the carb bowl is now empty so you need to hold the starter down for a while. I've found it usually starts up right away and then dies after 2 seconds and then it needs another 20 seconds for the gas to really get flowing. To expediate this a bit you can just turn the key on and then off after 5 sec to run the choke. Do this like 4-6 times. Oh, one other thing. You don't really want the main jet coming loose because if it backs out a bit you'll run super rich off the line. That happened to me once and I had to push it and then jump on. On, another thing is that all the carb screws strip out pretty easy to make sure you screwdriver fits and don't tighten them too much cuz next time you're in there it'll be even tougher.
If you want to get into clipping the diaphram spring and shiming the needle you don't need to remove all the hoses etc because this stuff is accessed from the top. For the diaphram spring just take the 2 screws out of the plate on the top of the carb and lift that off. The diaphram spring will be right there and there will also be a rubber gasket/bladder (the diaphram) it can be a little tough to get back in but just install it with it up and then slowly push it down while you hold the edges in the grooves. You'll see what I mean when you're in there. To shim the needle lift this diapram part out and the needle and stuff will come with it. Just lift the diaphram spring out and using a mini phillips screwdriver reach down and while you push down turn the needle holder left to remove it. Then it'll lift out and the needle will just fall out. There's a tiny spring in there that you don't want to lose. There's lots of good pics and instructions for shimming on battlescooter.com. If you are adding a significant amount of shim you will need to modify the white plastic piece but you'll see what I mean. Also be careful cuz the white plastic piece strips out easy (funny how I know all this stuff).
|
|
|
|
Post by timberwolfmadcat on Dec 5, 2005 21:55:08 GMT -5
gee, too bad theres noone nearby that knows how to do it, im totally willing to pay well to learn, thanks DD, it doesnt sound so bad, ill think about it for a little more, see if anyone nearby teaches classes on how to do it Just to make sure i got this right, Lower Jet# = Richer, Higher Jet# = Leaner |
|