
Post by Dandy Dan on Jun 19, 2005 18:07:17 GMT -5
Ok here it is. I tried to keep things as simple as possible for the rookies out there that wish to get in over their head.
Materials
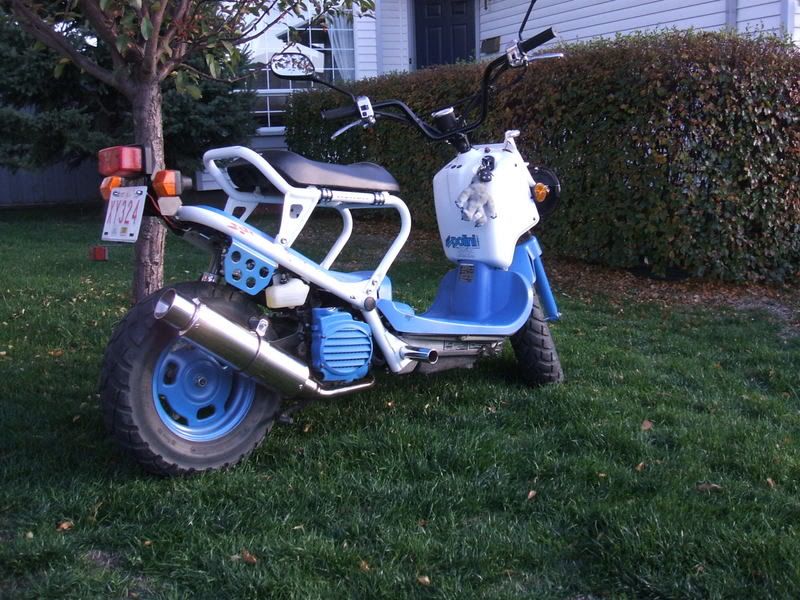
Honda Ruckus
H.O. Camshaft (including bearings, cam lube)
Metric Socket set
10mm wrench
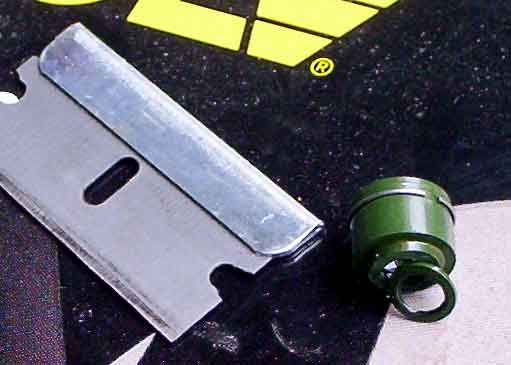
Razor Blade
New head gasket
New Valve seals
An assortment of pliers
Masking Tape
Pen
1) Remove seat, floorboard and front cover and exhaust pipe.
2) Detach all wires and hoses from engine. Remove all coolant hoses, detach everything from the carb except for the wires and throttle cables, remove fuel lines and the wires that slide on to the nipples etc. Bascially you need to remove everything that attaches the front half of the bike to the back. An except is the rear brake cable. Just take out the bolts that clamp it along the way but leave it attached at the wheel. As you are doing this stage make sure you know where everything goes. I wrapped masking tape around each hose and labeled were it came from.
3) Take apart the main pivot. There is a rod with a nut on the end that slides through a sleeve. You may need a friend to hold one socket cuz you'll need two at once going here. Before you do this support the front of the scooter with some wood or something to hold it up when you take the pivot apart. The rear is fine on its own because the wheel and center stand hold it up. I took the shock off to but you may not need to.
4) Pivot the whole rear end 90 degrees clockwise. This will give you great access to the head.

5) Sometime before you remove the head you need to drain the coolant. Just remove the 4 screws for the black cover, and then take the cap off the top and the plug out of the bottom.
6) Dismantle the head. Remove the valve cover and the cover on the exhaust side of the head. You can loosen the timing chain tensioner on the top of the engine or just loosen off the sprocket. It is important that you get the chain back on in the right spot so that the cam lines up with the piston position. You can use a market to mark where the chain and sprocket lines up (or whiteout).
The first piece you'll remove from the side has 2, 8mm bolts and you need to use two 1/4" drive sockets to remove the bolts (hold one while you loosen the other). Or to get them loose you can try and prevent the chain from moving by grabbing it with pliers or something. Just be careful.

7) Then carefully take the chain off of the sprocket while being careful not to let it fall of the sproket inside the main part of the engine. The cam will fall out at this point so be careful. You may need to either loosen the head off of the block or loosen the chain tension. I'm not sure exactly....

8) Now remove the head, take out the 4 longs bolts on the front plus two fatter bolts on the exhaust side.

9) Take off and throw out the headgasket. You want to replace this everytime you go in to the engine. Also remove the rocker arms. The axles they're on just slide out.

10) Now remove the valve springs. You could use a spring compressor but the spring really aren't that stiff. What you want to do is set the whole head on a tall socket so that the valve you are trying to remove the spring off of is resting on the socket. I believe you want a 12mm for the exhaust and 14mm for the intake. Then set another tall socket on top of the valve spring and give it a little tap with a hammer. This is just to 'break the seal'. Once you've done this keep the head resting on the socket but use a 10mm wrench to push down on the spring. Then have a friend remove the little pieces that attach it to the valve.

11) Remove and cut down the seals. They have a little wire clamp (see a pic) that you'll need to remove. You can then slide em off but they don't come too easy. Thats why you should get new seals cuz you could easily tear em. I put a small tear in mine. You can't cut much off the seals without compromising the sealing abilities but you don't really need to either. You have to cut off of the top of the seal cuz the seals are resting on the guides so if you cut off of the bottom they won't slide on further. You can cut maybe 1/2mm off. The total increase in lift if about .35mm. (the lobes are about .1- .2 mm taller and the minimum radius is about .1-.2mm shorter so you gain about 1/3 off a mm. Plus the rocker arm works in about a 2:1 ratio so your total lift is about .7mm. It's hard to believe the tolerances would actually be this tight and I suspect the valves wouldn't hit if you took nothing off but I took 1/2mm off to be safe.


12) (optional) port and polish things. You can enlarge the intake port, remove some seems, cut down the PAR nipple instead the intake port so its flush to the wall, slope the carb/intake interface so that there is gradual drop in diameter instead of the air hitting a lip. etc. I'm not really the porting expert so I did a fairly conservative job. I enlarged the exhaust slighly but didn't match it.
13) Put the valve springs back on. You'll need one person to compress the springs while the other person uses needle nose pliers to position things.
14) Put the bears on the new cam. You'll need to press them on somehow. I used a C clamp. You could set a socket on the top and bottom and try and tap them or perhaps a vice would work. Just make sure they're going on even.

15) Lube the cam with lube provided
16) Install Rocker arms, cam etc.
17) Put the rest of the headtogether, make sure you get the chain on right
18) Button things up in the reverse order of dissasembly. Refill coolant
19) You'll need to increase your valve shims by about .2mm since the minium radius of the cam is lower.
20) Adjust your carb ( I tentatively went from an 85 with 2mm of shim to a 95 without an shim)
21) Give it an oil change soon as porting shavings or other crap may get in.
22) Drive fast.
I've got a lot more pics if you want a better look at something. I just have a slow 28.8k connection right now so these quality has been dropped quite a bit and I didn't post most of em.
Materials
Honda Ruckus
H.O. Camshaft (including bearings, cam lube)
Metric Socket set
10mm wrench
Razor Blade
New head gasket
New Valve seals
An assortment of pliers
Masking Tape
Pen
1) Remove seat, floorboard and front cover and exhaust pipe.
2) Detach all wires and hoses from engine. Remove all coolant hoses, detach everything from the carb except for the wires and throttle cables, remove fuel lines and the wires that slide on to the nipples etc. Bascially you need to remove everything that attaches the front half of the bike to the back. An except is the rear brake cable. Just take out the bolts that clamp it along the way but leave it attached at the wheel. As you are doing this stage make sure you know where everything goes. I wrapped masking tape around each hose and labeled were it came from.
3) Take apart the main pivot. There is a rod with a nut on the end that slides through a sleeve. You may need a friend to hold one socket cuz you'll need two at once going here. Before you do this support the front of the scooter with some wood or something to hold it up when you take the pivot apart. The rear is fine on its own because the wheel and center stand hold it up. I took the shock off to but you may not need to.
4) Pivot the whole rear end 90 degrees clockwise. This will give you great access to the head.
5) Sometime before you remove the head you need to drain the coolant. Just remove the 4 screws for the black cover, and then take the cap off the top and the plug out of the bottom.
6) Dismantle the head. Remove the valve cover and the cover on the exhaust side of the head. You can loosen the timing chain tensioner on the top of the engine or just loosen off the sprocket. It is important that you get the chain back on in the right spot so that the cam lines up with the piston position. You can use a market to mark where the chain and sprocket lines up (or whiteout).
The first piece you'll remove from the side has 2, 8mm bolts and you need to use two 1/4" drive sockets to remove the bolts (hold one while you loosen the other). Or to get them loose you can try and prevent the chain from moving by grabbing it with pliers or something. Just be careful.
7) Then carefully take the chain off of the sprocket while being careful not to let it fall of the sproket inside the main part of the engine. The cam will fall out at this point so be careful. You may need to either loosen the head off of the block or loosen the chain tension. I'm not sure exactly....
8) Now remove the head, take out the 4 longs bolts on the front plus two fatter bolts on the exhaust side.
9) Take off and throw out the headgasket. You want to replace this everytime you go in to the engine. Also remove the rocker arms. The axles they're on just slide out.
10) Now remove the valve springs. You could use a spring compressor but the spring really aren't that stiff. What you want to do is set the whole head on a tall socket so that the valve you are trying to remove the spring off of is resting on the socket. I believe you want a 12mm for the exhaust and 14mm for the intake. Then set another tall socket on top of the valve spring and give it a little tap with a hammer. This is just to 'break the seal'. Once you've done this keep the head resting on the socket but use a 10mm wrench to push down on the spring. Then have a friend remove the little pieces that attach it to the valve.
11) Remove and cut down the seals. They have a little wire clamp (see a pic) that you'll need to remove. You can then slide em off but they don't come too easy. Thats why you should get new seals cuz you could easily tear em. I put a small tear in mine. You can't cut much off the seals without compromising the sealing abilities but you don't really need to either. You have to cut off of the top of the seal cuz the seals are resting on the guides so if you cut off of the bottom they won't slide on further. You can cut maybe 1/2mm off. The total increase in lift if about .35mm. (the lobes are about .1- .2 mm taller and the minimum radius is about .1-.2mm shorter so you gain about 1/3 off a mm. Plus the rocker arm works in about a 2:1 ratio so your total lift is about .7mm. It's hard to believe the tolerances would actually be this tight and I suspect the valves wouldn't hit if you took nothing off but I took 1/2mm off to be safe.
12) (optional) port and polish things. You can enlarge the intake port, remove some seems, cut down the PAR nipple instead the intake port so its flush to the wall, slope the carb/intake interface so that there is gradual drop in diameter instead of the air hitting a lip. etc. I'm not really the porting expert so I did a fairly conservative job. I enlarged the exhaust slighly but didn't match it.
13) Put the valve springs back on. You'll need one person to compress the springs while the other person uses needle nose pliers to position things.
14) Put the bears on the new cam. You'll need to press them on somehow. I used a C clamp. You could set a socket on the top and bottom and try and tap them or perhaps a vice would work. Just make sure they're going on even.
15) Lube the cam with lube provided
16) Install Rocker arms, cam etc.
17) Put the rest of the headtogether, make sure you get the chain on right
18) Button things up in the reverse order of dissasembly. Refill coolant
19) You'll need to increase your valve shims by about .2mm since the minium radius of the cam is lower.
20) Adjust your carb ( I tentatively went from an 85 with 2mm of shim to a 95 without an shim)
21) Give it an oil change soon as porting shavings or other crap may get in.
22) Drive fast.
I've got a lot more pics if you want a better look at something. I just have a slow 28.8k connection right now so these quality has been dropped quite a bit and I didn't post most of em.


 Great posting DandyDan
 The Zoomer in Europe have a fuel injected 4 valve head, but the four valves are driven by a two lobe cam just like the one here in North America, that is what make us believe the camshafts are interchangeable, however nobody has tried to do the swap


