|
|
Post by Dandy Dan on Jul 12, 2006 8:20:43 GMT -5
Dandy Dan, my friend, this piston business is too important and exciting to sully with the stress of a MARRIAGE!, for God's sake, I recommend you put the marriage thing on hold till you and Chanito are up and running on your scooters. The eyes of the Ruckus world are upon you! I'm sorry....marriage really snuck up on me and I was defenseless against her angel eyes. |
|
|
|
Post by chanito on Jul 12, 2006 22:48:03 GMT -5
 What we need is a pic of the future Mrs DD Tomorrow i will post the pics of the head install and the final motor adjusments (like valve adjustment and rad install) and Frankie should be in Katrina and running Saturday, so next week will be tuning time ;D 8-)So far so good 
|
|
|
|
Post by Dandy Dan on Jul 13, 2006 8:25:42 GMT -5
I"ll post a pic of her this weekend.
Good luck with the tuning....I really think you're gonna need a slow jet kit to get it dialed.
|
|
|
|
Post by chanito on Jul 13, 2006 18:33:26 GMT -5
I"ll post a pic of her this weekend. :)Great ;D ;D We are dying to meet her   Good luck with the tuning....I really think you're gonna need a slow jet kit to get it dialed. I am hoping to get by with just an idle mix adjusment, but if not then i will post about it  |
|
|
|
Post by Dandy Dan on Jul 14, 2006 9:46:55 GMT -5
Well good luck but I'm with the skeptics.
Anyways, my fiance picked my engine case last night! I haven't seen it yet but hopefully it's a work of art. The shop I took it to is slow but supposedly they do awesome work. The total cost was $99 Cdn ($90 US) plus tax for boring and honing (they sent it out).
Tomorrow morning I'm gonna put everything together hopefully. It took me 3 hours to get it apart and I'm hoping to get it back together in 5 hours and then start the rejetting. I'm hoping to have it running okay by 2-3pm.
|
|
|
|
Post by chanito on Jul 14, 2006 19:43:24 GMT -5
 My head took longer to assemble than i expected, as the intake valve was burnt so i had to lap it until it got fixed, i finally have Frankie (the motor) together so tomorrow i will swap it with the motor in Katrina, is funny in the shop we have all kind of engines being assemble and some of them are super nice but Frankie is the one we most talk about, and a lot of people will be there tomorrow to watch Frankie fire up for the first time with the big piston, so i better make sure everything goes OK or i will have a lot of people on my back. Hopefully tomorrow i will start taming  the beast, so far the only mods for Frankie will be a side gapped spark plug, the CDI, a cut spring in the carb, an '06 carb needle and 85 main jet, idle mixture adjusted 1/2 turn out a little notebook and a lot of testing  . This i figure will be a good starting point and most people will be able to get there without much money involved, as the tunning progresses i will keep you guys up to date ;D
|
|
|
|
Post by chanito on Jul 14, 2006 19:44:20 GMT -5
 Hey what about that pic of Mrs DD 
|
|
|
|
Post by chanito on Jul 15, 2006 21:19:34 GMT -5
   Frankie is alive and well, i finally got the motor back together and rode Katrina with the big bore piston, even though the slow jet is the stock, it runs pretty good, pick up is "WAY" better and finally i can take advantage of the extra rpms the CDI can give me, accel is strong pass 8k, i had to watch my speed, as it was going at 8500 easily, so now Katrina can do 45, yippee! i still will need to work on the jetting as it really hates part throttle and it has a hesitation and stutters at any less than 3/4 throttle, it really loves wide open throttle, but is kind of annoying to ride around with the accel crank all the way and if you need to ride in traffic you need to release completely and then gas it up or the scooter will bog on you, also the idle is way low probably around 1500, so i think DD is right and i need to get me a set of slow jets, but i will try to adjust the idle mixture and speed tomorrow and i will post some pics and more info on the project, so far is great ;D ;D
|
|
|
|
Post by tedsmini on Jul 16, 2006 4:09:34 GMT -5
Congrats, you have to feel like Dr. Frankenstein, you have created a Monster Ruckus  |
|
|
|
Post by jrcanoe on Jul 16, 2006 8:53:38 GMT -5
chanito Glad your up and running; but more importantly you beat DD to the punch. It would not of seemed fair if he got up and running before you.(but you know he tried his darnedest) I'm still just fondling my piston as I read this thread everyday.
|
|
|
|
Post by chanito on Jul 16, 2006 12:02:01 GMT -5
 Yeah! i beat DD  that is nice So as you know i had to machine the valves and seats, as the intake was burnt, so after putting the head together i installed it 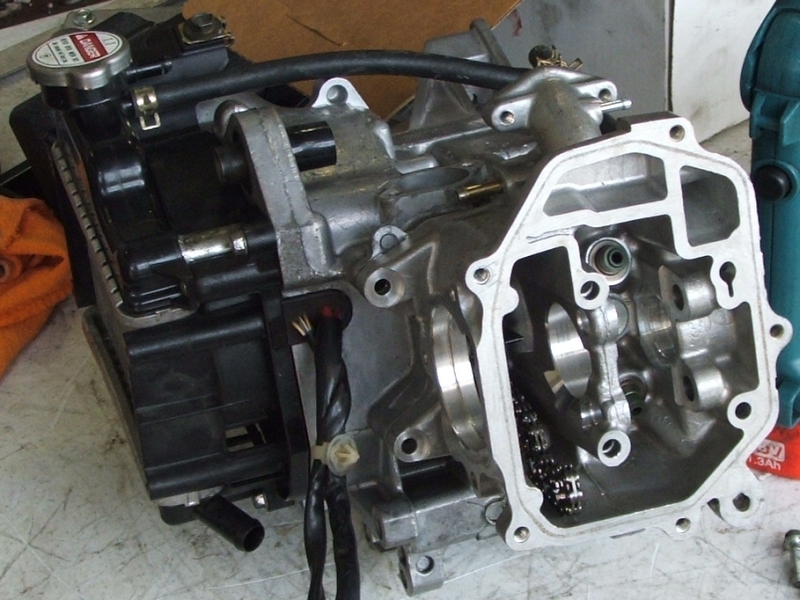 and proceed to finalize the engine aka "Frankie" so i putt everything back on and set it aside so i could get Katrina ready for the transplant 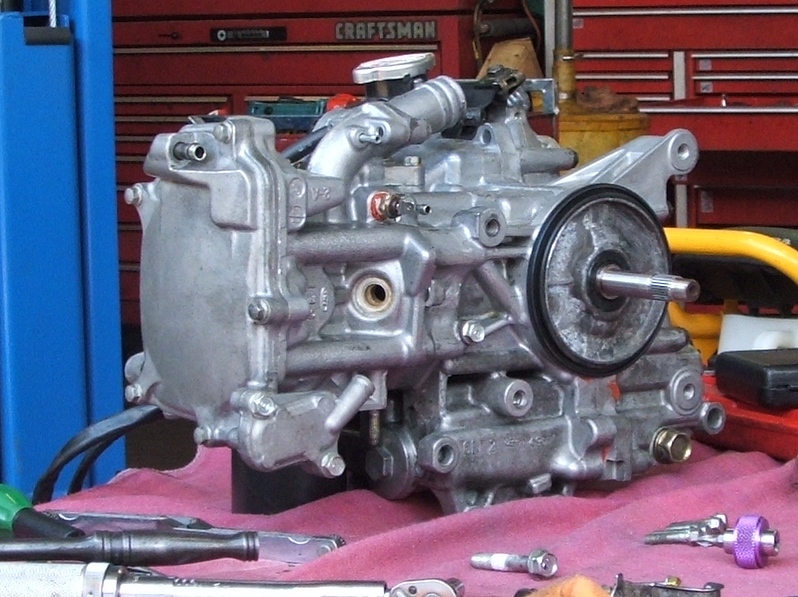 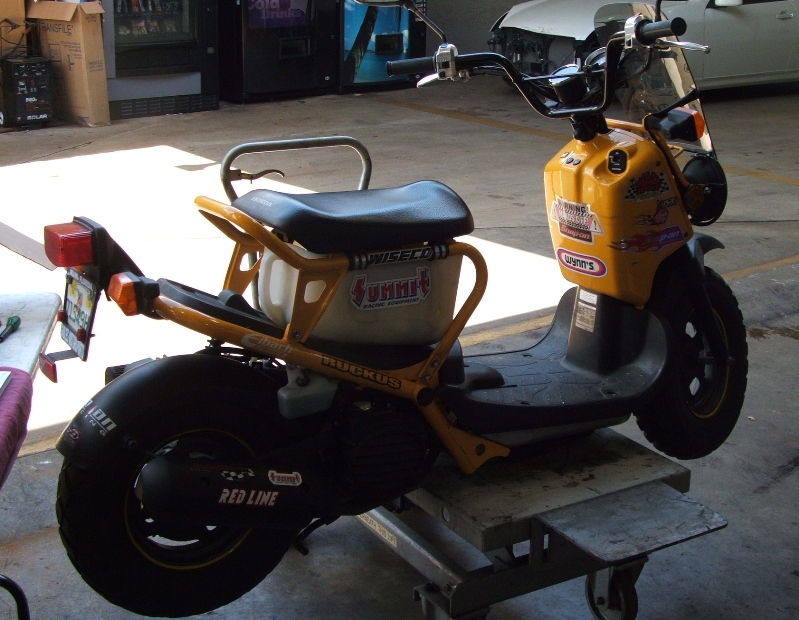 Then is just a matter of removing the seat and floor board to gain access to the motor, i also removed the rear wheel and muffler 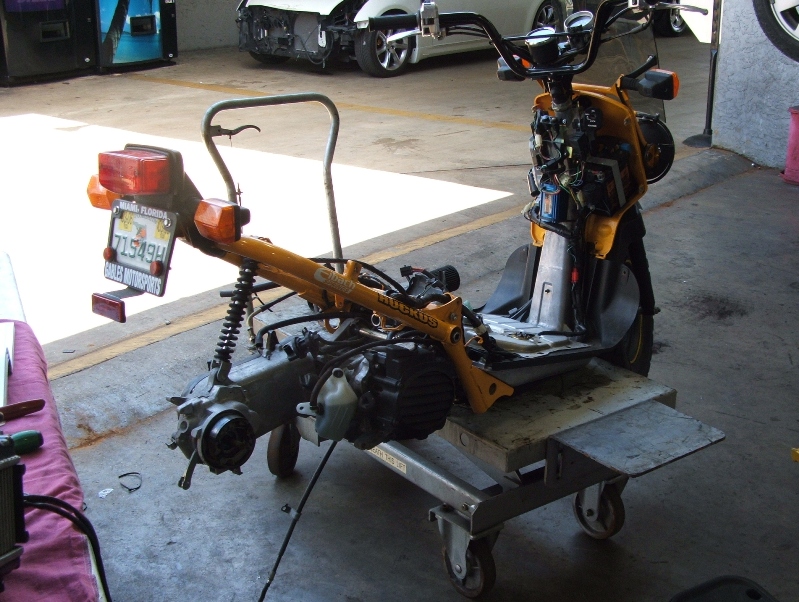 After removing the engine from Katrina i had to swap coolant hoses and mounts, so i did this on the bench and it was super easy 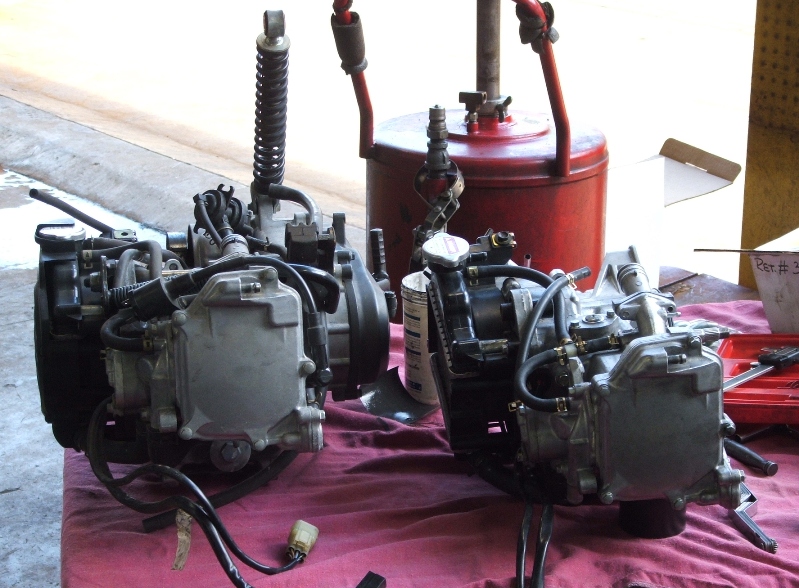 after installation is a good thing to get it running and check for leaks or any problem  checking for loose bolts or weird noises is a must at this point, try to do this and go for different rpms so the rings will seat properly, also see if there is overheating and make sure your coolant mixture is OK and filling the engine correctly, turn it off and go thru it very carefully, everything looks OK so it turn it back on and went for a ride  So far it looks like we accomplish what we set up to do, now i will go and drink a couple of pina coladas by the pool and toast to the little engine that could  cheers!
|
|
|
|
Post by Kami no Chiizu on Jul 16, 2006 19:05:51 GMT -5
Awesome.  |
|
|
|
Post by Dandy Dan on Jul 17, 2006 9:39:24 GMT -5
You win Chanito! I concede defeat  It's nice to hear that it's alive and nothing went wrong. I picked up my case from my fiance on Friday night. Using a caliper I measured the wall thickness and discovered that my new hole isn't perfectly centered. The top and bottom sleeve thicknesses were around 4.75mm but the one side was about 5.05 and the other side was about 4.55 so my hole is slightly off center. I have no idea if 1/4 mm off is a big deal but I imagine it's okay. I also measured the thickness at other end of the sleeve and it was identical so the hole may be slightly off center but it's a nice straight hole....and it's not like it's way off center. I stared at it for 5 min before deciding that yeah it's probably not perfectly centered so I went and got a caliper to measure the walls and one quarter of a mm is probably no biggie (hopefully). Next I measured the ring gap...this went very good. The gap was .15mm which is very close to Wiseco's spec of .16mm. Then I needed to install the new piston on the old crankshaft and get it in. Removing the old piston was easy but get the c-clips in to hold the wrist pin was surprisingly hard. In the end I came up with a technique that worked good but it's confusing to explain so I'll let you guys work away. I'll just say that don't squeeze the clips with pliers to make them smaller because they aren't that bendy so they'll be a little loose if you do this. Getting the piston rings in the sleeve proved to be a bit difficult too, as expected. At first I tried working them in by hand or using a pen to guide them in one at a time. I was able to get 1 or 2 rings in but I'd always get off axis and mess it up. Next, I took a juice can (like a pop can but skinnier) and I cut a 2" tall cross section out and then cut a gap in the wall (picture a 'C' if you're looking from above) so I could wrap it around the piston and squeeze the rings in. Using that I still couldn't get the rings in because it's awkward working down in the hole (if the metal was thicker and didn't bend you could probably do it like I think Chanito did) so I oiled the inside of the juice can thing and then used a hose clamp to clamp the can around the piston but not too tight. This squeezed the rings in and so I was then able to line the piston up with the hole and because the juice can was oiled I just pushed down and the piston slid out of the bottom of the juice can tool and into the sleeve. From there things went smoothly, It took me and hour up til this point and it took my another 3 hours to get the engine totally reassembled. I took my time to do it right because last time when I rebuilt my 2003 engine I didn't use enough sealant and it ended up having an oil leak from between the 2 case halves. I took the opportunity to check my valve shims as well and fine tuned them a bit. As it stands now, my engine is totally reassembled and ready for installation in the frame. I still need to refill it with oil because I didn't have any non-synthetic oil handy. I also need to refill the coolant and drain the 87 octane gas and refill it with 91 octane. As usual, I'm out of town for the week so next saturday I should be able to get the Lorax back up and running. |
|
|
|
Post by rucktune on Jul 17, 2006 13:02:05 GMT -5
Hats off to you both!
|
|
|
|
Post by Dandy Dan on Jul 17, 2006 14:06:58 GMT -5
Thanks  Chanito, I thought about it a little more and I figured out what the numbers on your piston are (I know that you've known all along but I never really had it all figured out.) The first number (1.614) is the diameter (bore) of the piston in inches (41mm / 25.4mm/inch) and the 2nd number (0.0014) is the clearance inches between the piston and the wall so when you add those numbers together you get the diameter of the hole. One thing that I was wondering about is that when you convert 41mm to inches you get 1.614173 inches which is different than 1.614 by 0.000173 which seems very minor but the clearance spec is only 0.0014. I guess all I'm saying is that by rounding the bore to 1.614 you're cutting off almost 0.0002 inches of diameter which essentially drops the gap from 0.0014 to 0.0012. Again, that still seems minor but it means that your actual clearance gap is only 85% of what is was supposed to be. Still, you guys are thinking "what the heck DD? that's nothing" but stay with me... The circumference of a 1.6154 hole (1.614 + 0.0014) is 8.19804 inches where as the circumference of the proper 1.61554 hole (1.614172 + 0.0014) is 8.19946. So the difference in circumference is between rounding the intial diameter to 1.614 or using a more accurate 1.614172 diameter is basically 0.00142 inches. Now is a difference in circumference of 0.00142 significant? I'd say yeah because the 'ring gap' is only spec'd at 0.0064 inches but by rounding the bore to 1.614 you've essentially dropped that to 0.0050 which is about 25% smaller. So I guess at the end of the day your ring gap is gonna be 25% too small. Anyways, I just spent way too much time writing that and doing the calculations and I don't even know what I'm talking about because 3 days ago I didn't even know what a 'ring gap' was so I'm definately not qualified to say something is too small. I guess now I'm just saying that there's a little food for thought for you guys. Realistically, a 25% reduction in the ring gap probably isn't a big deal but if your ring gap happened to be a little tight for some reason (ie. the rings were a hair big) then this would make the problem worse and could be the difference between forming a nice seal and being too tight and scratching the wall. |
|
8chpl
Ruckster
  
Posts: 158
|
Post by 8chpl on Jul 17, 2006 15:09:04 GMT -5
Dan, the circumference is 1.6154 x 3.1428 = 5.0724 in.
|
|
|
|
Post by Dandy Dan on Jul 17, 2006 15:17:40 GMT -5
Dan, the circumference is 1.6154 x 3.1428 = 5.0724 in. Doh! I guess I've been out of high school for too long. I was using Circ. = Pi * R ^2 and then I plugged in D for R....wow way too many mistakes. Thanks for the correction. |
|
8chpl
Ruckster
  
Posts: 158
|
Post by 8chpl on Jul 17, 2006 19:42:24 GMT -5
I know you are under stress buddy...... It's too bad you can't devote a solid block of time to do your re-assembly in one fell swoop.
|
|
8chpl
Ruckster
  
Posts: 158
|
Post by 8chpl on Jul 18, 2006 8:18:26 GMT -5
The thing with Ring end gap is that it is an indication of cylinder and ring wear. Engine Usage causes the cylinder to increase slightly in diameter and the diameter of the rings to sort of decrease. As material is eroded off the outside of the ring, it loses a bit of mass and this results in the gap increasing. With 2 strokes, outboards, bikes etc. there is often an oversize ring and piston available. The old Honda Cub 4 stroke scooters had a .025 and .050 overbore available. One of the reasons that many of these engines had loads of miles on them.
I don't know if an overbore is available for the Ruckus, it would be nice if it could be available for the Big Bore that Chanito has started. Hats off to both of you pioneers. I hope the big bore catches on, I have only 1100 Km on my 05 and may like to be able to overbore when the engine wears out.
|
|
|
|
Post by Dandy Dan on Jul 18, 2006 8:39:06 GMT -5
What's your guess for when the sleeve gets worn out? My understanding is that today's sleeves are made of pretty fancy metal that's gonna last a really long time like a car. My 2003 Ruckus has well over 30,000kms and it's running great. I checked the sleeve at 28,000kms and it looked great but I didn't measure the ring gap so I can't say for sure.
|
|