

Post by empty on Jul 8, 2009 0:02:23 GMT -5
Well i got my Ruckus on June 3 and couldn't afford too many new parts after i spent a ton on the bike, registration and insurance so i decided to do a little mods to make the appearance cleaner with what tools and parts I had around the house.
well here are the mods.. ENJOY!!
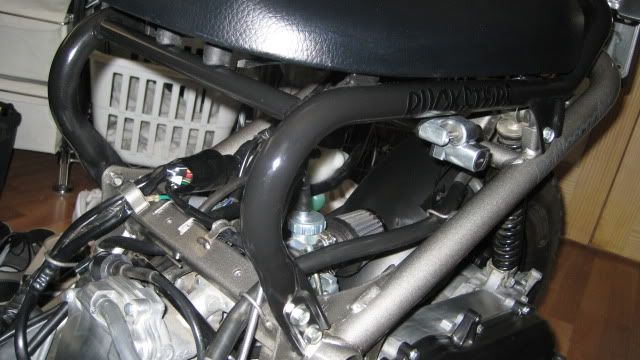
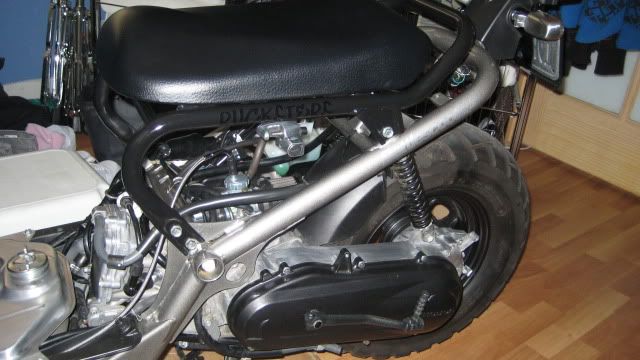
1 - First mod i did was a custom lowered seat frame
Things Needed:
-Pipe Cutter to modify fronts
-Welder or local welder
-Grinder to cut away paint for welding and smoothing out
-Patience to straighten the seat the way you like
-1 Flat / Gloss Spray can (2 layers)
-1 Clear coat can (2 layers)
as you can see i made it so my seat frame was pushed a couple inches back for comfort than normal aftermarket seats
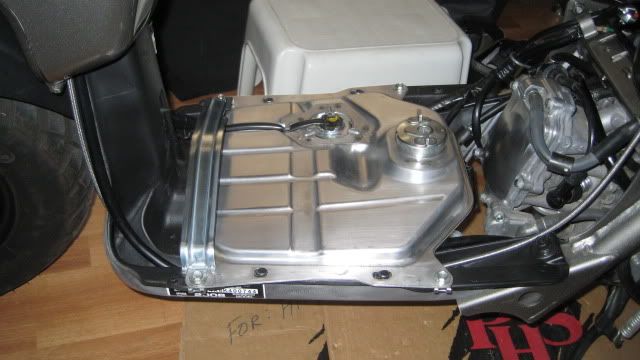
2 - I took off the stock plastic foot rests and decided to sand down the glue and rust look of the gas tank, I also threw a custom foot rest since i don't have my pegs yet.
Things needed:
-400 Grit sand paper and higher grits if you want to polish it out
-spray bottle of water (wet sanding)
-skrew driver
-4 stock rear plastic panel bolts
-vice grip or some type of device to bend aluminum
-Stock plastic foot rest
i sanded down the gas tank and other places around my stock engine for a polished look using my 400 grit sand paper by wet sanding.
your probably wondering what the stock plastic foot rest is needed for.. well if you look under the stock plastic foot rest you will notice a aluminum bar. Hack that thing off and bend it to a fit across your gas tank (note: you will also have to flatten each hole out as you will notice they appear to have a couple of parts that hinder the install of the bolts ) by the way i sanded this down as well for a polished look
3 - I decided to relocated my Rear tailights to get rid of that stock looks but keep the OEM rear tailight.
Things Needed:
-dremel kit/grinder
-cordless or wireless drill that will match your drill 2 medium sized skrews. (OR YOU CAN APPLY PRESSURE MAKE HOLES WITH YOUR SKREW AND SKREW DRIVER BY YOURSELF with MAN POWER!!)
-2 medium to long sized skrews
-skrew driver
-aftermarket side blinkers from your local bike shop, i picked mine up from Chaparell for 12 bucks for 2 (they have amber ones as well which i plan on getting for my fronts)
-plenty of black zip ties
-double sided tape
-a type of straight bendable metal to hold the license plate from tilting when riding
first things first remove the whole tailight assembly off of the frame untill the mount on the frame is visilbe. Then you want to take each tailight off remember what wires go to which (orange for left blinker, light blue to right, green is for negatives.) then you want to disassemble the rear tailight by taking the 2 black skrews off of the red cover, after that is done drill or skrew in 2 skrews at the inner top of the black casing so that it will hold the tailight assembly on your plastic seat frame. Modify your rear black plastic cover so that it fits snug to where you would like it to be visible for others. Use the 2 skrews to skrew directly to the seat. (make sure it clears your seat frame when you try to open it) rewire your brake light.
signals were double sided taped to my license plate and i used the stock weak wire holder to give it extra support as well as zip ties.
make sure you zip tie and wire manage your wires as well as connect them properly.. turn your ruck on and make sure signals are wired the right way orange left being left, blue right being right.
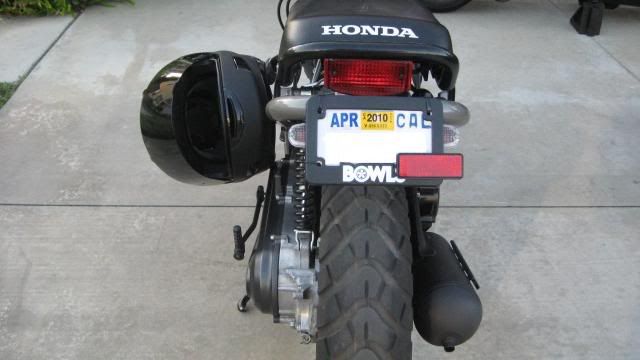
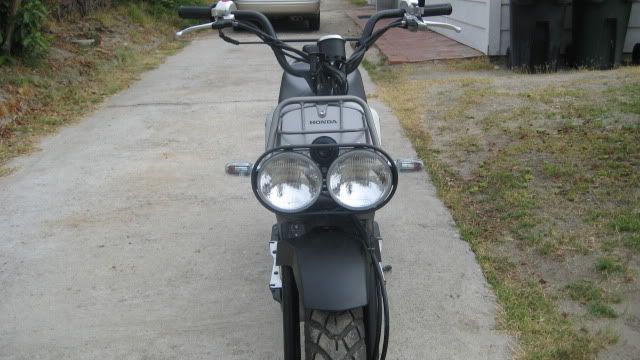
4 - Got rid of my front frame bunney ears where the stock signals used to be and relocated them where my amber reflectors used to be
Things needed:
-drill with small to big sized drills to accomidate the size of each turn signal
-eye goggles for protection
-stool to sit on
-rag to place inbetween your painted battery box and where your drilling (so you won't scratch your battery box
-straight accuracy being careful not to bend the metal
disassemble your signals and let them hang, you then want to drill the amber reflector holes from the stock size a larger size step by step (do not skip sizes) untill it is big enough for your turn signals. after that is done install your signals back again.
i then took the 2 skrews off of my battery box and skrewed my reflectors dirrectly in my battery box holes. (this will eliminate your 2 battery box skrews and your 2 reflector bolts)
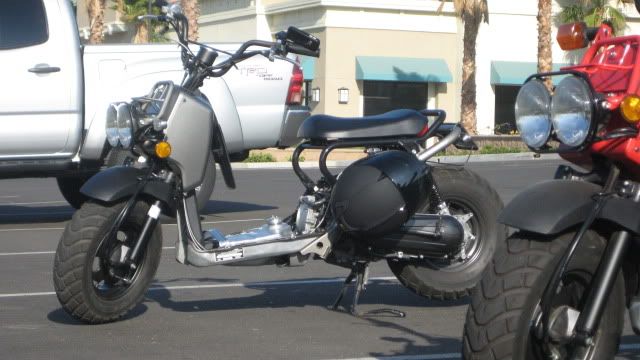
here's how she sits at the moment.
MORE MODS TO COME IN THE FUTURE.
feel free to comment and to ask questions and if you need more detailed pictures i can get some for 1 dollar each pic =D j/k haha.
tell me what you think!!
well here are the mods.. ENJOY!!
1 - First mod i did was a custom lowered seat frame
Things Needed:
-Pipe Cutter to modify fronts
-Welder or local welder
-Grinder to cut away paint for welding and smoothing out
-Patience to straighten the seat the way you like
-1 Flat / Gloss Spray can (2 layers)
-1 Clear coat can (2 layers)
as you can see i made it so my seat frame was pushed a couple inches back for comfort than normal aftermarket seats
2 - I took off the stock plastic foot rests and decided to sand down the glue and rust look of the gas tank, I also threw a custom foot rest since i don't have my pegs yet.
Things needed:
-400 Grit sand paper and higher grits if you want to polish it out
-spray bottle of water (wet sanding)
-skrew driver
-4 stock rear plastic panel bolts
-vice grip or some type of device to bend aluminum
-Stock plastic foot rest
i sanded down the gas tank and other places around my stock engine for a polished look using my 400 grit sand paper by wet sanding.
your probably wondering what the stock plastic foot rest is needed for.. well if you look under the stock plastic foot rest you will notice a aluminum bar. Hack that thing off and bend it to a fit across your gas tank (note: you will also have to flatten each hole out as you will notice they appear to have a couple of parts that hinder the install of the bolts
) by the way i sanded this down as well for a polished look3 - I decided to relocated my Rear tailights to get rid of that stock looks but keep the OEM rear tailight.
Things Needed:
-dremel kit/grinder
-cordless or wireless drill that will match your drill 2 medium sized skrews. (OR YOU CAN APPLY PRESSURE MAKE HOLES WITH YOUR SKREW AND SKREW DRIVER BY YOURSELF with MAN POWER!!)
-2 medium to long sized skrews
-skrew driver
-aftermarket side blinkers from your local bike shop, i picked mine up from Chaparell for 12 bucks for 2 (they have amber ones as well which i plan on getting for my fronts)
-plenty of black zip ties
-double sided tape
-a type of straight bendable metal to hold the license plate from tilting when riding
first things first remove the whole tailight assembly off of the frame untill the mount on the frame is visilbe. Then you want to take each tailight off remember what wires go to which (orange for left blinker, light blue to right, green is for negatives.) then you want to disassemble the rear tailight by taking the 2 black skrews off of the red cover, after that is done drill or skrew in 2 skrews at the inner top of the black casing so that it will hold the tailight assembly on your plastic seat frame. Modify your rear black plastic cover so that it fits snug to where you would like it to be visible for others. Use the 2 skrews to skrew directly to the seat. (make sure it clears your seat frame when you try to open it) rewire your brake light.
signals were double sided taped to my license plate and i used the stock weak wire holder to give it extra support as well as zip ties.
make sure you zip tie and wire manage your wires as well as connect them properly.. turn your ruck on and make sure signals are wired the right way orange left being left, blue right being right.
4 - Got rid of my front frame bunney ears where the stock signals used to be and relocated them where my amber reflectors used to be
Things needed:
-drill with small to big sized drills to accomidate the size of each turn signal
-eye goggles for protection
-stool to sit on
-rag to place inbetween your painted battery box and where your drilling (so you won't scratch your battery box
-straight accuracy being careful not to bend the metal
disassemble your signals and let them hang, you then want to drill the amber reflector holes from the stock size a larger size step by step (do not skip sizes) untill it is big enough for your turn signals. after that is done install your signals back again.
i then took the 2 skrews off of my battery box and skrewed my reflectors dirrectly in my battery box holes. (this will eliminate your 2 battery box skrews and your 2 reflector bolts)
here's how she sits at the moment.
MORE MODS TO COME IN THE FUTURE.
feel free to comment and to ask questions and if you need more detailed pictures i can get some for 1 dollar each pic =D j/k haha.
tell me what you think!!

