|
|
Post by chanito on Feb 16, 2007 21:24:38 GMT -5
8-)OK time for another chapter, i was hoping to finish assembling the engine, but i forgot the head gasket at home, anyway i got both halves of the crankcase together and remove the broken mount, but i managed to take some pics of the chanito syringe method of applying sealer, i am not that good as controlling the flow of sealer out of the tube, so i usually buy some syringes without the needle 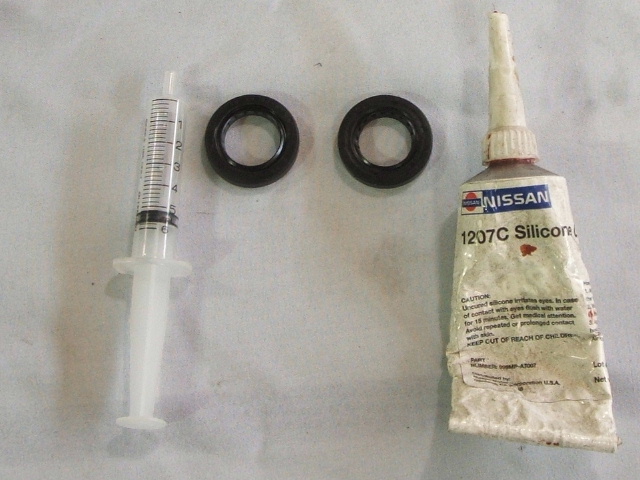 as you can see i put it between the two crankcase seal, because even though they look the same one have a smaller hole and goes on the variator side, and the one with the big hole goes on the alternator side, i get the piston out of the syringe and fill it with the sealer from the tube 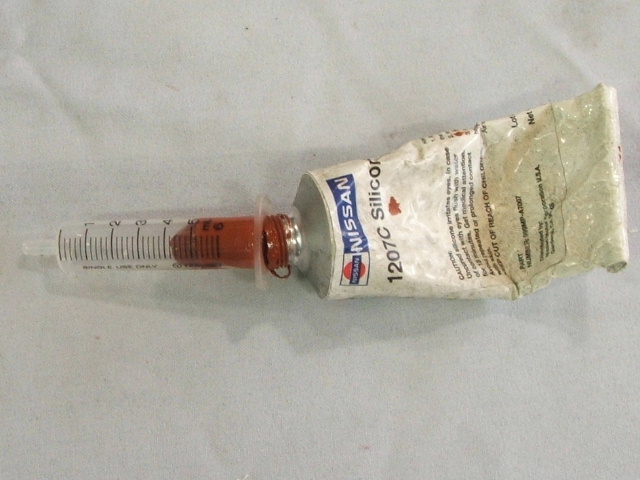 then install the piston back in the syringe and use the syringe to lay a nice bead, i have try a bunch of different ways and this is my favorite way to apply sealer, see even i can do a decent job  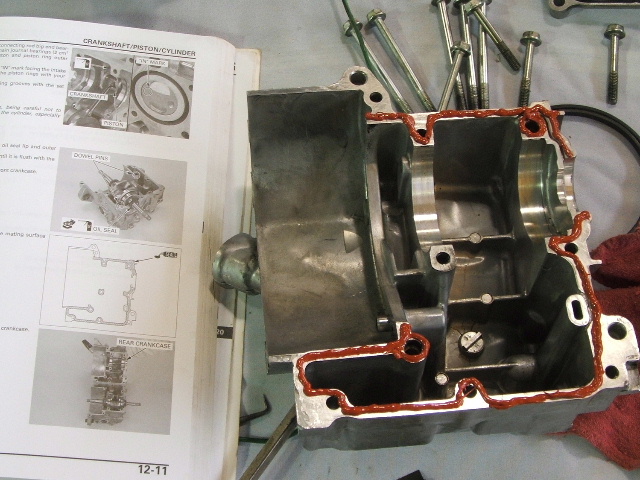 then just get the two halves together and torque them, do not worry about the look of the sealer squeezing out, as it can be easily clean once the sealer dry, install the seal and the gasket 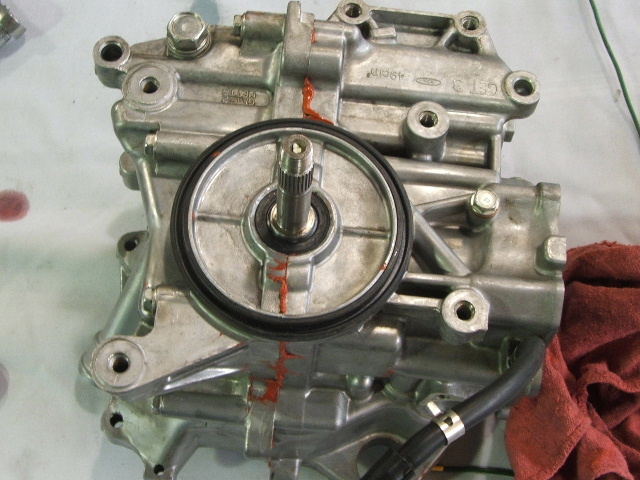 now install the chain and set the piston on top dead center, all we need to do now is add the head and accessories and we are done 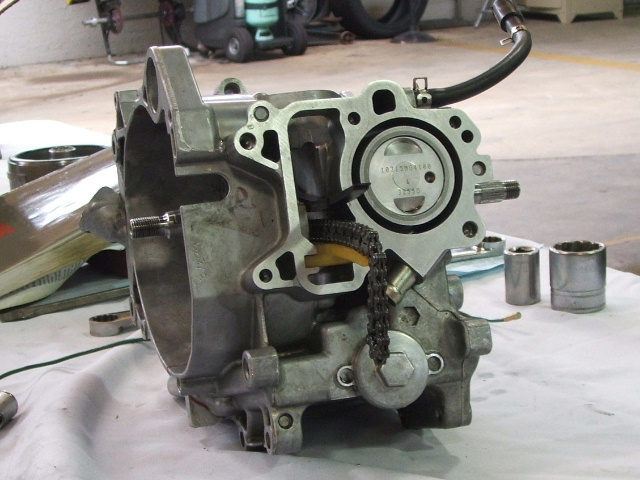 hopefully tomorrow i will bring the head gasket and finish the engine  |
|
|
|
Post by chanito on Feb 17, 2007 16:12:00 GMT -5
 Finally i got it together, i installed the head and all the accessories, i am only waiting for the engine mount, to press it in and send it back to Sanjuro, who i hope will forgive me for taking sooooo lonng to put his engine back together, i only want to add some cautions for all of you building this engine yourselves, the intake rocker arm is also the one feeding oil to the cam lobes and rocker arms, so it can not rotate or it will oil starve the cam and it might fail, they are build with a step at the end, this done so the plate at top of the head the one with the alignment mark will lock it in place, so make sure it is doing so. 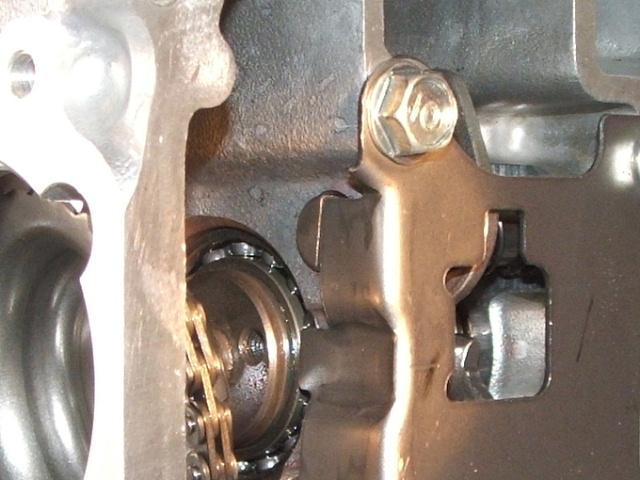 Also there is a pipe that is also the upper radiator hose, it has two o-rings that SHOULD BE REPLACE EVERY TIME YOU TAKE IT APART, it has a short end and a long end, the long end goes toward the radiator, and the short toward the engine block, the reason is so important to replace these o-rings is because if they fail, coolant will leak into the alternator (not a good thing) 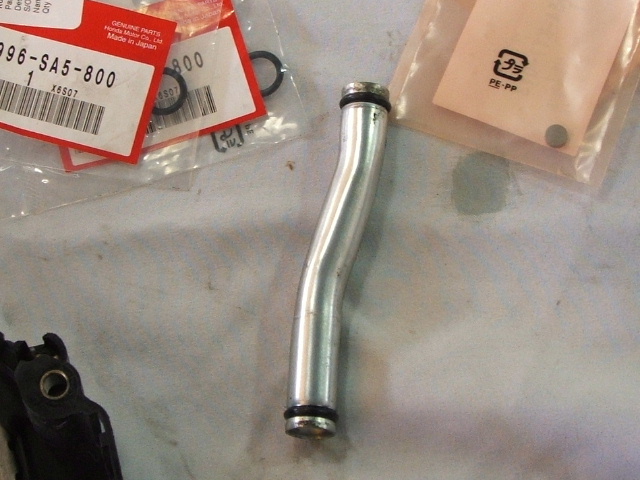 in order to make the pipe go easier is a good idea to coat the outside of the rings with silicone grease 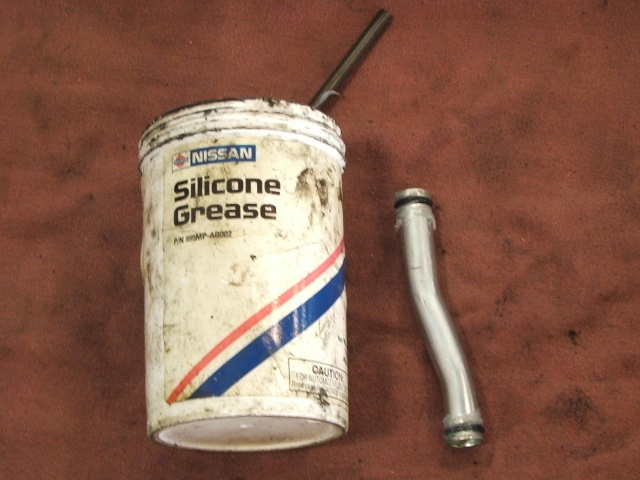 As you can see i use Nissan chemicals, because i work on an Infiniti dealership, but you can use any brand you are comfortable with. And finally is a very good idea to use blue loctite on the two bolts holding the intake manifold, as vibration from the engine plus the weight of the carb and whatever intake you might have can get this bolts to come loose 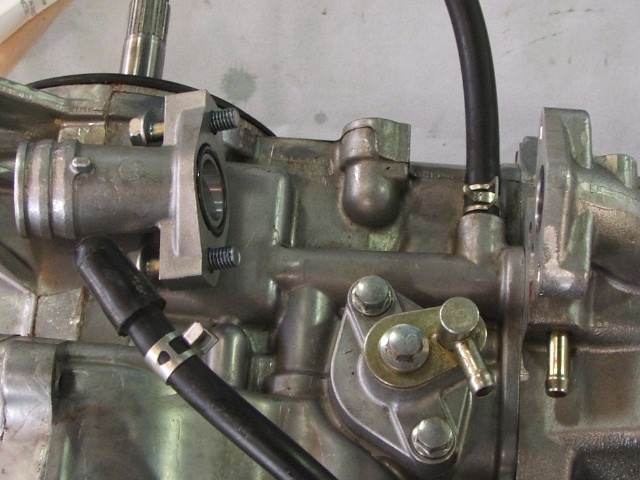 Hope you guys have enjoyed this so far, only thing left is press in the mount ;D
|
|
|
|
Post by sanjuro62pt1 on Feb 17, 2007 16:58:44 GMT -5
 Finally i got it together, i installed the head and all the accessories, i am only waiting for the engine mount, to press it in and send it back to Sanjuro, who i hope will forgive me for taking sooooo lonng to put his engine back together... There's nothing to forgive, especially when I've got the Ruckus engine master blessing my engine with his skill and knowledge.  |
|
woodie
Junior Ruckster
 
Posts: 57
|
Post by woodie on Feb 18, 2007 16:58:44 GMT -5
why is it being rebuilt??
|
|
|
|
Post by sanjuro62pt1 on Feb 18, 2007 18:56:06 GMT -5
why is it being rebuilt?? The exhaust valve seat/seal was torn, and I wanted Chanito to take a look at it. The h.o. cam was probably the culprit. |
|
|
|
Post by chanito on Feb 18, 2007 20:32:32 GMT -5
 I feel kind of guilty, because when we discuss this over the phone with him, we more or less figure it was the seal, (which can be done without taking the engine apart), however he wanted peace of mind, so we agree on the rebuild and we have done just that, it should have been an easy 1.2.3 job but i had to go to the hospital to have some polyps remove on the meantime, and since i am a coward when hospital are mentioned, it took me more than it should to get this done. Hopefully this seal problem will not come back and he can enjoy his ruckus, the way it should be enjoyed , by riding it   And i also got some beautiful tires out of this plus some expending money for Katrina 
|
|
|
|
Post by I Heard A Rukus on Feb 27, 2007 21:06:39 GMT -5
Chanito, I have a question for you. Could this have been caused by the valve seal being installed and then removed (say with a pair of pliers) and then re-installed? I ask because that's what it looks like to me. The theory of the cam ruining the seal doesn't seem possible when the damage is on the side of the seal. 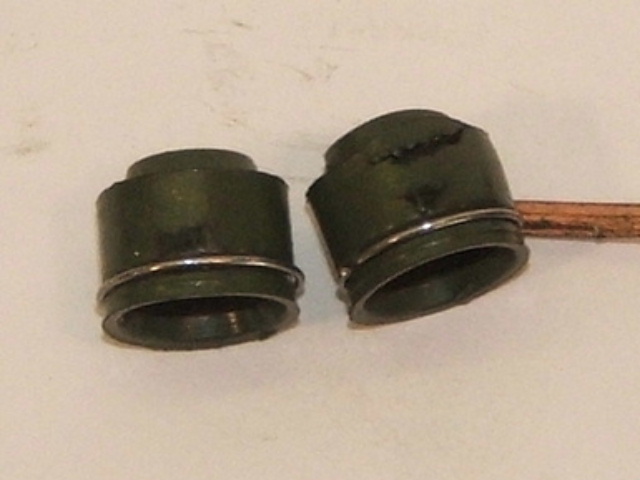 KP |
|
|
|
Post by chanito on Feb 28, 2007 7:13:17 GMT -5
 That is a tough question, as you can see that is a tear kind of damage, in my experience those are commonly done when you are installing the seals and miss and press on the side, However the seals are so easy to install in the Ruckus that you do not need any tool to do it, just finger pressure is good enough  As you can see that is a very soft rubber, so it marks easily, and the only marks i see are the ones i put on when i took them off, but maybe they use something to pry for underneath and took them off and put it back, but that is just speculation  The other option is that the cam lobe is just aggressive enough that at some point it push the valve down enough so that the bottom of the spring retainer hit the seal and created that damage, funny thing is that the new seals are shorter now on the valve stem, so that risk is gone ;D So any ideas are good, as i would love to know for sure so we can avoid something like this in the future  
|
|
|
|
Post by Dandy Dan on Mar 5, 2007 11:54:23 GMT -5
Why are the new seals shorter? Did you cut em down? Or did Honda change the part #?
|
|
|
|
Post by chanito on Mar 5, 2007 19:49:30 GMT -5
Why are the new seals shorter? Did you cut em down? Or did Honda change the part #? Honda changed the design on the top, so now is tighter and shorter, which is good  Probably when they changed the PCV system they updated the seals |
|
|
|
Post by I Heard A Rukus on Mar 5, 2007 21:52:36 GMT -5
Why are the new seals shorter? Did you cut em down? Or did Honda change the part #? Honda changed the design on the top, so now is tighter and shorter, which is good  Probably when they changed the PCV system they updated the seals Ok, cause I was wondering.... I've built alot of engines now and I've used new OEM seals on all of them and I never understood why you would cut them shorter... I see now why I was confused, the seals I have been using do not need this modification/hack job. KP |
|
|
|
Post by turbowagon on Mar 29, 2007 13:47:28 GMT -5
Chanito, Just wanted to thank you for taking the time to make this thread w/ the pictures and comments. Seemingly minor things like pointing out the difference in the oil seals, which end of the radiator pipe goes to the block, and explaining the cutout in the intake rocker arm, really help a newbie in reassembling the engine. These little details are often left out of the service manual, and end up saving us a lot of time and headache.  |
|
|
|
Post by Dandy Dan on Mar 29, 2007 14:07:06 GMT -5
I just re-read this thread and it sure is a gold mine...SJ is one lucky dude to get an engine this pampered  |
|
|
|
Post by chanito on Apr 2, 2007 18:39:55 GMT -5
|
|
|
|
Post by Dandy Dan on Apr 3, 2007 9:58:39 GMT -5
Wow....nice observation  That's wierd that they don't mention that in the manual. |
|
|
|
Post by varroa on Jan 20, 2008 0:51:04 GMT -5
chanito, what did you use to clean the combustion chamber?
could you please include a list of all necessary chemicals/cleaning supplies when you make the "how to do the BB yourself" thread?
|
|
|
|
Post by chanito on Jan 20, 2008 9:50:58 GMT -5
 I used a scotch brite pad, a can of brake cleaner and a lot of elbow grease, i will try to make the how to as friendly as possible and obviously comments are a must from you guys 
|
|
dangsr
n00b Ruckster

Posts: 16
|
Post by dangsr on Feb 8, 2008 3:04:44 GMT -5
the only thing i would do different is use less silicone gasket
ive had plenty of experience building car engines and transmissions
all you need is a very thin layer, think less than a credit card in thickness
if it squishes out the sides, that means its gonna get into your oil
|
|
|
|
Post by chanito on Feb 17, 2008 15:08:13 GMT -5
the only thing i would do different is use less silicone gasket ive had plenty of experience building car engines and transmissions all you need is a very thin layer, think less than a credit card in thickness if it squishes out the sides, that means its gonna get into your oil  Congrats on your engine building experience, and thanks for the advice regarding the amount of silicone, while i understand your concern, aluminum engines need silicone to keep sealing after they expand, so having too little is also a concern, they need enough silicone to cover the WHOLE sliding area, i usually put a bead of enough thickness to cover 1/3 of the area, and then when i close it, check to make sure i have an even amount squeeze out without any interruptions, that might indicate a part with not enough silicone, the amount leaking out should be so small it would not separate itself from the engine, and just stay there until next time the engine is apart  |
|
|
|
Post by chanito on Mar 8, 2010 19:25:12 GMT -5
I have decided to make all the engine threads one so i added all the ones from the big bore thread in here -------------------------------------------------------------------------------- i was going to do a how-to, but i will do it later, i have decided to post some pics of my progress, so this is the operatring table, it can be a picnic table and cover it with a fender cover, you need a clean working place 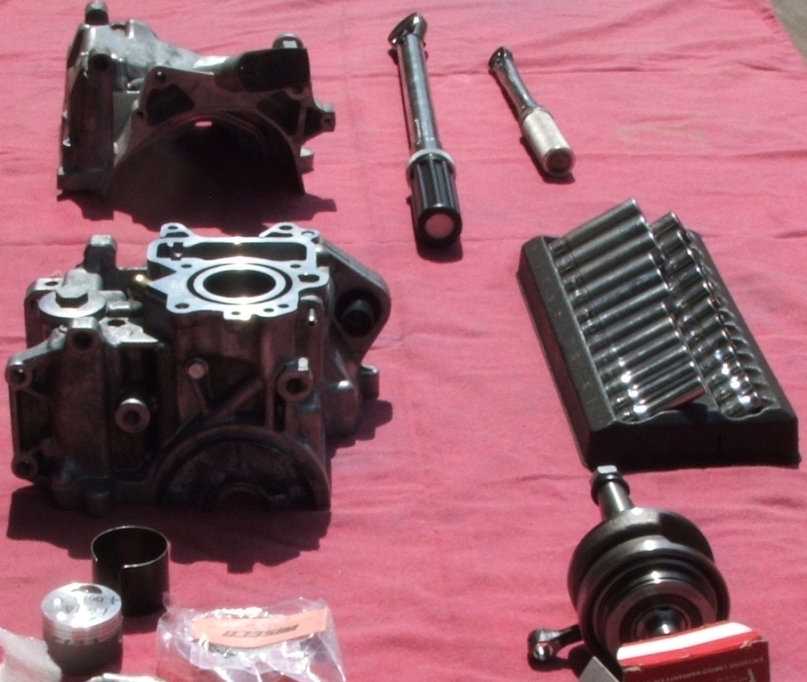 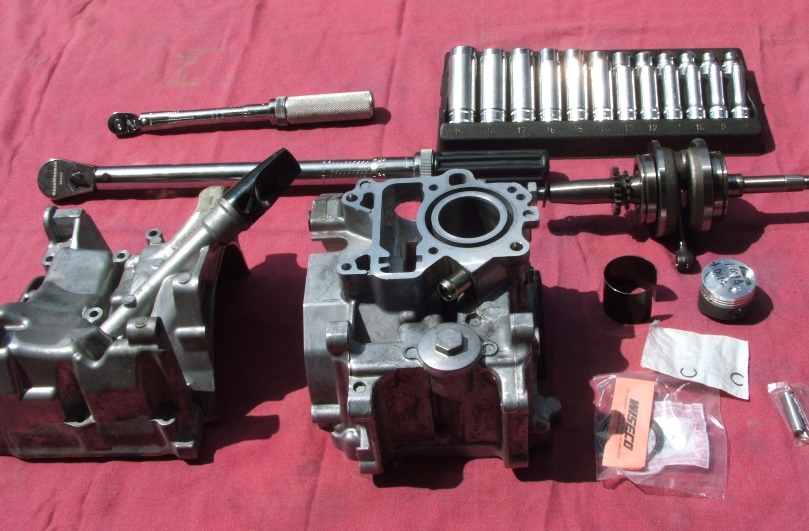 there is a need for lube and they should be handly 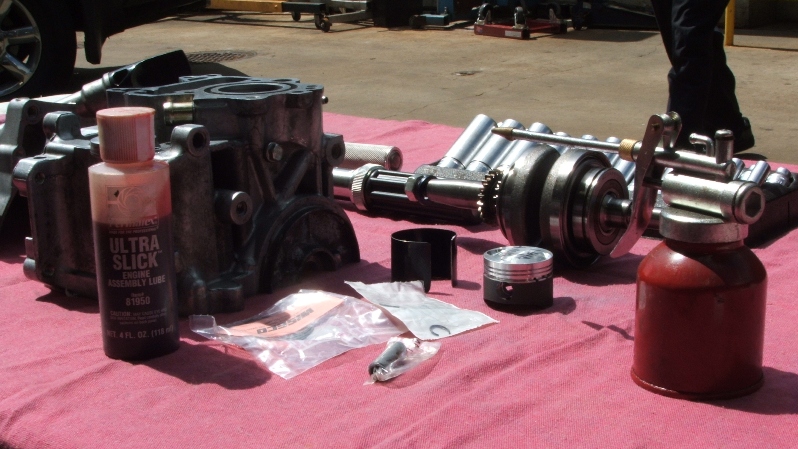 I realize that the boring have taken away the cone at the bottom of the cylinder that allows the ring to be compresed, i had to make a tool out of a band use to seal the boxes where engine come in, i might to make some more so i can send it with the kit upon request 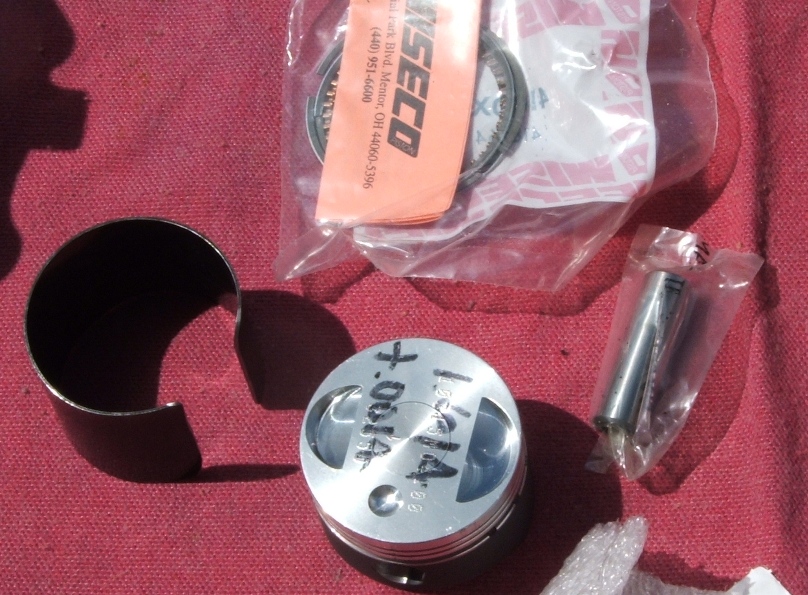 this is the motor with the piston in it 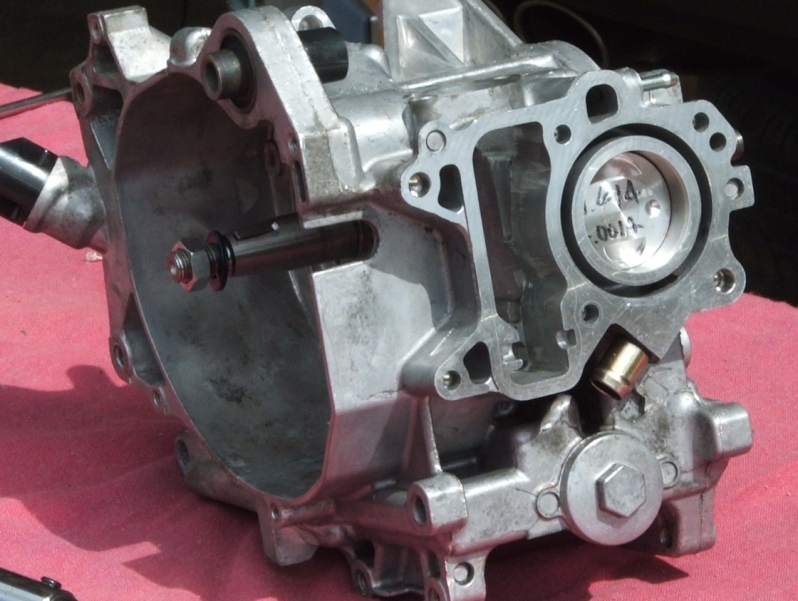 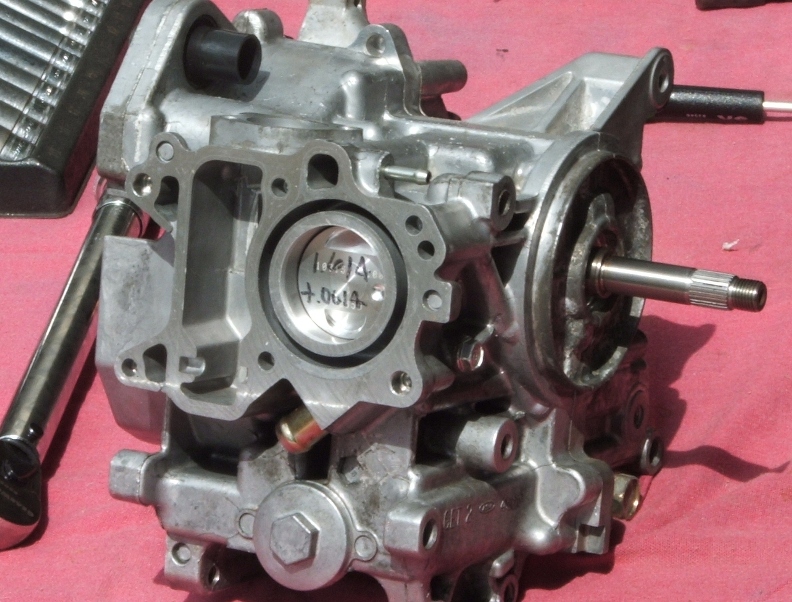 I hope to do some more tomorrow, hopefully i should finish, i will be on the site again later, so please let me have any feedback, and thanks to DD for remain me to figure out a way to compress those rings, probably a small engine shop might have the right tools, but i did not Here are a before and after (the before is from the BSS site ) 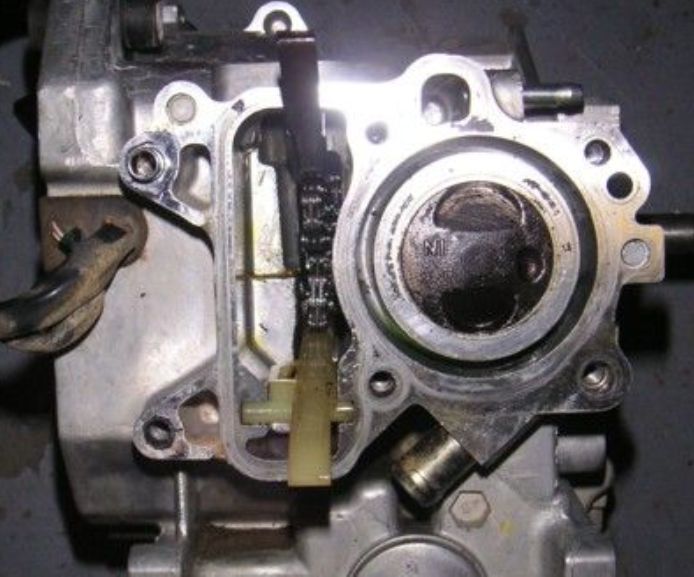 And this is Frankie with the big bore piston  1.- I love to use the assembly lube, it works great and the little container usually last me for a couple of car engines, so it should last for a lot of ruckus engines, the cost is around 3 dollars per bottle, i usually coat everything that will get lube with engine oil, and use one of those brushes they use on plumbing for preparing the surfaces for soldering, also i use one of those plastic syringes for applying the silicone, as i find it give me better control, you can get them for cent at your local pharmacy, because i do not buy the expensive needles, i just squeeze the silicone from the tube into the syringe and then just use it to apply the bead of silicone to the surfaces being seal 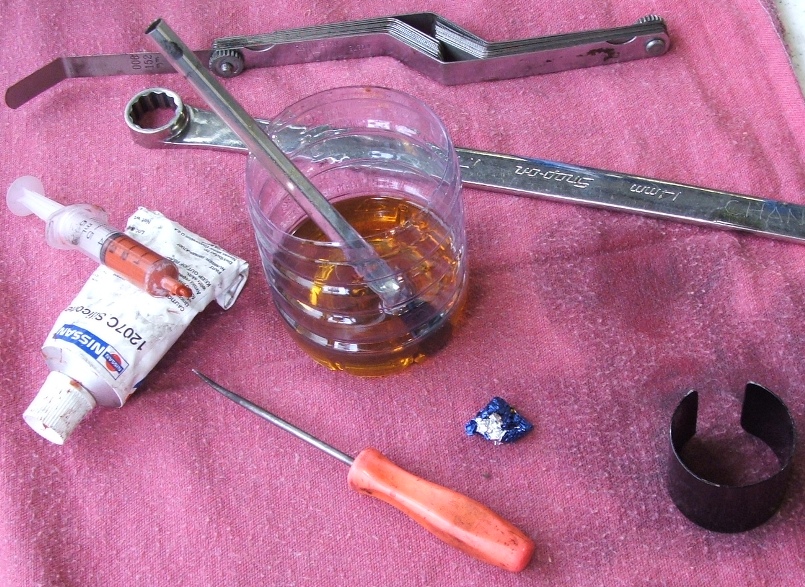 2.-the number were put in by the machine shop, they are just the diameter of the piston in inches and the require clearance 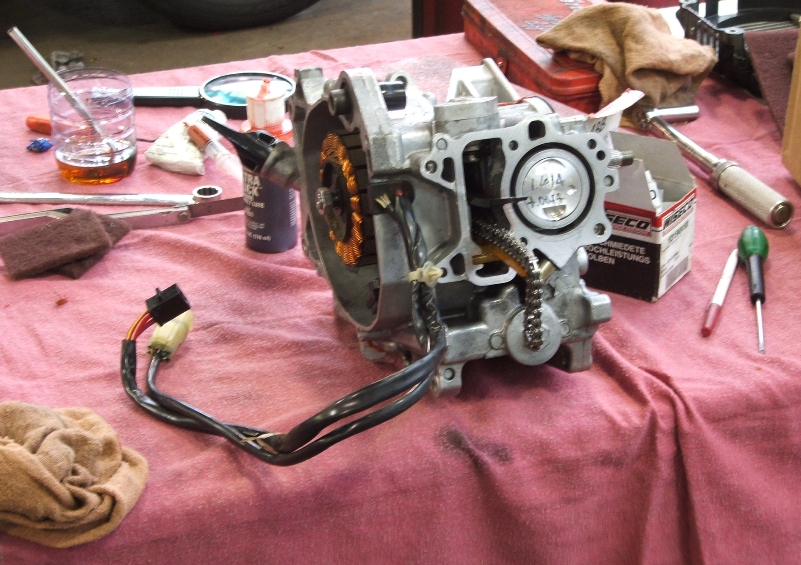 3.-And yes you will need to break in your engine after the piston install. I forgot to mention that i checked the ring gap and is was within specs, so my day went very smooth, do not forget to check it any way 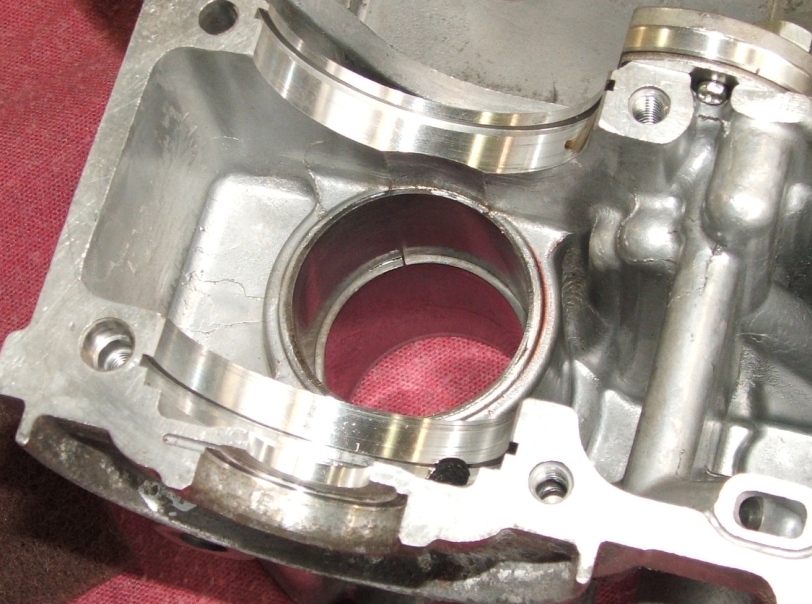 Also i used the bottom of a soda bottle to put some engine oil so i could coat the rings and piston properly 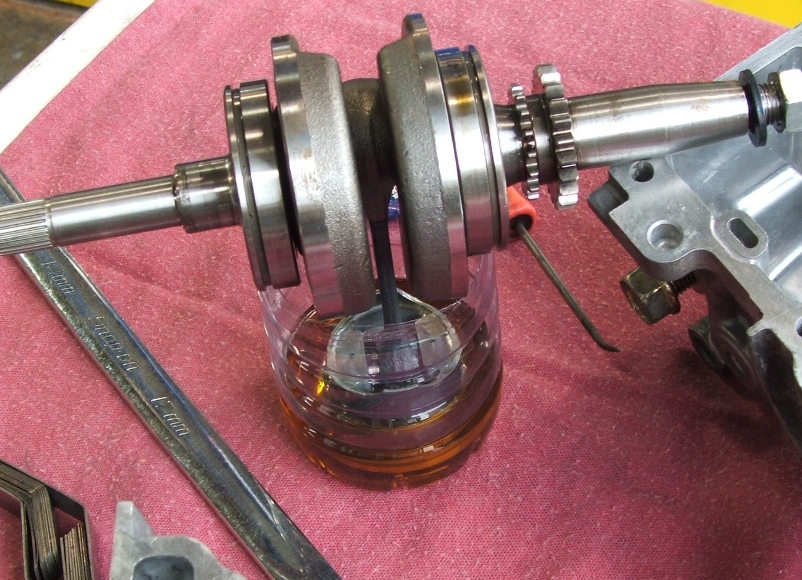 The tool proved to be a necessity as installing the piston with out it can not be done, a motorcycle shop should have a special tool, that will compress the rings so the piston can be installed, but i do not have one, so i make me one, if you are buying the kit and will do the work yourself, let me know i can provide one with the kit. the syringe give an even bead of silicone so the engine halves will seal properly 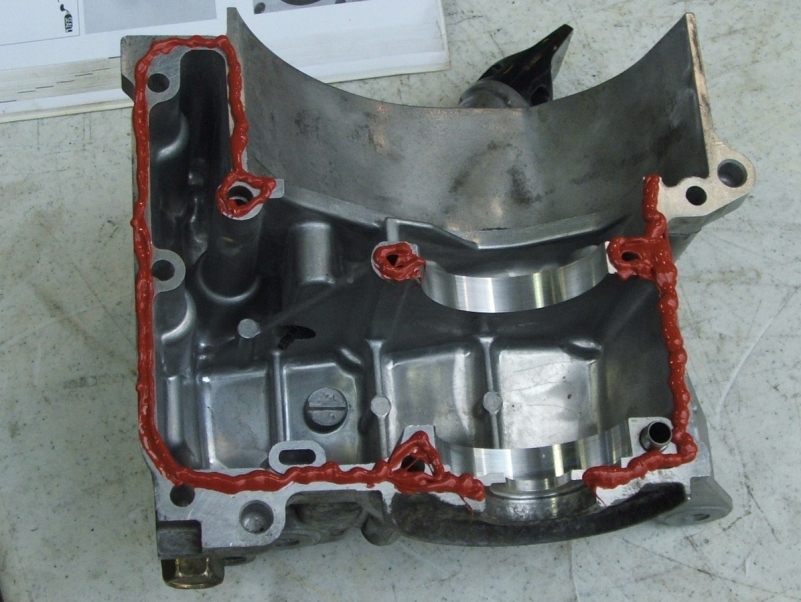 So far working during lunch and taking the pics and then clean and go back to work is harder than i though, i need a photographer to take the pics meanwhile i am assembling the engine, so i can work faster, but anyway, i am ready to mount the head next, i will post pics of that then 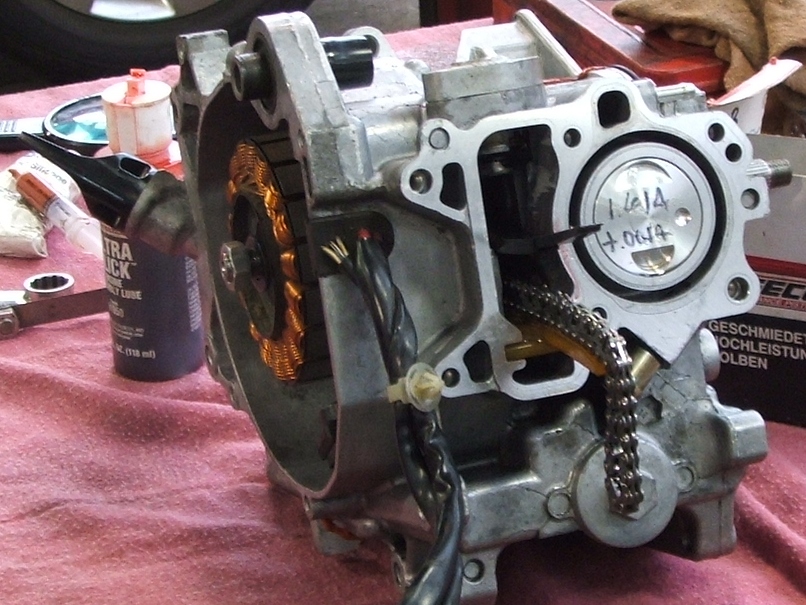 if you have any comment or question please let me know -------------------------------------------------------------------------------- This is in my opinion the steps to install an engine on a ruckus or metro, First get some friends to be there with you, buying a six pack of beer is a good incentive for some friend to be there during the install. Probably the best way would be to install the transmission to the engine with the rear wheel and rear shock attach to it, doing this will simplify the installation a bit, then just install the assembly to the scooter, put the long bolt and install the upper mount on the rear shock, connect all the electrical connectors you removed and double check the route the wiring goes thru, you do not want pinch wire when you are riding, then hook up your cooling lines and the vacuum lines to the intake, then fill all the fluids, and stand back and go thru everything again, get a paper towel and clean all the hoses and connections, Start the engine and let it idle for a couple or minutes, turn it off and get your friends to look the engine over for leaks, having a lot of friend (3-5) is good as most would love to point any problems, if there is any problem, now is the time to fix them, after fixing any leaks and if you do not find any, check the fluids again, then take the scooter for a small ride (10-15 minutes is the goal) that should have got the scooter up to working temp. Go over it once again, and fix any remaining problems, if there is none, then just go out again and start scooting with gusto |
|