|
|
Post by chanito on Jan 13, 2007 13:13:36 GMT -5
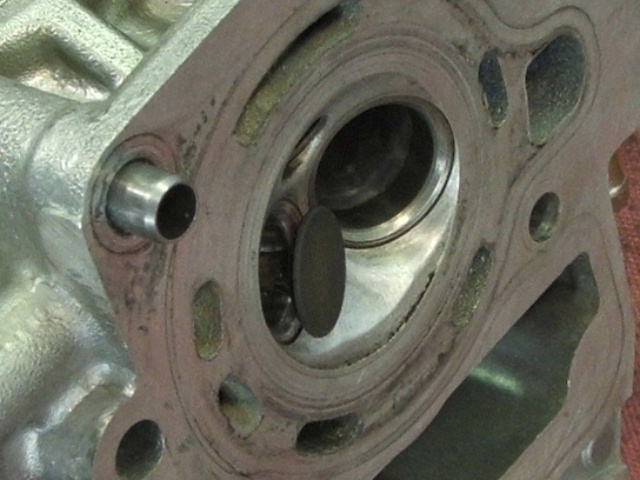
;D I got Sanjuro engine to overhaul, i got it in a box very well packaged, props for a job very well done, i find a couple of plastic bags with cork from the lot of wine bottle used during the life of the scooter  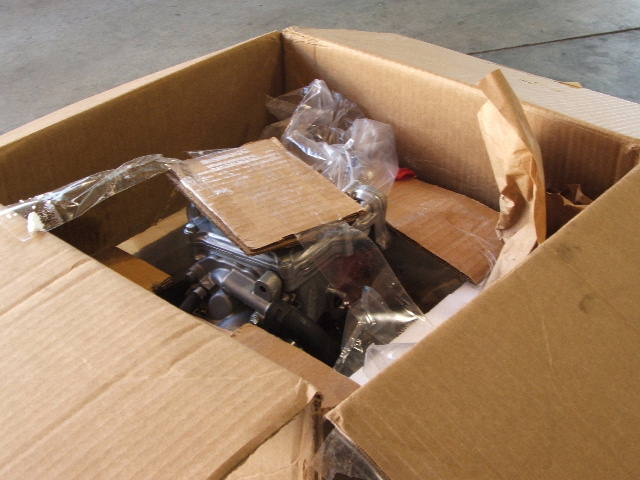 The engine is very clean and obviouly pamper by its owner ;D 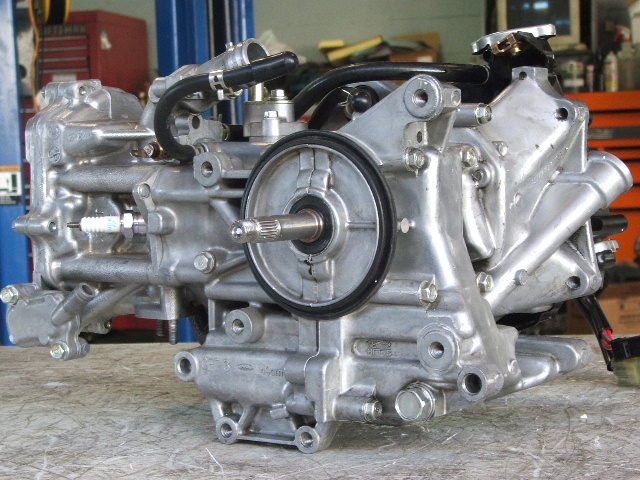 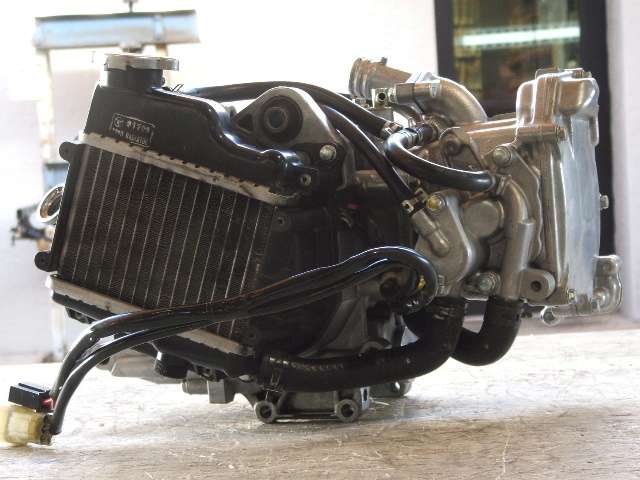 during tear down i started to feel guilty as the engine appears to have been very well put together, before tearing down the engine is always a good idea to check valve clearances and they were too tight at 8 for the intake and 10 for the exhaust, so i took the vave shims measure them and make a note so i can order shims on the right size 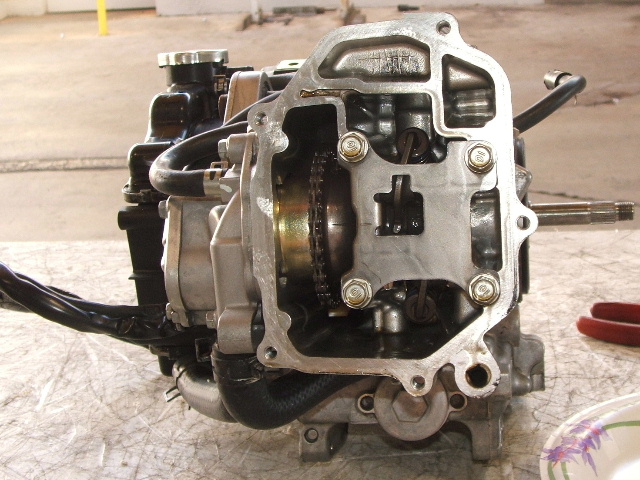 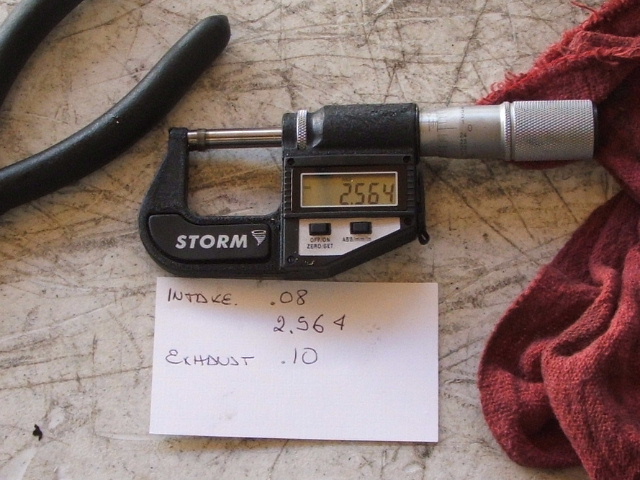 After taking the engine apart and the head away from the block is time to remove the valve train, i like to use a piece of paper were i write what they are and just wrap the parts on it, so at build back time i know which is which 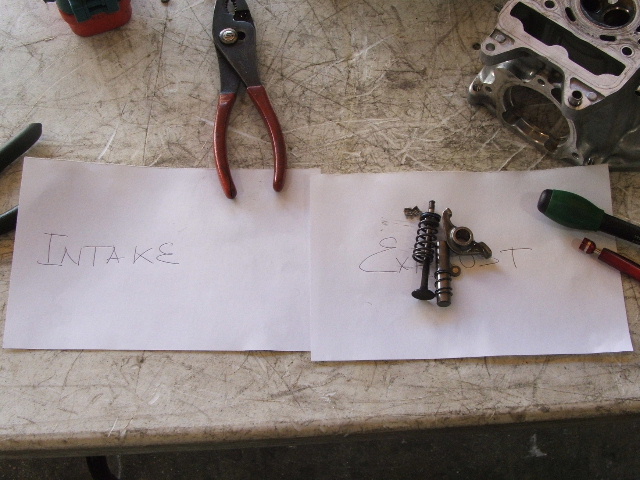 This is the first time i have the oportunity to check a HO cam in person and i am impresed with how well made they are ;D this is a comparition beteewn the HO and the stock 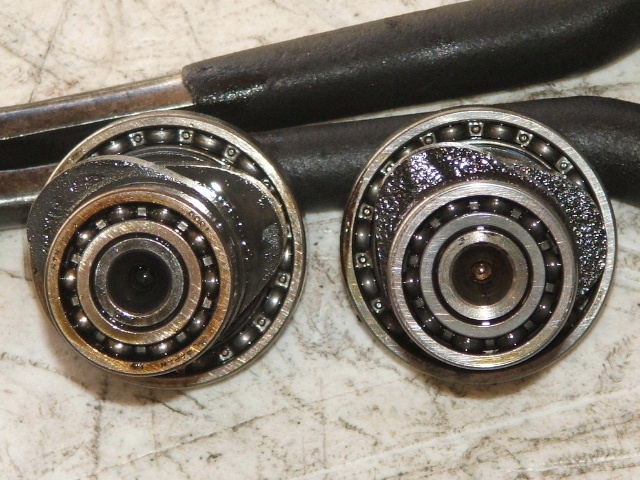 The exhasust port shows a lot of carbon built up, which is surprising for an engine with so litle miles after an overhaul, "my theory" is that is due to the exhaust allowing fresh fuel to be dump into the exhaust during cam overlap, so i think the open type mufflers just make the PAIR system useless on a post '05 ruckus   this also shows the exhaust port out of center (which seem to be the only area where we can gain a significant flow advantage over stock), so i will center the port and clean it a little bit The combustion chamber is very clean with just a little bit of dry carbon which makes me think his slow jet might be a little rich, this is very easy to clean with a just a LOOONG ride on a wekend  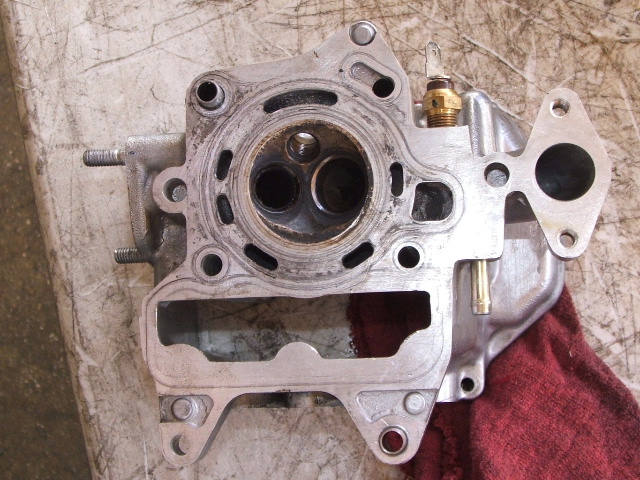 So, so far so good for this engine ;D Sanjuro likes to run ful blast with a cold engine as can be seen with the wear on the skirt,  the forged pistons expand more than cast so they have more clearance, which allow them to rock when they are cold, when they are warm they are very stable and can take more abuse, so this is as bad as it is going to get, so Sanju can go back to abuse his engine  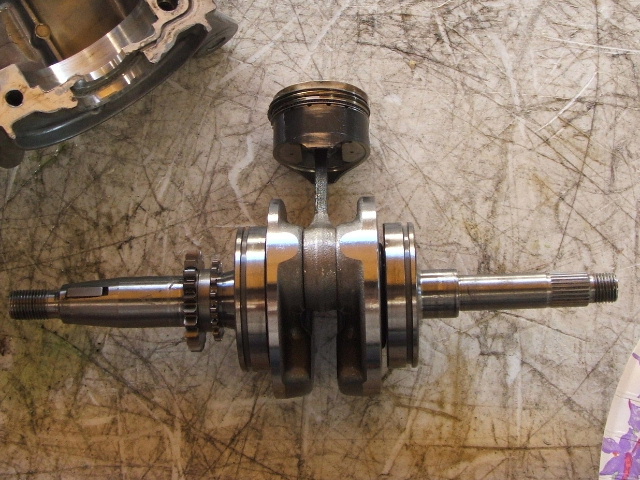 This is going to be a very easy job as ther is not much that need to be done to the engine  Next chapter, "Port cleaning and centering"  |
|
|
|
Post by sanjuro62pt1 on Jan 13, 2007 16:01:08 GMT -5
Hehe, can't wait for the next chapter;-)
|
|
|
|
Post by Dandy Dan on Jan 13, 2007 22:06:11 GMT -5
Wow very nice pics and a great progress report! Are you just doing a tune up/porting job or is there a bigger reason why you're in there?
|
|
|
|
Post by sanjuro62pt1 on Jan 13, 2007 23:43:53 GMT -5
I just wanted Chanito to have a look at the engine since I was still getting smoking at start up. Nothing like have the master make sure everything is all good. The engine already was ported and polished, but Chanito is going to center the exhaust port too.
|
|
|
|
Post by I Heard A Rukus on Jan 14, 2007 19:25:27 GMT -5
Looks like it's going smooth. When I do these engines I also re-build the head and replace the Valve Stem Seals, they are cheap and pretty easy to replace. I also lap the valves. On auto engine rebuilds I have the valves ground however I have yet to find a machine shop that has a tool small enough to do ours, and honestly lapping does the same job, almost better in my opinion. All that is required is to remove the valve springs, retainers, and keepers, make sure you are careful, these buggers FLY sometimes. Buy some valve grinding, or valve lapping compound at any auto parts store. Make sure the valves are clean, a wire wheel on a bench grinder works best, and I also clean up the valve seats with a dremmel tool with a brass wire wheel on it, you don't want to use steel as it could mess up the valve seat, and they are pretty easy to jack on our heads. Once all that is clean you just smear some grinding compound on the valve, re- insert and flip the head over. Now you'll have to make a smallish tool here, I use a bolt with the head cut off, but you can use a drill bit or some shank, anything that will fit in the chuck of your electric drill. On the end of this shank place a piece of rubber hose, you want to make sure the hose fits snug on the valve, NOT TIGHT, snug. Once you have this built place it over the valve stem, using reverse on the drill pull up slightly and run the drill at about 1/2 speed. If you chose the right hose when you pull too hard you'll just pop off the valve, no damage done, also if you start to feel vibrations you need more compound on the valve, and you'll know what this feels like, similar to fingernails on a chalk board. Grind the valve for about 30 seconds to a minute. Pull the valve out and clean the excess compound from both surfaces. Now if you did this right you should see a light grey/silver band around the valve and the seat, should be matte finish, this is where you ground creating a perfect seal between the two parts.
That's about it!! Re-install the new stem seals and have the head re-surfaced and you're done!
Hope this helps, KP
|
|
|
|
Post by Dandy Dan on Jan 15, 2007 9:28:01 GMT -5
Hmm....very clever IHAR, next time I'm rebuilding an engine I'll do this as well. Thanks a lot for posting up this info.
|
|
|
|
Post by chanito on Jan 15, 2007 19:47:52 GMT -5
 Thanks for the tip, i do it a little different, but lapping a valve is a must, i use the vacuum hose trick but only use a drill if the seat is super dirty, otherwise just hand lap them, i will post pics over the weekend, also cleaning the ports require to make special tools as the factory ones do not fit, they are easy enough that making them should be a piece of cake for anyone with a pair of pliers an a metal coat-hanger, the only fancy material is a piece of Scotch Britte, which you can get on the supermarket  Some dishwasher fluid comes in handily at clean up time with another piece of scotch brite  Pics to come 
|
|
|
|
Post by chanito on Jan 19, 2007 19:09:00 GMT -5
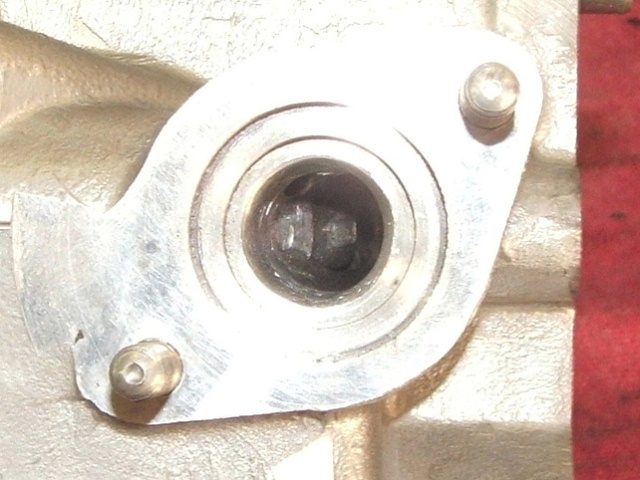
8-)OK time for chapter 2. The head is on excelent shape so the only thing to do is center and clean the exhaust port 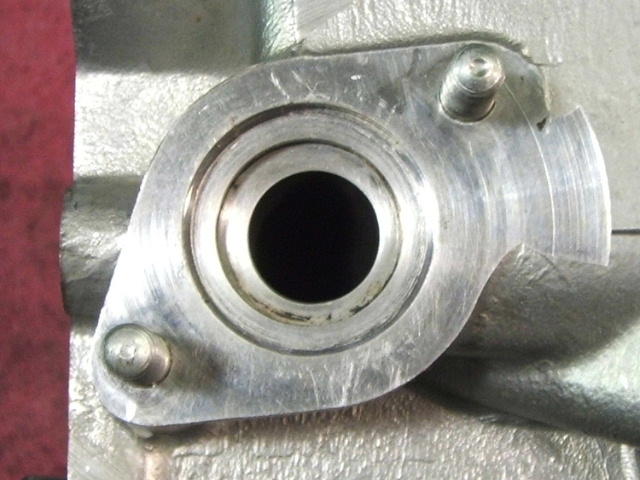 as you can see, it is clean but slightly off-center, so fisrt thing to do is cover the port face with tint from a magic marker 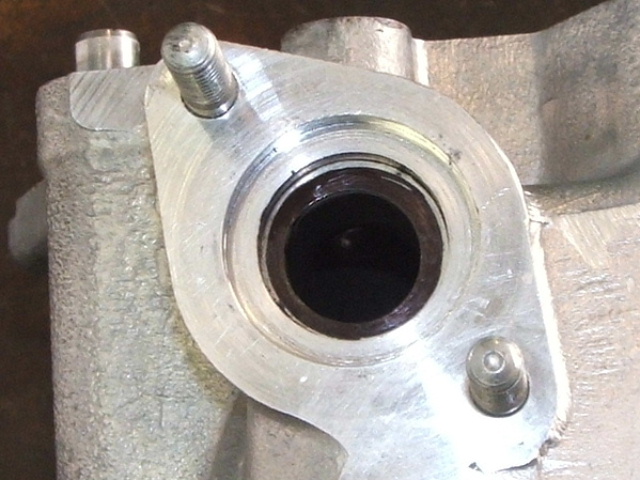 then using a drill bit of a size that will allow the tip if the bit to be on the thinest part of the port and the wall of the bit on the wall of the port 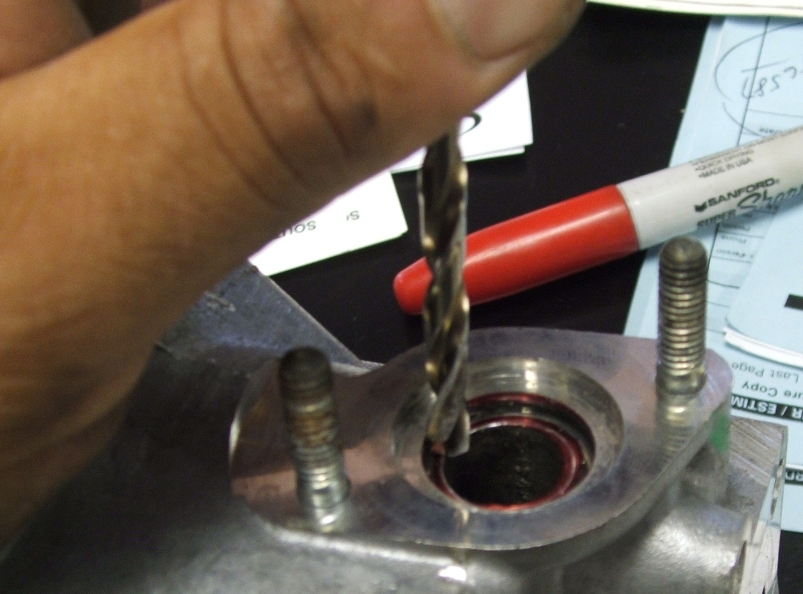 the port should look like this 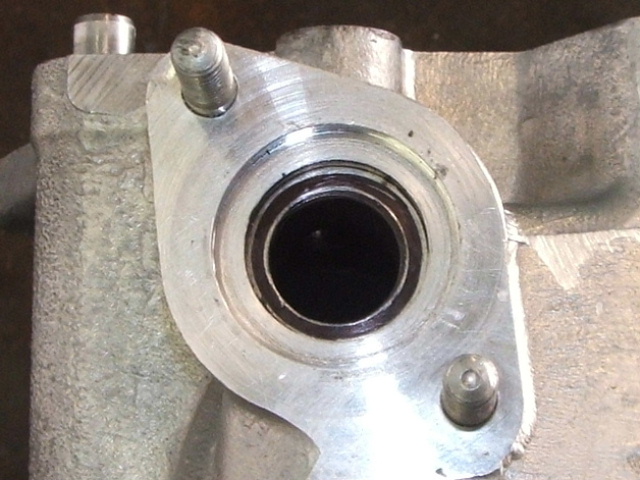 then with a lot of patience and love grind the port until it reaches the mark 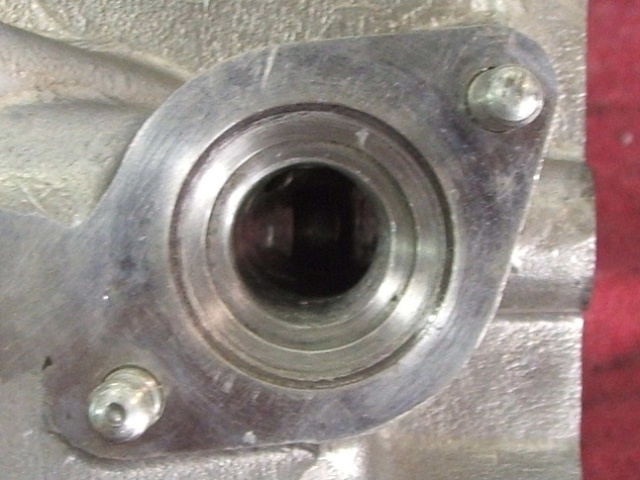 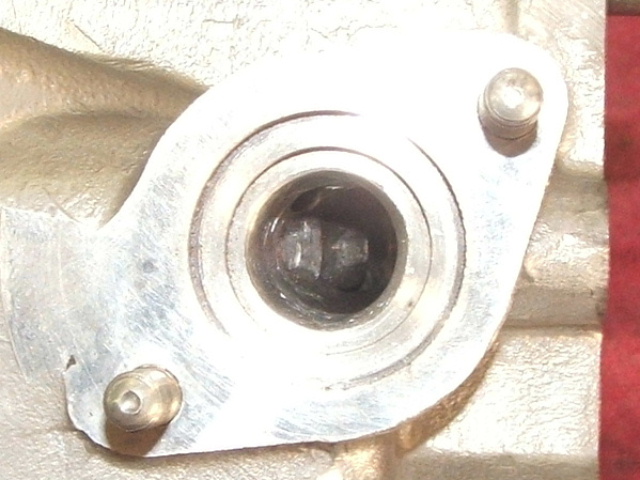 polishing the port is a bad idea as it creates a lot of turbulence on the ehaust flow when the flow reaches the begining of the header and go into the rough colder inside of the pipe, but a super rough is not a good idea, so you need to smooth out the port, normally you will use a buffing tool, but sadly our port is way too small for regular tools 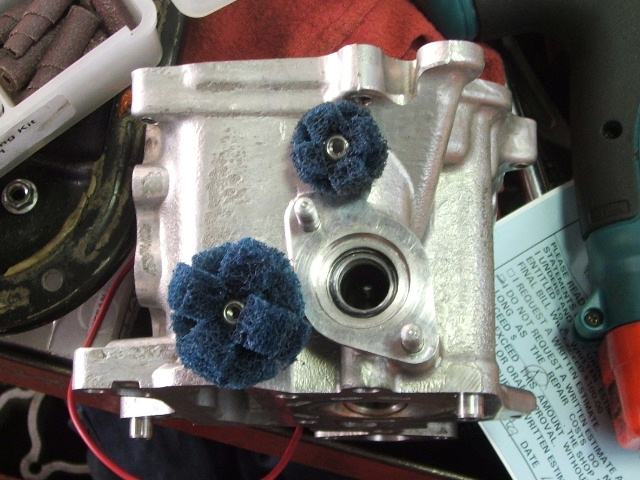 So that means we have to make our own tools, they are not that hard to make, all you need is a coat hanger and a pad of scoth brite 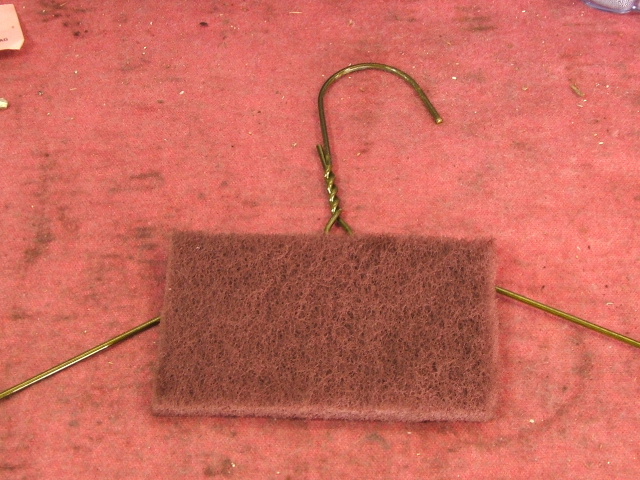 cut some stripes out of the pad material, make them about 1.5 the size of the port 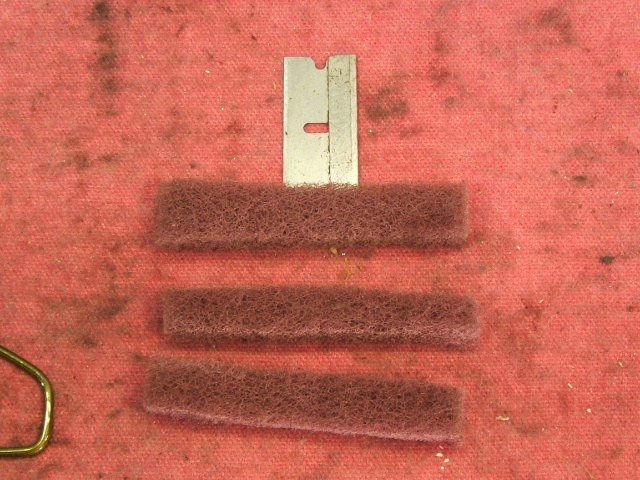 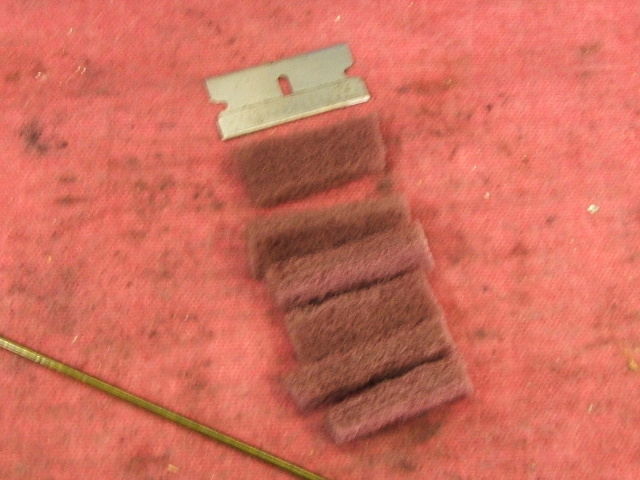 then get a piece of the coat hanger bent it around the pad pieces so they form a small ball, now you can use a drill and run this inside the port, this should within reason smooth out most of the roughness inside the port 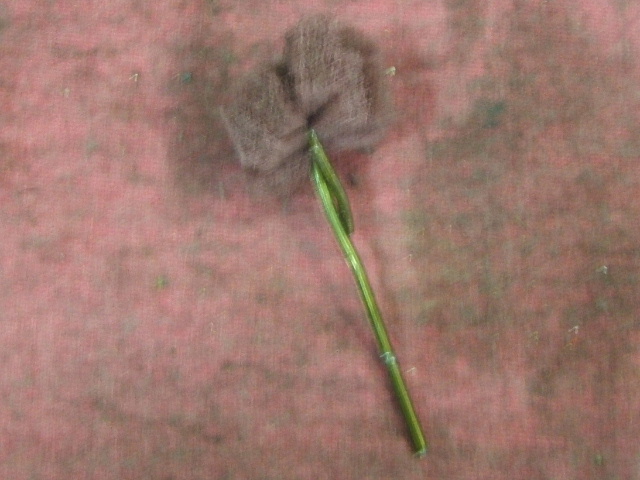 this tool will be unbalance, so only use it with a drill, and not too fast, you will probably need to replace the pad pieces, but it does a very decent job  |
|
|
|
Post by sanjuro62pt1 on Jan 19, 2007 19:23:10 GMT -5
Chanito, your use of the drill bit to mark where the port is supposed to be is pure genius.
|
|
|
|
Post by Dandy Dan on Jan 22, 2007 8:57:01 GMT -5
Nice stuff Chanito...always a great read  So what did you use to grind out the port? My dremel (well imitation dremel) came with a bunch of crappy bits that fall apart. What kind of bit should I be used for a job like this? And why would Honda not center the port? |
|
|
|
Post by chanito on Jan 28, 2007 15:40:09 GMT -5
|
|
|
|
Post by sanjuro62pt1 on Jan 28, 2007 16:03:01 GMT -5
during tear down i found the exhaust valve seal had a cur, i did not find anything that could cause it, so i guess it happened on assembly, probably something hit it and cut it  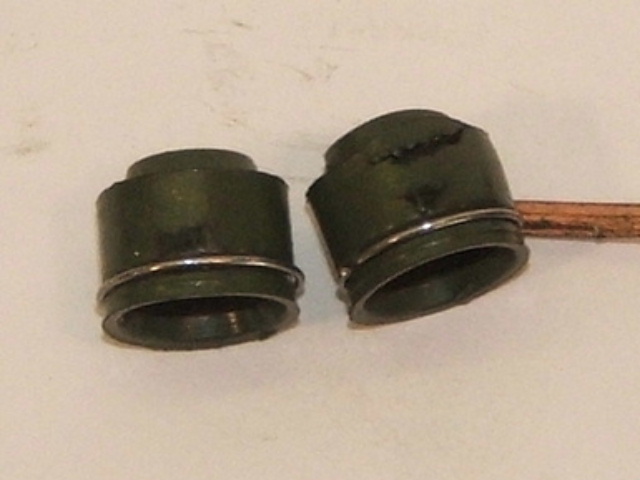  I am so happy i got this nice tires as part of the deal of taking apart this nice engine, but i still feel guilty  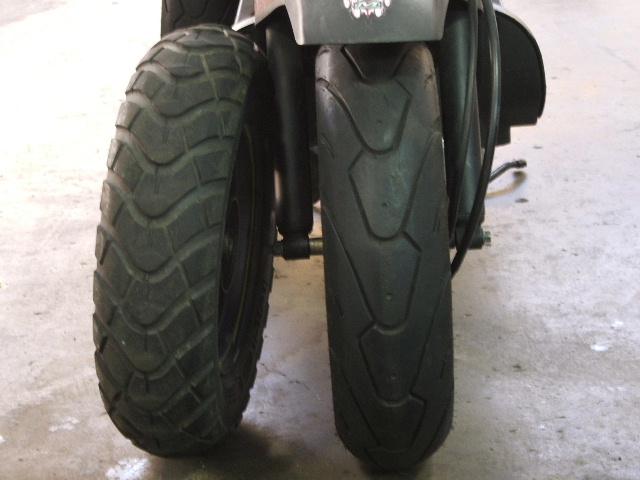 so next stop is lapping the valves and start the reassembly  Yeah, that pesky exhaust valve caused a lot of worry for me, but thankfully there wasn't any other red flags. Chanito, enjoy the tires and wheels ;D |
|
|
|
Post by chanito on Jan 28, 2007 16:06:33 GMT -5
 By the way those black marks on the seals close to the metal rings are caused by the tool used to take them out, the problem is the cut close to the top
|
|
|
|
Post by I Heard A Rukus on Jan 28, 2007 20:12:20 GMT -5
Well that cut seal sure would cause smoke on start up. I replace both stem seals on all engines I build, I have a box of those things sitting around!
Nice work. KP
|
|
|
|
Post by Dandy Dan on Jan 29, 2007 9:22:55 GMT -5
Any chance that tear was caused by the H.O. cam? There hasn't been a lot of talk about it lately but when it came out Jason said it has more lift and more duration and that the valve guides should really been machined down to lower the seals. He said cutting the seals down or removing them is an option but not the greatest method.
|
|
|
|
Post by chanito on Jan 29, 2007 19:38:41 GMT -5
 That is hard to tell, but it is a tear so more likely it was caused by the cam on a super tight exhaust or when they install the seal, it was hard to see so i will use a mirror to inspect it when i am done install in the new seals, and just to cover all possibilities i plan to shave the new seals 
|
|
|
|
Post by chanito on Feb 10, 2007 22:14:41 GMT -5
;DSo finally i was able to go back and start working on the engine again, first i need to do some mild honing, to break the glaze so the rings can seat properly again 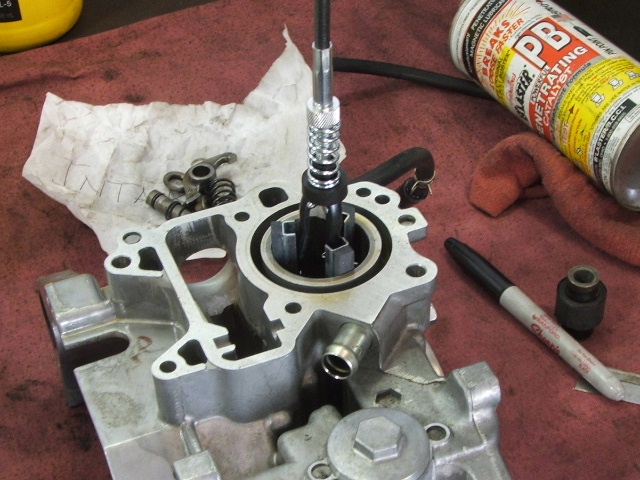 then i need to lap the valves to make sure they seal tight 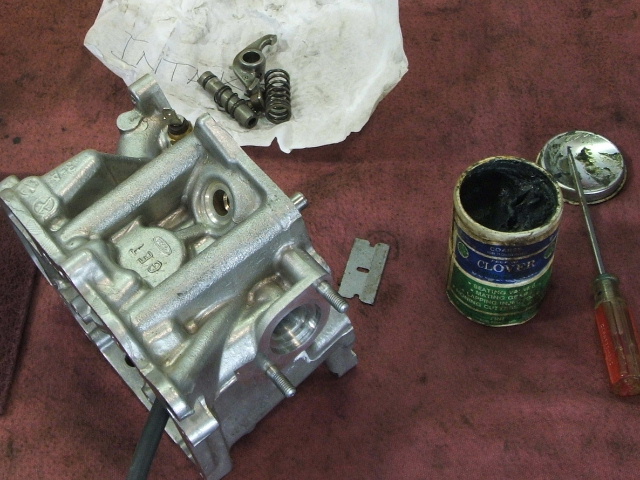 All you need is to use some fine valve lapping compound and using a short piece of vacuum rubber hose attach to the valve stem rub the compound on the valve seat and valve face, and check to see if you have an even cover around the valve, if you do you are OK if not just keep using the valve compound and grind away until you do, when you are done,both the valves and the seat should have a dull Finnish all the way around 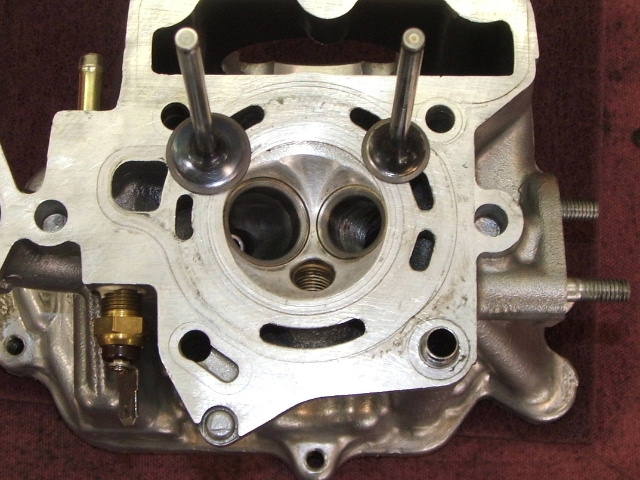 Than using a piece of glass and a very fine "emery cloth" (not the same as sand paper) soak the emery cloth on dishwasher fluid and water, and using a figure 8 movement sand down both the head and the block so they are clean and you can be sure they will seal with just the head gasket, remember all you want to do is remove small nick and scratches, no shave the head  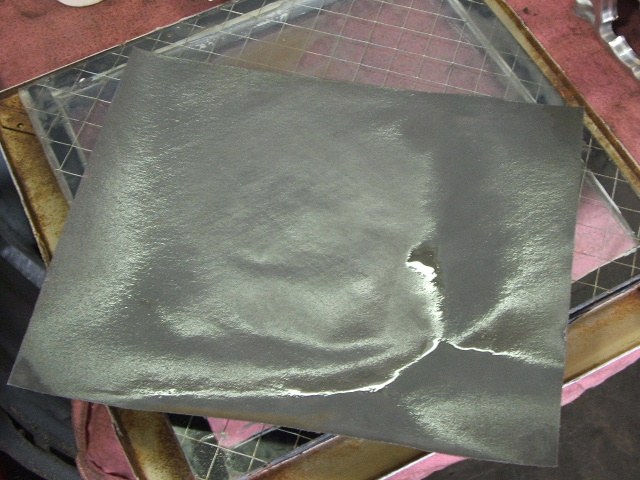 when you are done you want then to look like this 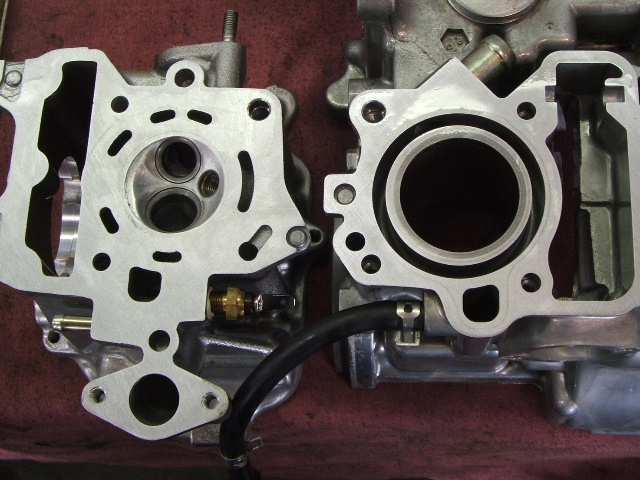 I usually mark the engines i work with my signature and a number in this case BBR (big bore ruckus) 002 as 001 is the engine in Katrina 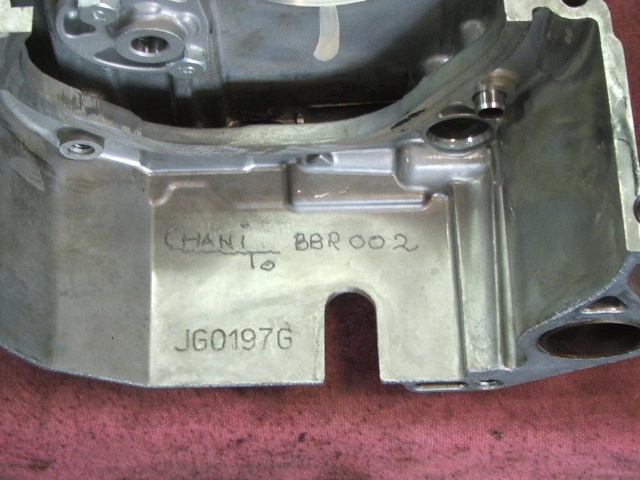 The only bad note on the day is that just before starting, when i was cleaning the block i discover that the mount is broken, so i will have to install a new one, is very easy to do now that the engine is apart so i will do it during next week. 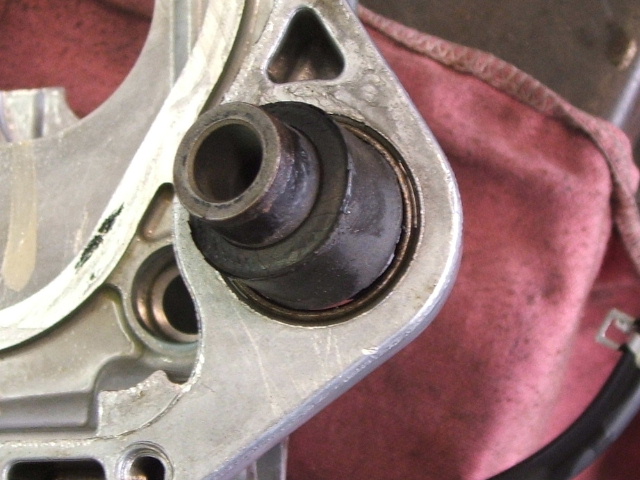 So now all is left is the easy part, to put the engine together, the only tricky part left is adjusting the valves ;D |
|
|
|
Post by sanjuro62pt1 on Feb 11, 2007 1:12:55 GMT -5
Cool, my engine is 002 in Chanito's world::-)
So Chanito, was the mount cracked or just defective? I'm wondering how it happened, and I'm glad you discovered it before I put the bike back together. I'm wondering if I have to replace the mount on the swingarm now.
|
|
|
|
Post by chanito on Feb 11, 2007 9:13:42 GMT -5
The mount is just a rubber bushing between two metal bushing and is glued together, apears that the bushings just came unglued, it will need to be replace as i do not think we can get a glue that will hold on with the engine vibrations. "My opinion" is that is just failed due to all the harsh quemical used during the machining proces for the sleve install and the cleaning i did here, plus the extra stress due to the extra power, i think a new mount on the engine case should be enough, as the one on the tranny (swing arm) had a much easier life  |
|
|
|
Post by sanjuro62pt1 on Feb 11, 2007 10:58:38 GMT -5
Chanito, could you order me the bushing for the swingarm too? I washed my swingarm case with a parts washer at my local bike mechanics shop. I avodided the bushing, but I'd rather be safe than sorry.
|
|


 the forged pistons expand more than cast so they have more clearance, which allow them to rock when they are cold, when they are warm they are very stable and can take more abuse, so this is as bad as it is going to get, so Sanju can go back to abuse his engine


 the forged pistons expand more than cast so they have more clearance, which allow them to rock when they are cold, when they are warm they are very stable and can take more abuse, so this is as bad as it is going to get, so Sanju can go back to abuse his engine


 Pics to come


 So what did you use to grind out the port? My dremel (well imitation dremel) came with a bunch of crappy bits that fall apart. What kind of bit should I be used for a job like this? And why would Honda not center the port?
 here it is