|
|
Post by andr01dm on Jul 15, 2008 22:06:17 GMT -5
I started this on Sunday; but ran into issues with my camera's SD memory card.. along with issues with doing the engine dismantling. Still not quite finished with that but here's how it's gone so far: 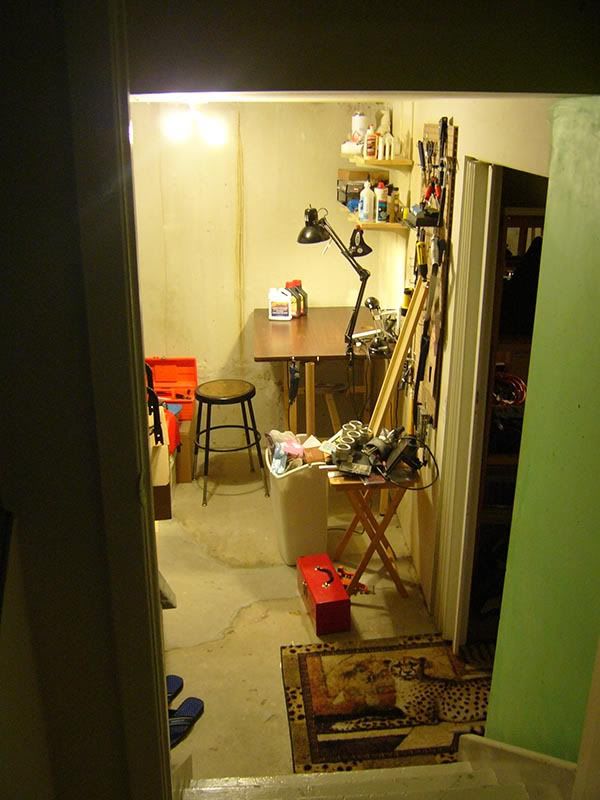 My workshop in the basement.. it's not pretty, but it's mine. 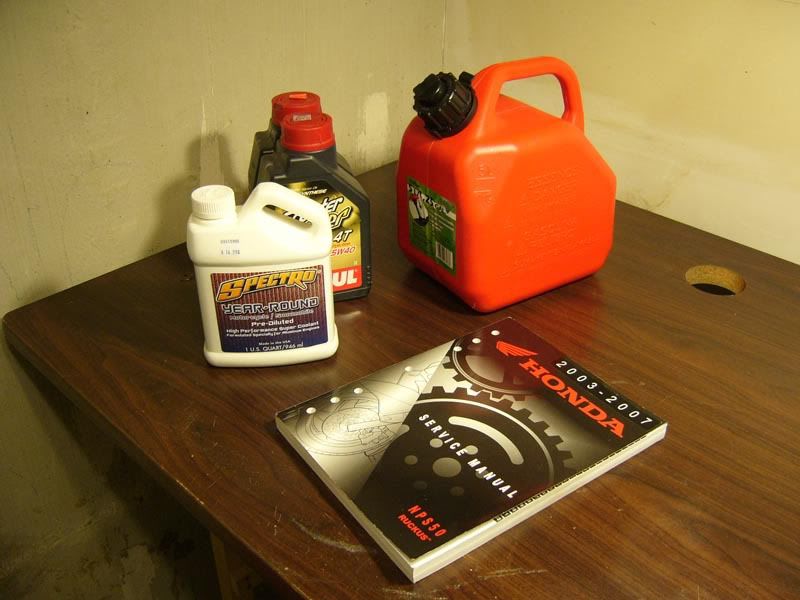 Important stuff to have before getting started: Oil enough for several changes during the break-in of the modified engine, engine coolant, a gas can for both draining the old fuel and re-filling with high octane fuel once it's re-assembled and most importantly of all the Honda repair manual. 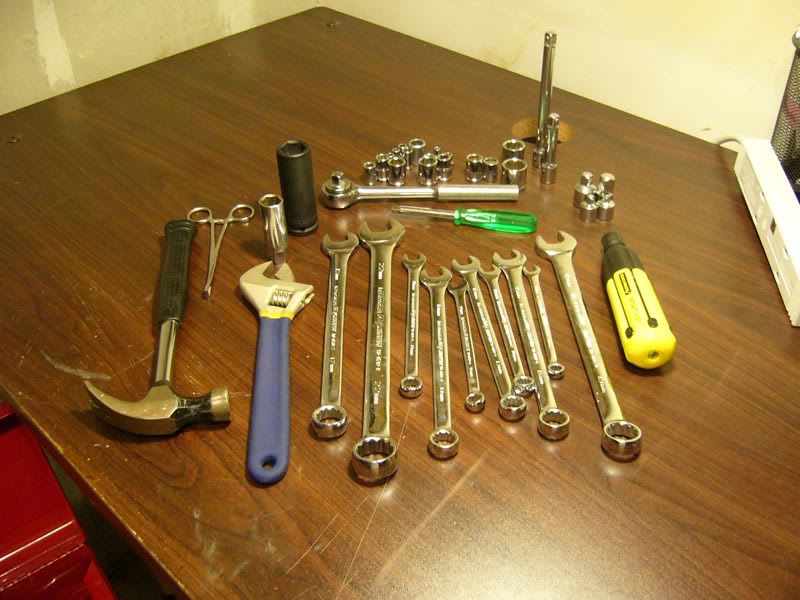 A handful of tools that I've needed in the past when doing work on FATC (my bike is named 'Fate Amenable to Change'). Hammer, sockets, screw driver, body piercing clamp, etc. 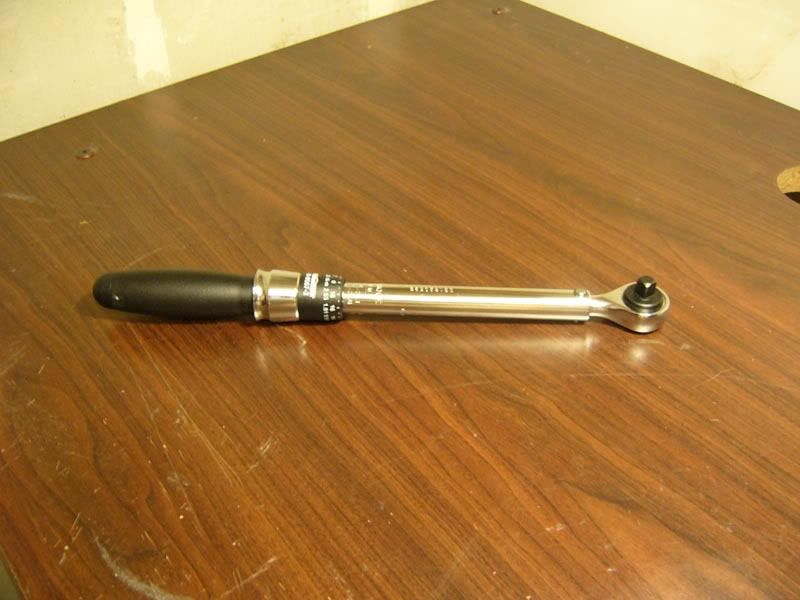 A new acquisition.. my old torque wrench didn't go high enough for the rear wheel's bolt. 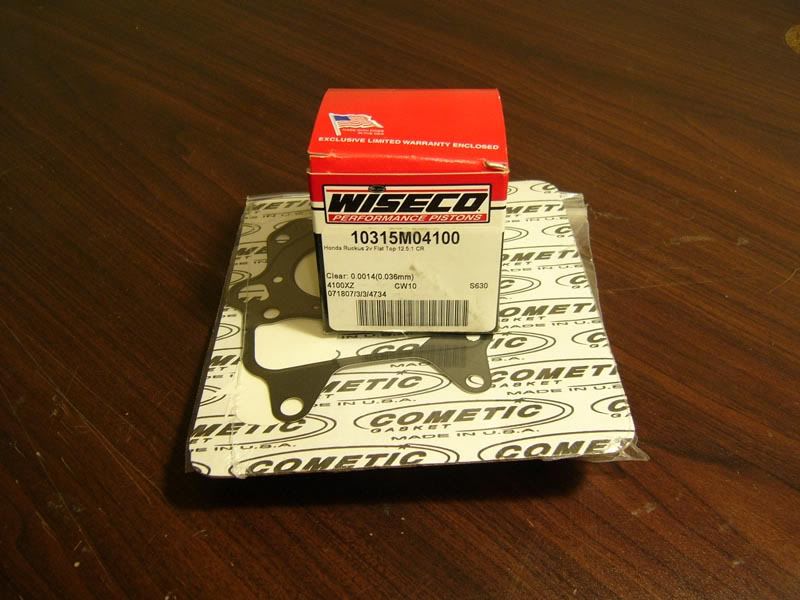 The big bore kit from Chanito Motor ( www.chanitomotor.com/ ). 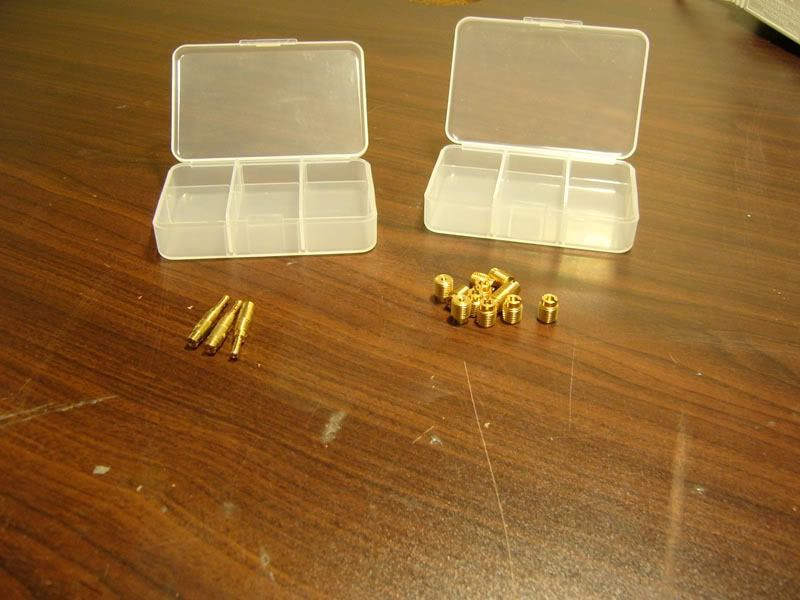 Carb jets from Battle Scooter ( www.battlescooterstore.com ). 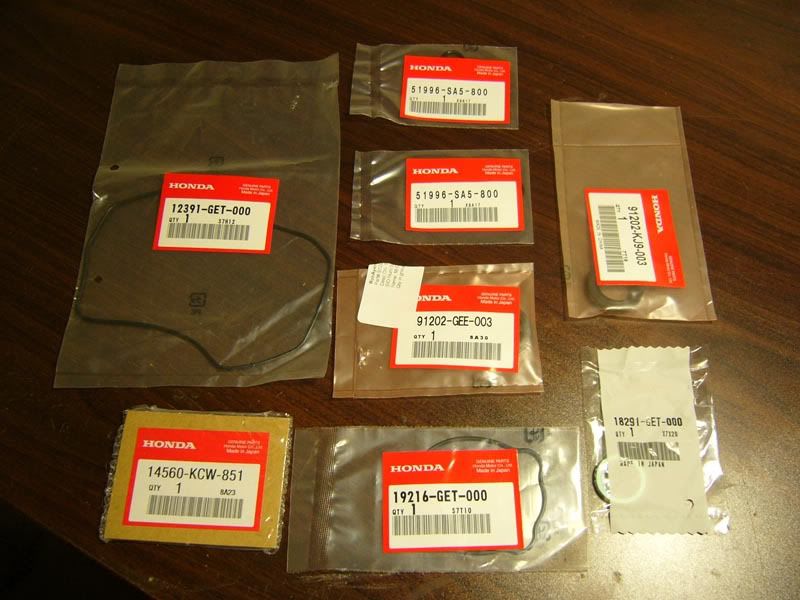 The Honda parts of the big bore kit.  The Weisco parts in the big bore kit. 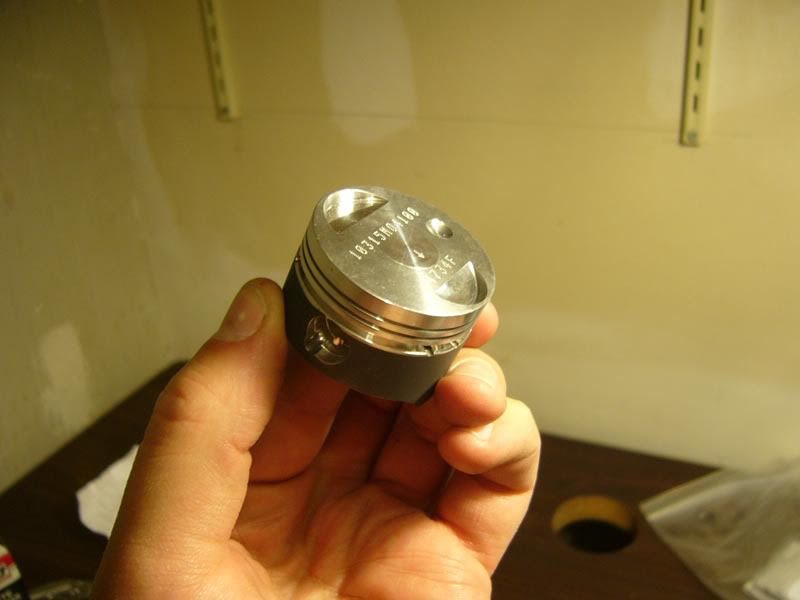 Don't be fooled, I have GIGANTIC meat hooks. (Not really.. it's a tiny piston!) 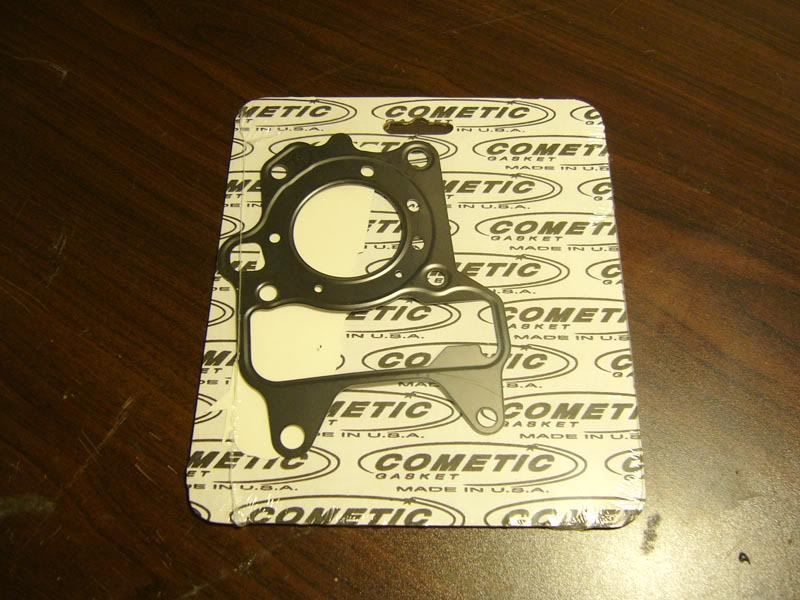 And the last bit in the kit.. pretty certain this is the replacement head gasket, designed to deal with the boosted compression. 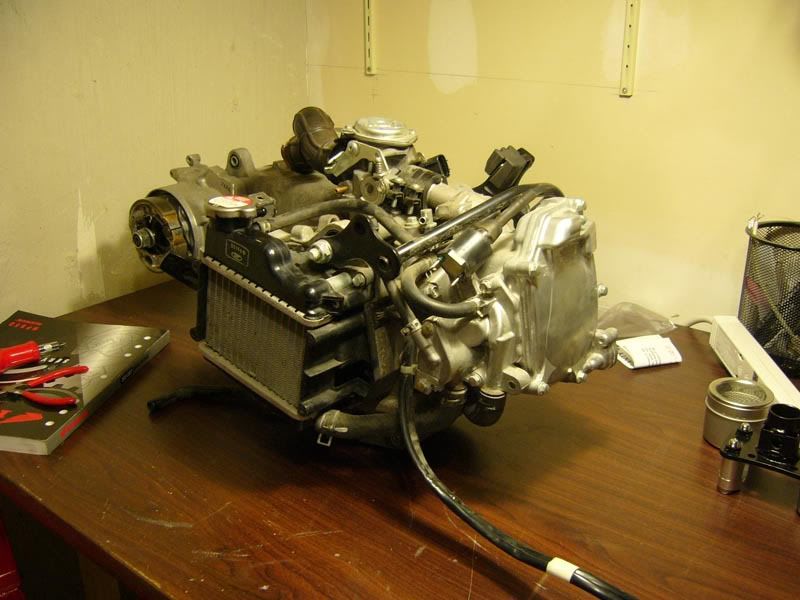 Aaaand an unsuspecting Ruckus engine, freshly plucked from FATC, which is currently sulking behind my car down in the parking garage. Most of it's parts are in my car's trunk.. a decently secure lockup. 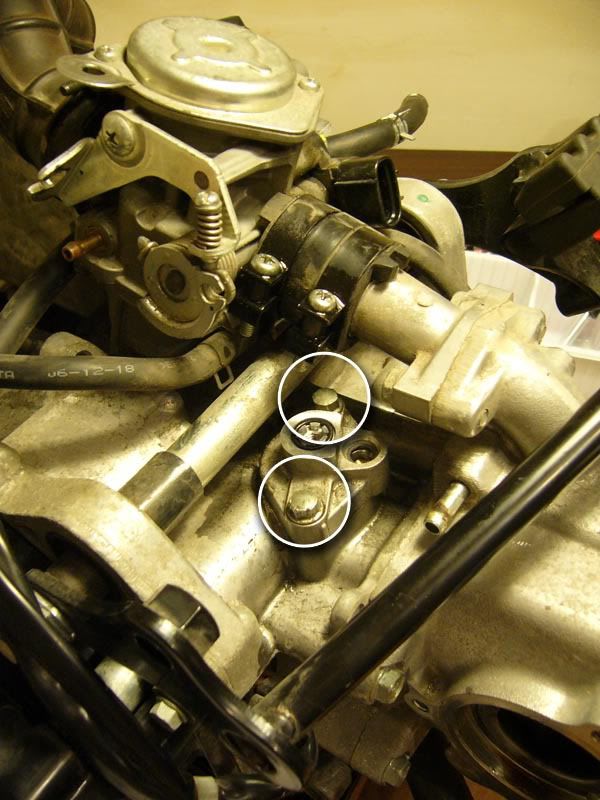 These bolts, circled, gave me a HELL of a time! I ended up mangling them a bit using a large vice grips on them. Today I bought an impact driver which made short work of similarly difficult to work on bolts inside of the piston head. Wish I'd had it earlier.. oh well.. just have to get some replacement if the originals won't work any more...  This was as far as I got by the time I had to fall unconscious on Sunday night. I'm a bit further along now. 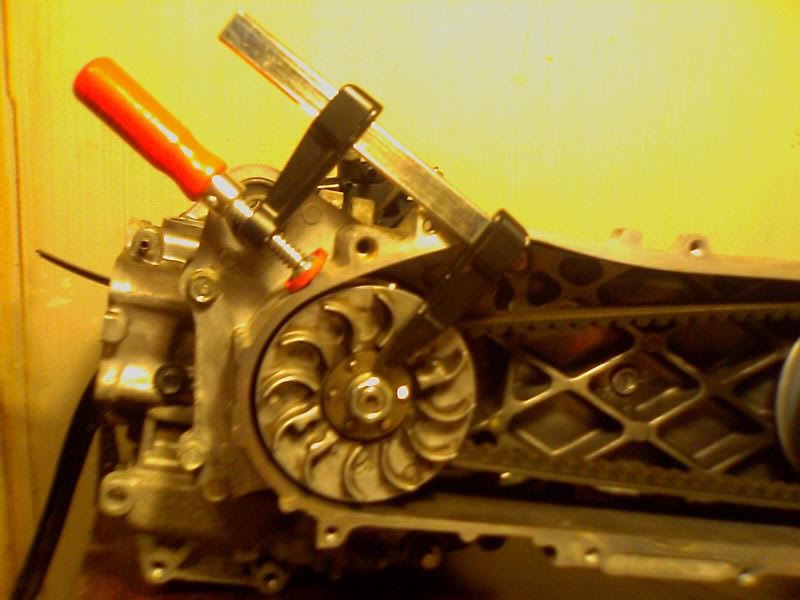 I was able to use this clamp instead of the "Universal Holder" tool when removing the bolt holding the variator on. It worked surprisingly well and there's no damage to any of the parts. I'm not sure if I'll be able to use a similar arrangement when torquing it back on though.. have to try-n-see. This is a Kitaco variator btw, not stock, with 6g weights. This is my 2nd time mucking around inside the tranny, though last time it was still attached to the bike. 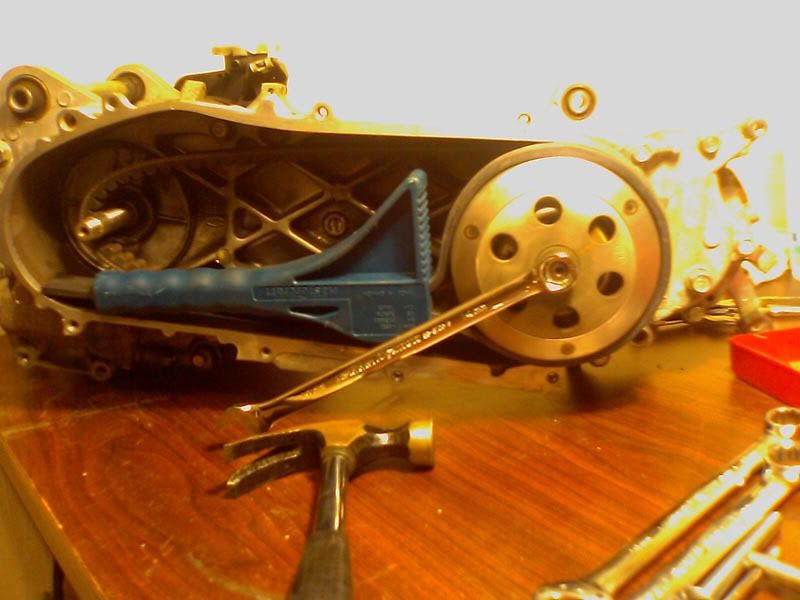 This arrangement made pretty short work of removing the clutch. I'm planning to replace the clutch spring while I have it out. 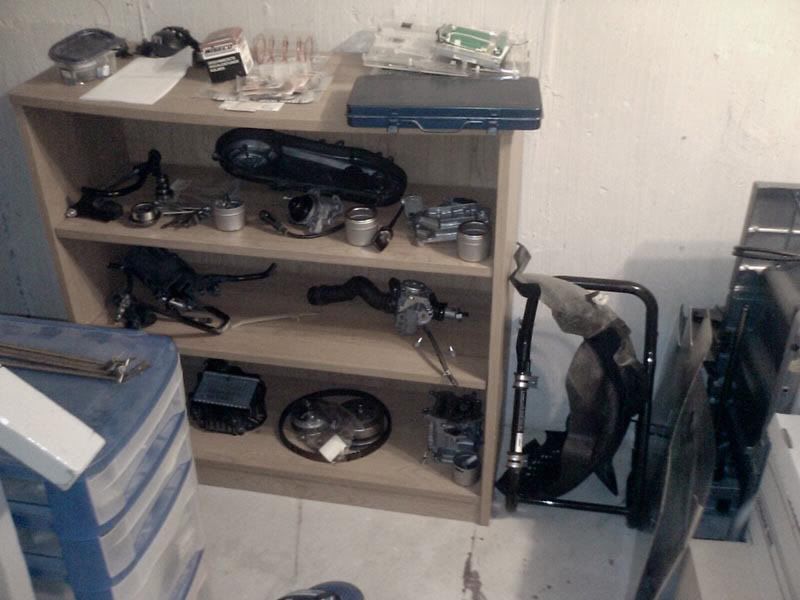 Keeping all the dis-assembled parts organized. I have to pick up a puller from Canadian Tire so that I can get the generator apart, then it should be just a few more bits to remove and I'll have the cylinder in hand, ready to go off to the machine shop. Only four days later than I had anticipated... I miss riding... >.< |
|
|
|
Post by Kami no Chiizu on Jul 16, 2008 0:51:05 GMT -5
Nicely organized.
|
|
squeek
Junior Ruckster

Posts: 59
|
Post by squeek on Jul 16, 2008 0:52:49 GMT -5
WOW i'm actually super happy you are taking pictures of all the steps hope it all works out.
|
|
|
|
Post by chanito on Jul 16, 2008 5:52:44 GMT -5
;D Wow! congrats on the build up, but make sure you have an inch/pound torque wrench for the engine build, as with a foot/pound is too easy to make a costly mistake  |
|
|
|
Post by andr01dm on Jul 16, 2008 7:50:58 GMT -5
;D Wow! congrats on the build up, but make sure you have an inch/pound torque wrench for the engine build, as with a foot/pound is too easy to make a costly mistake 8-) Eep! I'll pick one up at Canadian Tire today when I get the puller. Thank you for extremely timely advice! :D |
|
shawna
Junior Ruckster
Posts: 58
|
Post by shawna on Jul 16, 2008 15:10:02 GMT -5
Looking great so far..!!!
Keep up the great work !!!!!!!!!!!!
|
|
|
|
Post by andr01dm on Jul 16, 2008 17:28:03 GMT -5
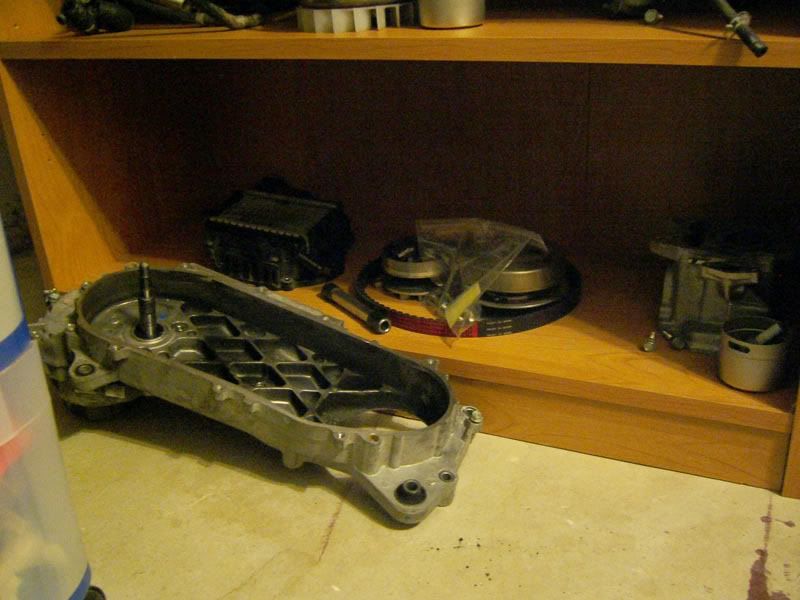 Removed the transmission and alternator leaving... 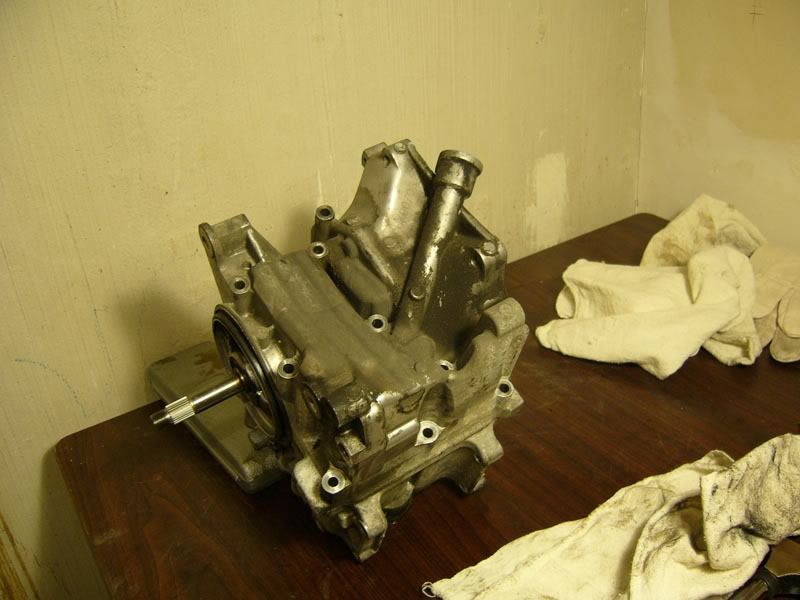 ...just the crankcase. I've removed the final bolts holding this together but it wouldn't come apart, until I realized that there's a base plate behind the alternator's coil that needs removing as well. I don't believe there's anything in the Honda repair manual about this.. I couldn't find it anyway, but a lot of stripping an engine down involves references between sections of the book, so perhaps I missed that reference. It's just four bolts and a bit of wiggling until it comes off. 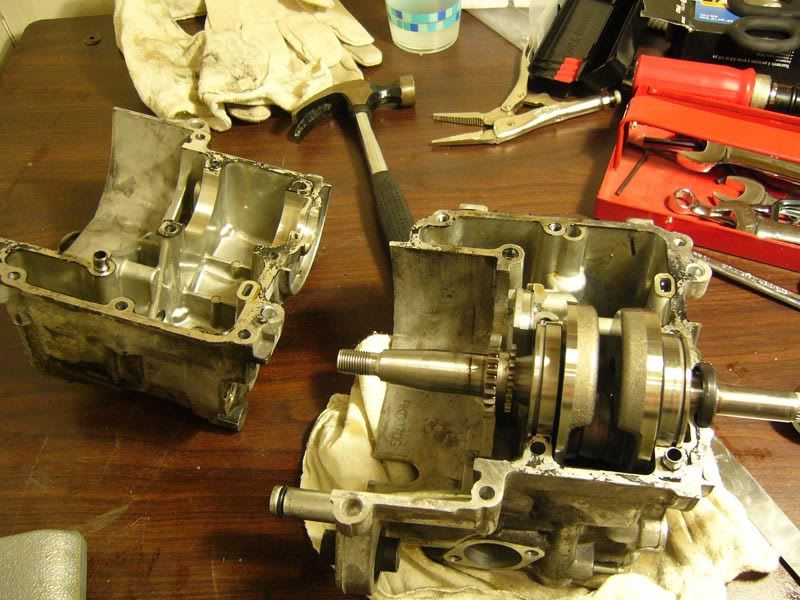 And here's the top (right) seperated from the bottom (left) revealing the bottom of the crank shaft. 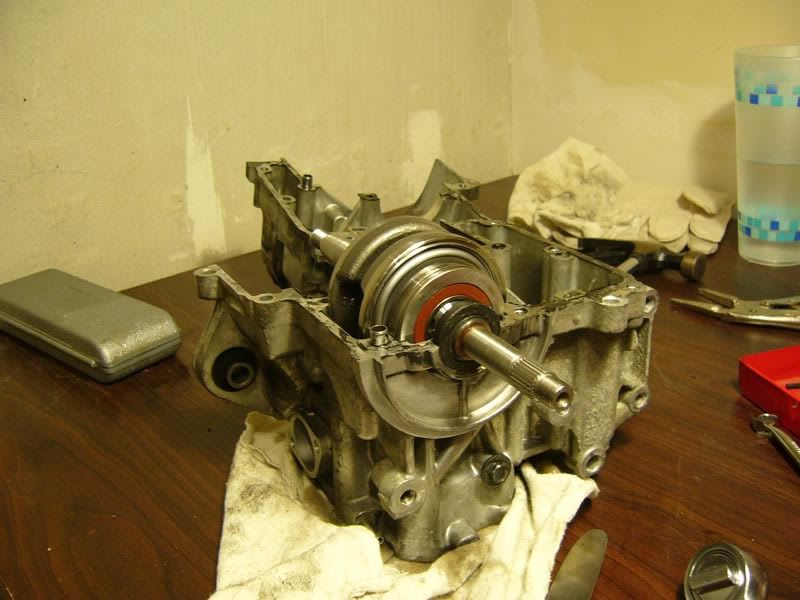 Side view. 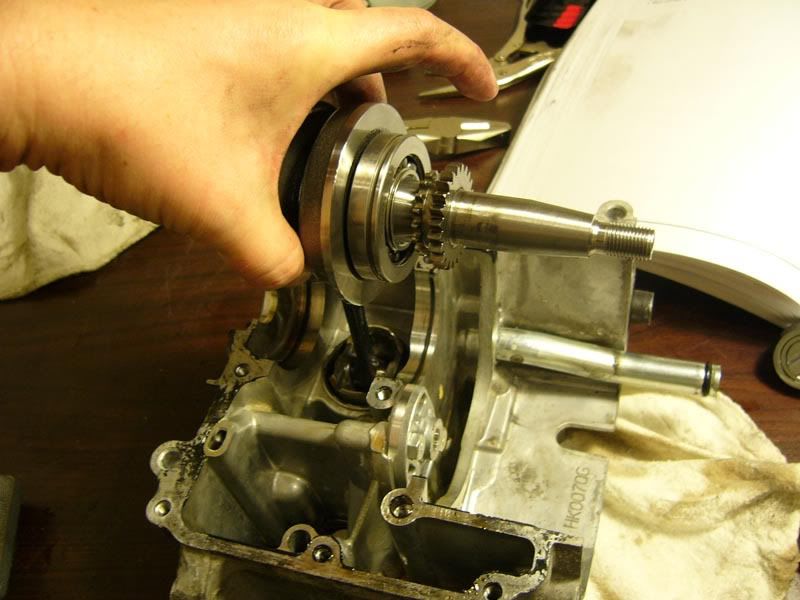 It's just a matter of lifting it up out of the case, though it takes a little force to get it started. 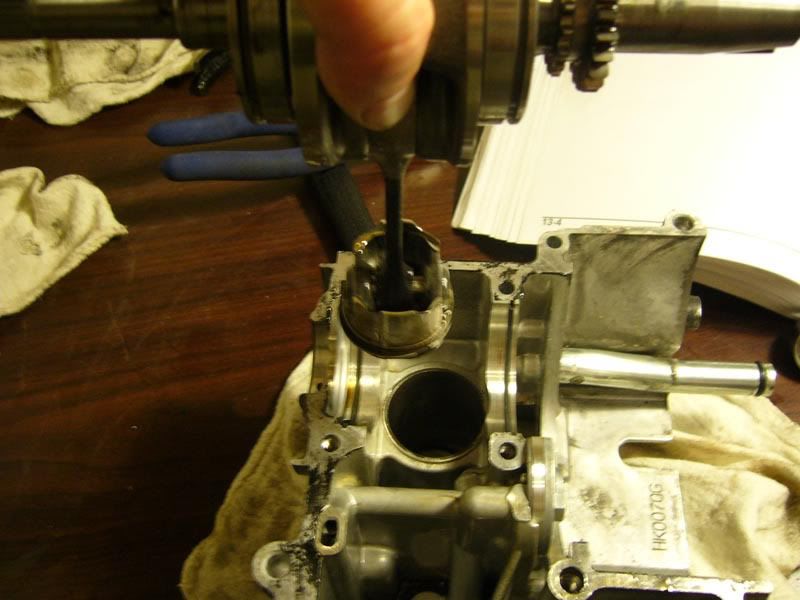 POP! POP! One very filthy piston. I've cleaned the cylinder block a bit and it's now ready to go off to be bored, which I'll be doing tomorrow morning before work in an AutoShare car. 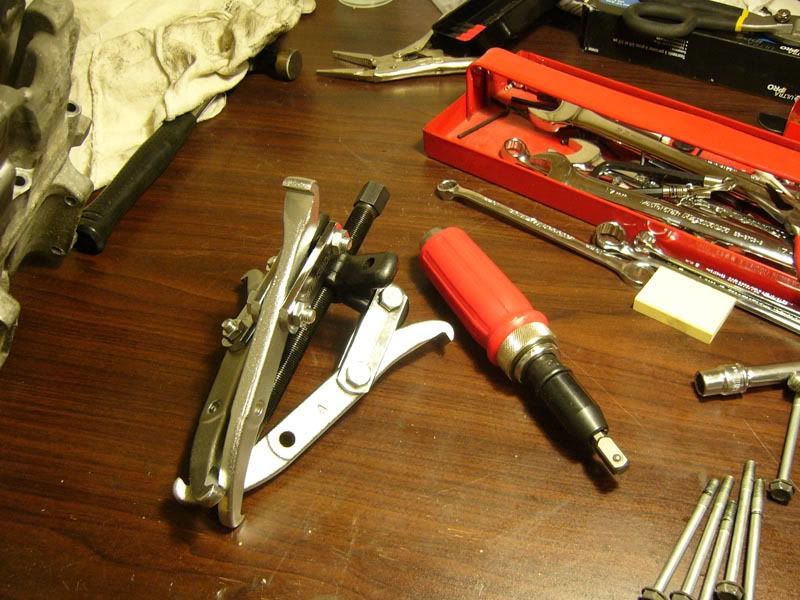 Here are the two 'surprise' tools that I had to buy during the tear down. On the left is a 3 arm puller (perhaps a bit overkill sized) which was $40 at Canadian Tire and on the right is an impact driver that I bought at Napa for just over $30. I checked my torque wrench, and it does appear to have inch/pounds, so it should be good for the reassembly process. This is another tool that I found extremely useful: 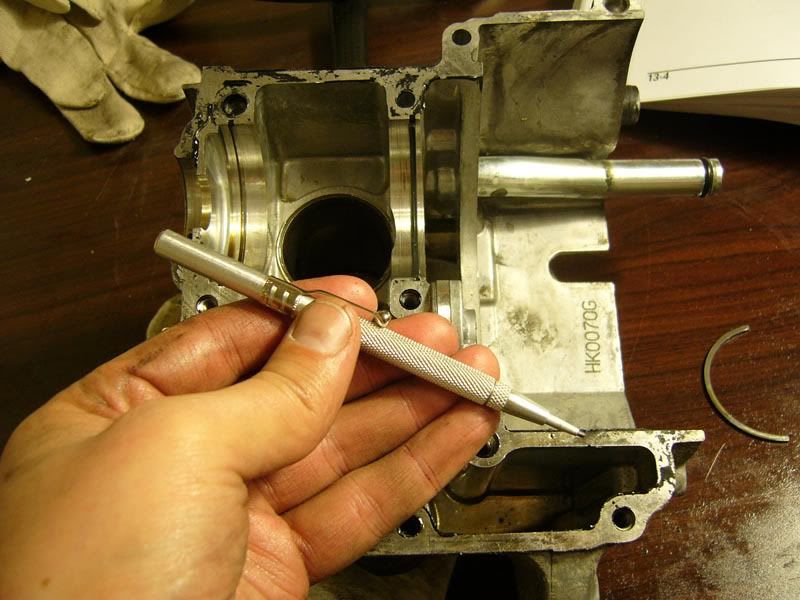 It's an awl with a magnet down at the 'erase' end. The magnet has helped me with removing and keeping track of tiny parts, like the valve shims. For example, in the background you can see where teh the crankshaft goes into the crankcase, and there are these two half-circle clips. 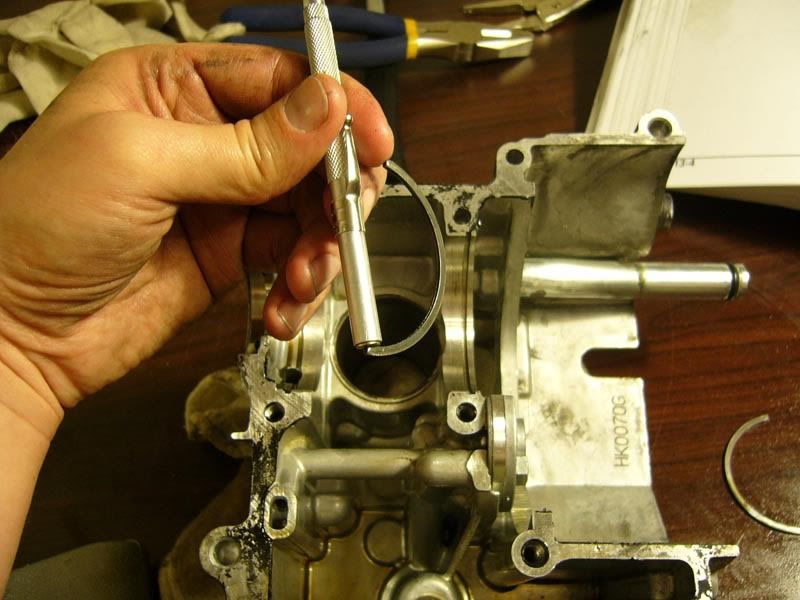 The magnet makes it quick and easy to remove them. Next Steps are going to be getting the cylinder head into the shop, then cleaning up the parts in prep for re-assembly.. perhaps do the initial re-jet on the carb. I'm sure there's also some sealant I need to get for putting the crank case back together. There's a handful of other things I'd like to try; like polishing the ports, removing some of excess weight on the engine by grinding off some of the mould flash and such and perhaps see about having the fly wheel lightened. But really I'd be happy just to get it back together and running! |
|
|
|
Post by andr01dm on Jul 17, 2008 10:27:34 GMT -5
Dropped it off at Gord's Performance this morning. I probably wont get it back before the weekend.. c'est la vie. Not a biggie anyway as there's a lot of cleaning and tweaking to do before I can do the re-assembly anyway.
Gord's shop is fairly small, nestled in amidst a bunch of other machine shops and construction places, with what to my untrained eyes looked like a decent shop setup. The guy I met, who I'm pretty sure was Gord, was quite personable and straight forward. He was surprised at the high compression rating on the new piston, which I brought along with the cylinder head as a reference for the machinist.
*fingers crossed*
Also this was my first time driving a Prius hybrid, having signed it out from AutoShare to make the trip. Interesting, but don't think I'd buy one.. assuming I were in the market for a car. It felt very, very heavy and kind of bland handling-wise.. a bit too much eye candy in the computer interface too. Eh. *shrug*
|
|
|
|
Post by andr01dm on Jul 19, 2008 0:57:54 GMT -5
Still waiting on Gord's to call.. if I've not heard anything by EOD on Monday I'll be giving 'em a call myself. I miss my bike & I haet being stuck on the TTC again. "The Better Way" my 455! >.<;
Meanwhile I've been puttering around with cleaning parts and investigating the carb. Just figured out how one gets shims under the main needle, so I'll likely post something about that since I've not seen any photos about that online anywhere yet and it was a little puzzling at first...
I'll likely put the carb back to stock first, to see how well that performs before I go crazy adjusting the mix, jetting and shimming.
|
|
|
|
Post by andr01dm on Jul 23, 2008 11:39:17 GMT -5
Still waiting on getting my cylinder back from Gord's, and becoming a little annoyed about it. I was originally told that if I could drop it off on Monday before last I would have it back a day or two later. I missed that day because it took longer to get my engine apart. Dropped it off on Thursday instead and was told it'd be early this week.. now it's "probably" before Friday. Gord says that he's got people on vacation and that has slowed things down; not my problem. You get folks going away, you arrange to deal with it ahead of time so your customers don't end up 'dealing' with it.
Ah well.. still waiting on the damn K&N filters to arrive anyway and I've been working on my handle bars and adding some seat storage.
Kind of annoying though.
...
Did I mention that I'm loving riding the TTC again?! NOT! >.<;
|
|
|
|
Post by andr01dm on Jul 25, 2008 9:10:35 GMT -5
Just picked up my cylinder head from the shop this morning...  Woot! Looks like I have a busy weekend ahead of me. I'd like to be back on the road on Monday.. really sick of the TTC again. >.<; ... Wish I could give Gord's Performance a glowing review, but I can't.. more on that later for those who may be considering getting a big bore done in the GTA. Gotta get back to work shoveling pixels and code into the Internet's furnace. |
|
|
|
Post by andr01dm on Jul 25, 2008 18:36:04 GMT -5
Aaaand my K&N filters arrived today as well, so it looks like I'll be re-assembling Fate Amenable to Change this weekend. ^_^
Re: Gord's Performance
I have two problems with Gord's lack of performance in getting my big bore done; failure to do it in the time quoted and failure to do it for the price quoted.
When I first called I was told "same day or the next day" for "$50". Turned out it took a week and a half and cost $80, and I only got that because I called and said I was picking it up this morning whether they'd bored it or not.
Every time I spoke with someone at Gord's it was the same excuse; that the boring machines were too busy. I suspect that is true.. and that my little 1 cylinder kept getting shoved to the back whenever a hy00ge V8 was dropped off.
Very unprofessional. If you can find another shop, you should use them instead.. and make sure that when you drop off your cylinder that they sign something that commits them to getting the job done at a certain time for a certain price.
Ah well.. my lesson learned.. but most importantly I do have my big bore cylinder now. I didn't even complain about the extra $30 or having to hang around for an hour, paying extra on the car rental, while the guy at the shop did the work. Just damn glad to have it done and ready to go together finally.
^_^
|
|
|
|
Post by andr01dm on Jul 26, 2008 20:41:59 GMT -5
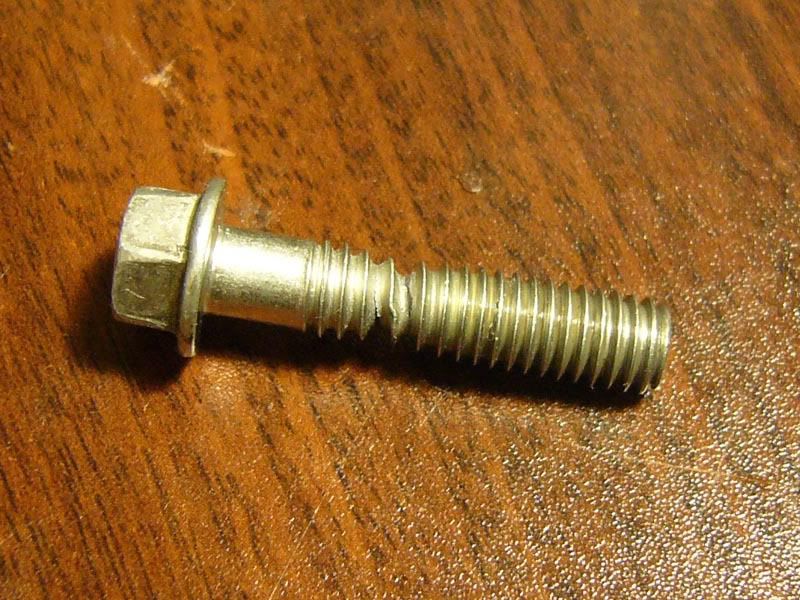 *sobs* I was confused by the confusing technical writing in the Honda service manual and over torqued. Oh well.. off to the shops tomorrow to get four new bolts for the stator base in my engine. At least nothing broke off inside of the crank case. |
|
|
|
Post by andr01dm on Jul 27, 2008 9:03:41 GMT -5
No joy finding bolts at Canadian Tired, so I won't have FATC on the road for this next week's commuting. More damned TTC. ARGH! During the week I have to AutoShare a car for grocery shopping, so I'll grab some new bolts then.. have to call around first and locate a store that has them. While the final assembly and tuning is delayed there are other things I can get done, such as lapping the valves on my cylinder head.  I used an un-orthodox tool for keeping the valves from moving while I compressed their spings to remove them; plastercine. (NOT play dough! That stuff would be too soft.) 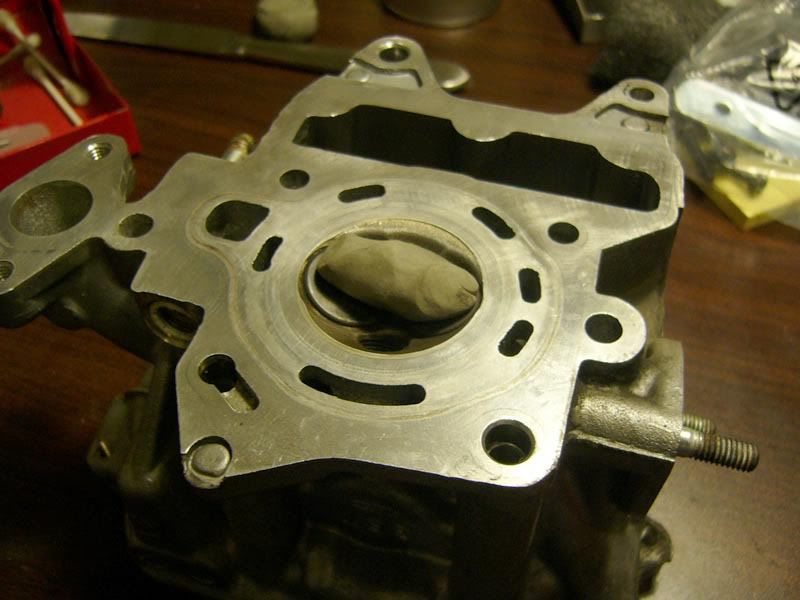 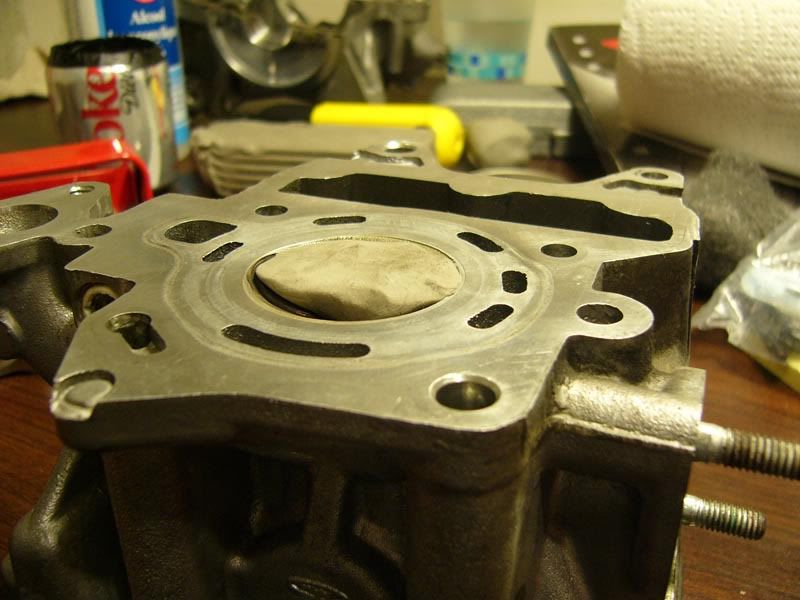 Once it's smooshed in there good I flipped the head over, compressed the springs and my hubby helped out by teasing the retainer teeth out of the holders. 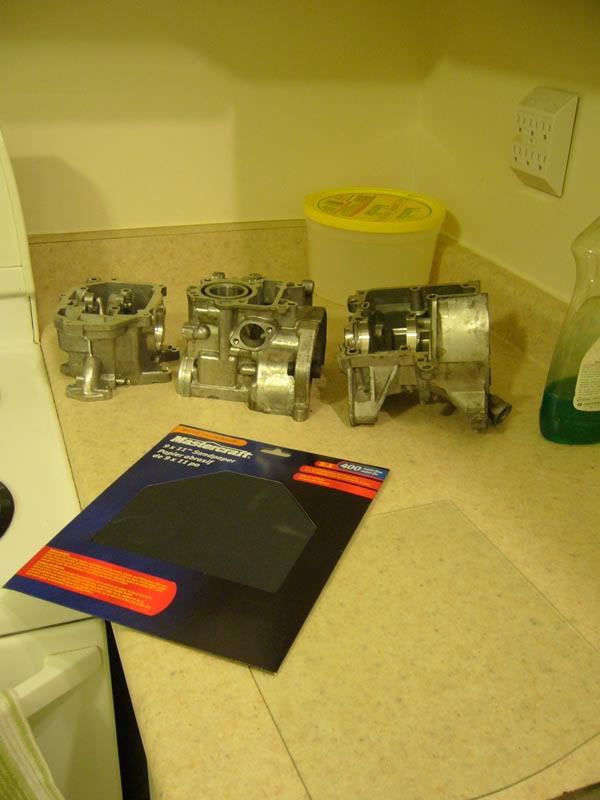 Smoothing the mating surfaces between the parts of the crank case. I initially used a sheet of glass that I 'borrowed' from a picture frame.. breaking it in the process. Bleh. 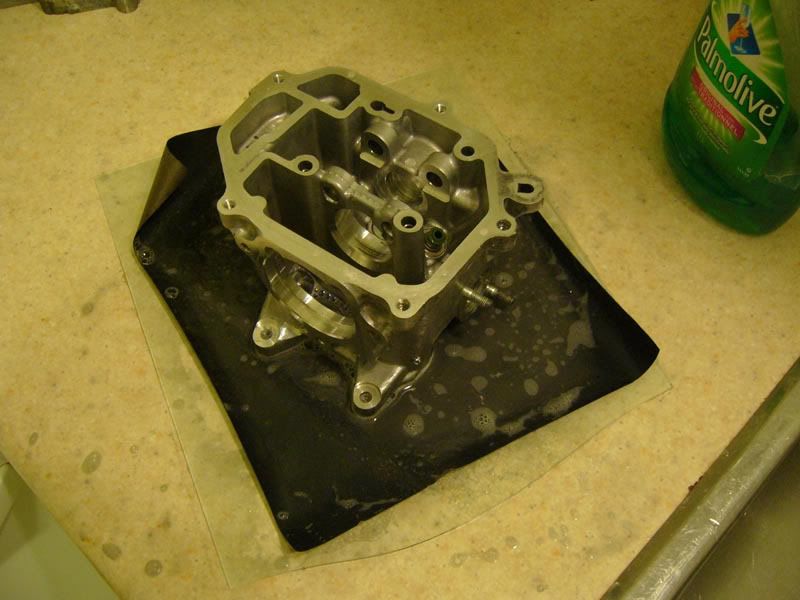 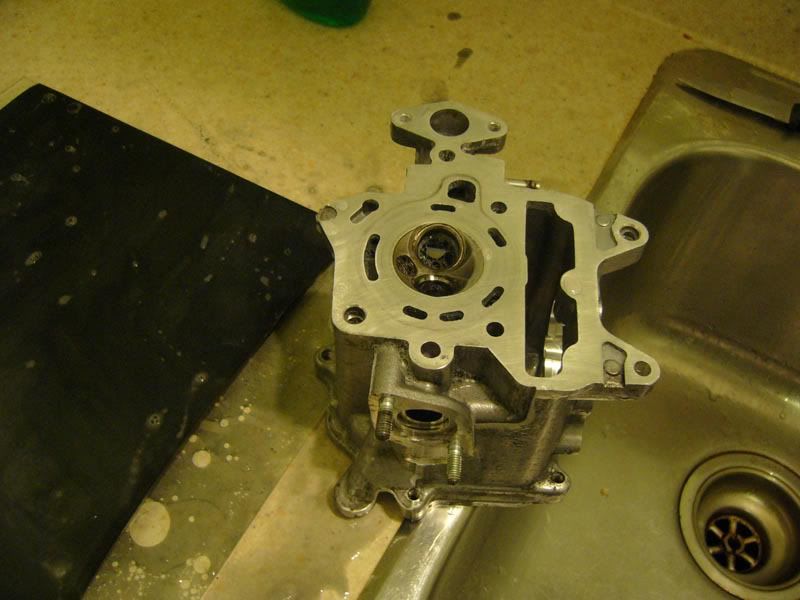 It was too slippery though, and after this photo I discarded the glass and worked directly on the kitchen counter. Kinda filthy for a food prep area, I know, but I spent a lot of work cleaning it up afterward. |
|
|
|
Post by andr01dm on Jul 27, 2008 10:53:13 GMT -5
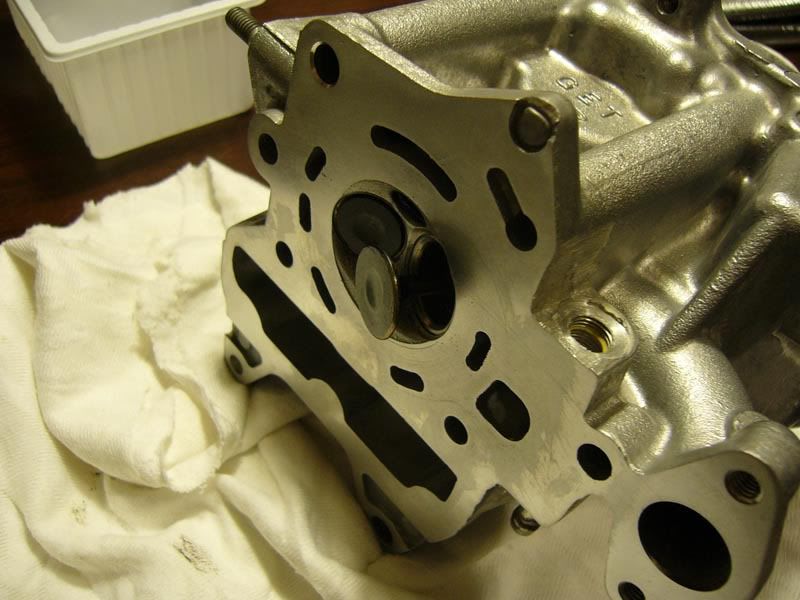 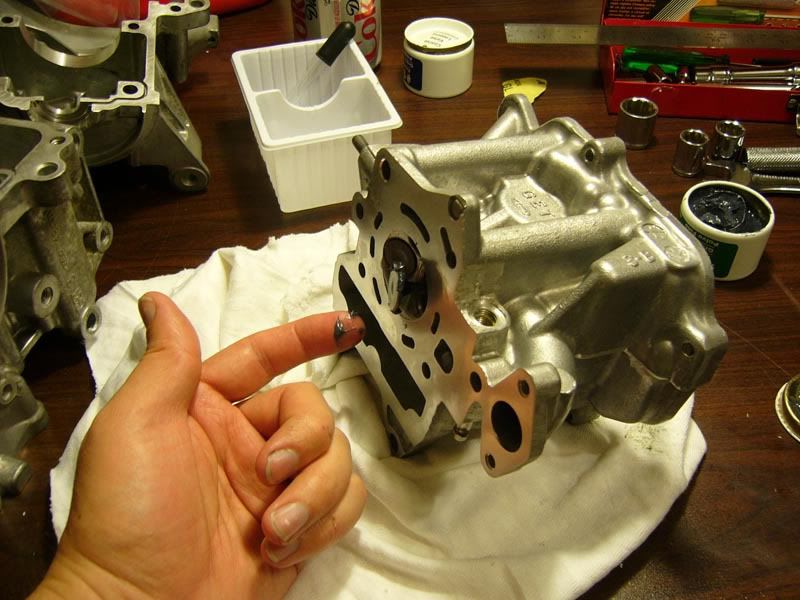 Getting back to lapping the valves; I slid 'em back into the cylinder head and put on a few blobs of lapping compound. 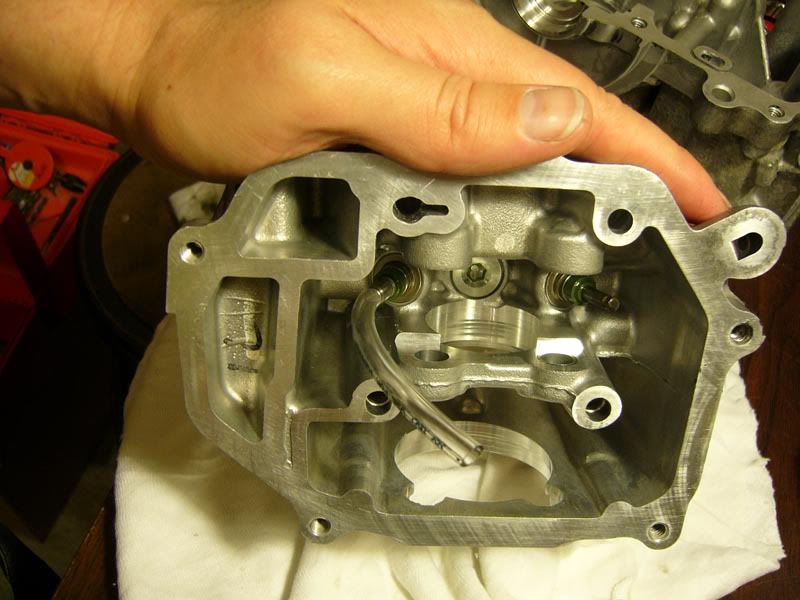 Then a short piece of plastic tube over the stem and by rotating this while pulling the valve into it's seat I used the lapping compound to gently remove the glazing and get the valve seated against the head. I found it useful to press gently against the valve head and help it spin it, like a record.. the tube kept getting slippery inside and I had to uses a few dozen small pieces of tube before the job was finished. 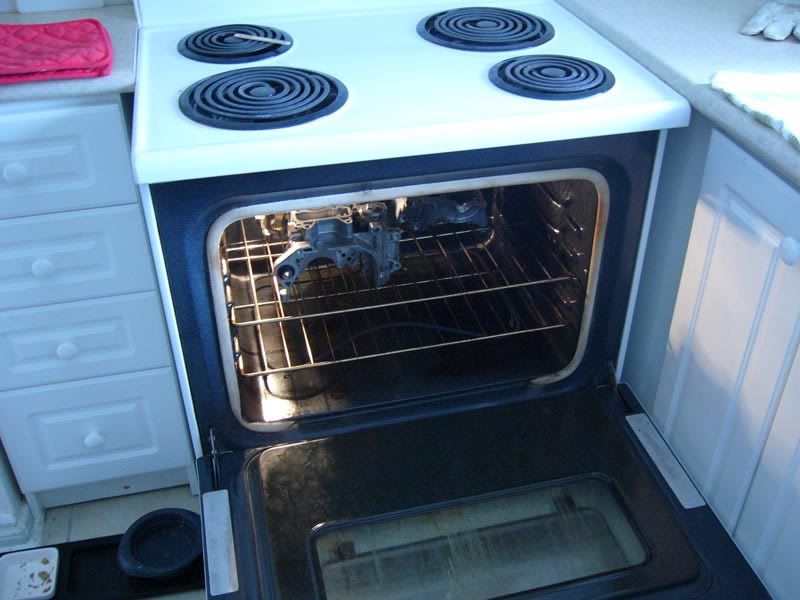 After another soap-and-rinse to get rid of the lapping compound I baked all of the engine block in the oven to drive off any water that was trapped inside. 200°F for an hour. Moving on to the piston... 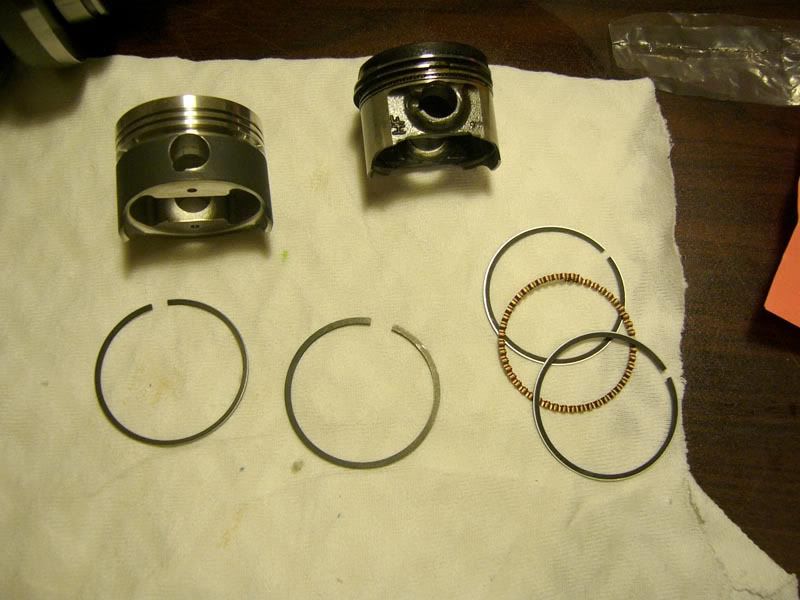 The rings had to go on first, so I used the old one as a reference and organized the rings in order; left to right = top to bottom order. A thin one with a slightly silver edge, a thicker all black one, a slim one then the wiggly oil scraper and another thin one. They go onto the cylinder in reverse order, since you put them on from the top. For example: 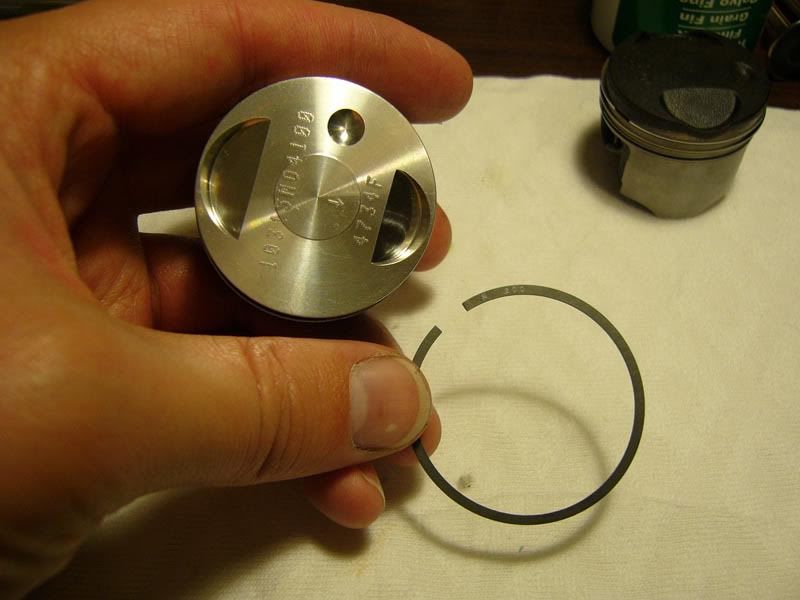 The ring to go on in this case is the 2nd one down, the black one. 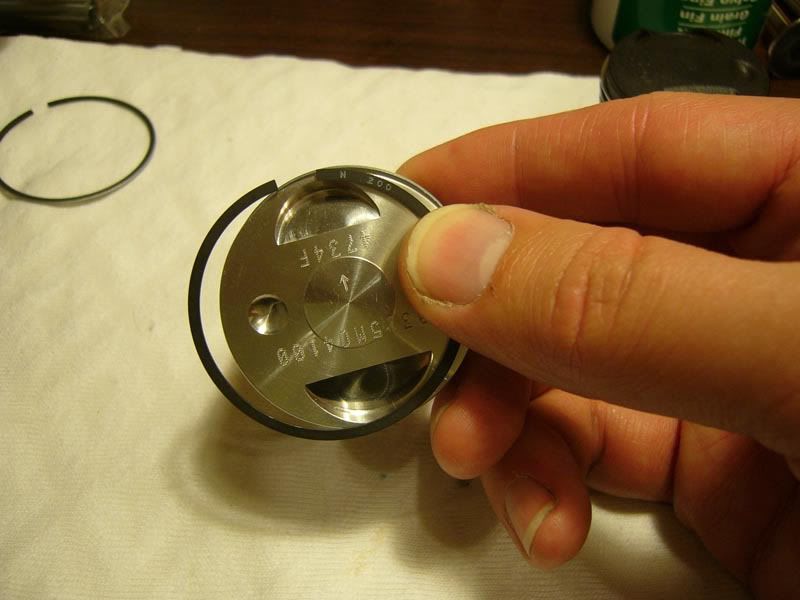 Starting by holding the ring against the top of the piston. 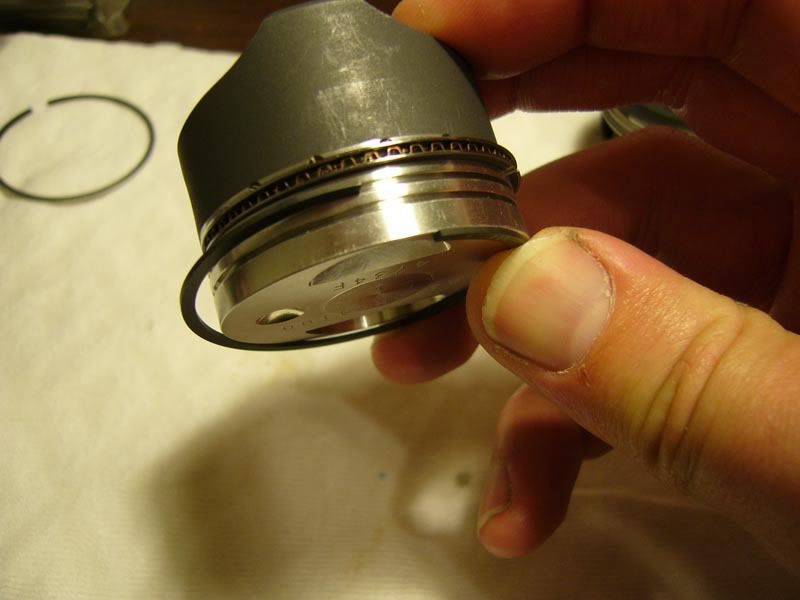 Flexing the ring down to hook one end of it into the slot that it fits into. 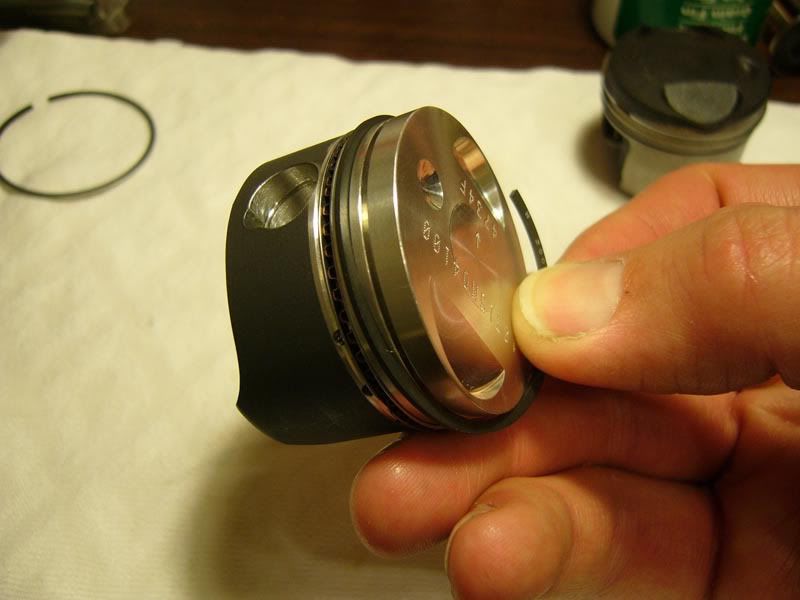 Working around the piston, flexing more of the ring down and into the slot. 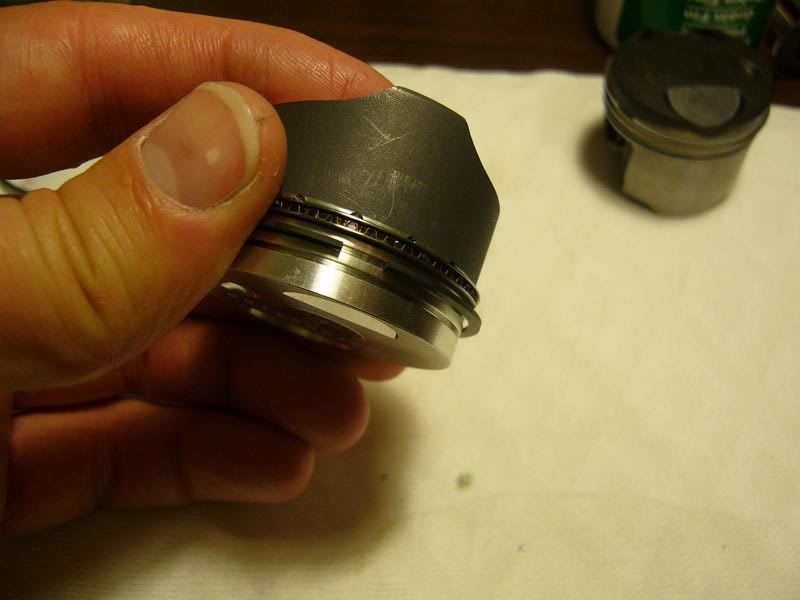 And there you go. I'd already done the oil scraper rings when I took this photo.. the only real difference is that all 3 fit in the same slot and you have to be careful not to overlap the wiggly scraper ring's ends. Attaching the piston to the connecting rod was a five-letter-word-for-female-dog! The little C clips that keep the piston's pin in place were a nightmare to get in, until I figure out the trick to it. 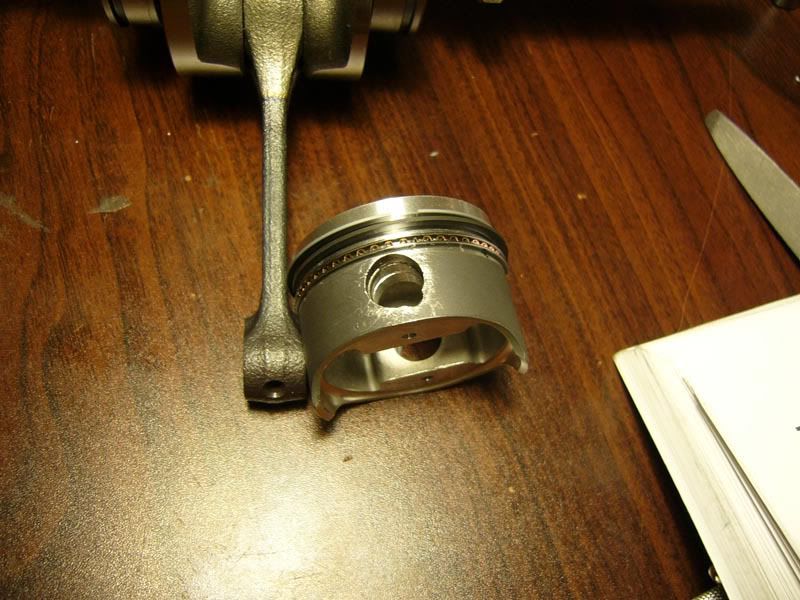 Here's the first one, in place, and you can see the small amount of damage that I did to the cylinder around the opening.. hopefully these little scratches won't be a serious issue.. not much I can do about it now anyway. >.<; Here's how the C clips go in:  The first one I did on my own using a small padded vice to hold the cylinder, but once it's attached to the connecting rod & crank shaft I needed my husband's help to keep it steady. There's his hands holding it, and I have the clip in a pair of needle nose pliers. 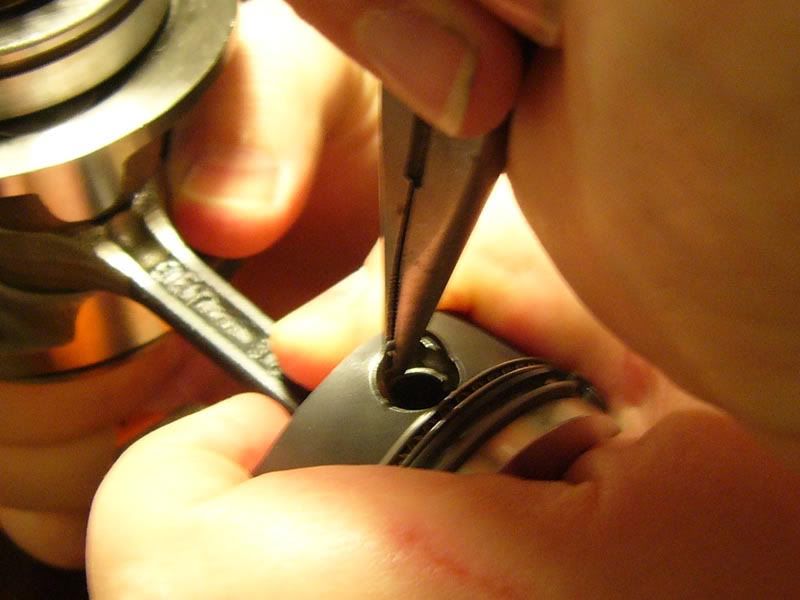 The trick is to hold the C clip with the gap pointing towards the hole in the piston; down in this case, and then you just push it in. The hole itself does the work of compressing the clip and this keeps the sharp ends of the clip well away from any surface of the piston. Once it's in far enough (touching the pin inside of the piston in this case, but I was able to feel when the clip got into the groove when I did the first on) you rotate the clip around the axis of where it's in contact with the cylinder. Not around the axis that passes through the center of the C clip. You can then use the tip of the pliers to press the clip down into place, using the little notch cut into the side of the pin hole. (I could make a drawing of this if anyone wants clarification...) 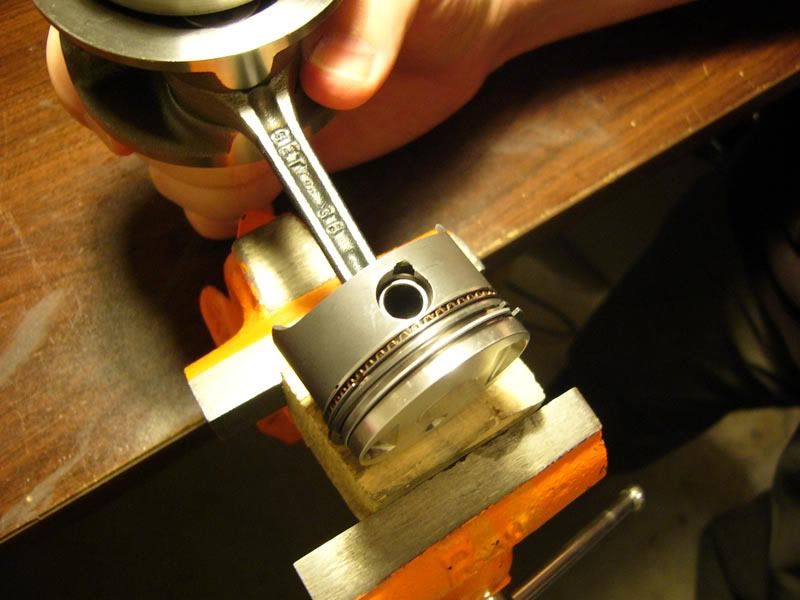 Tadah! 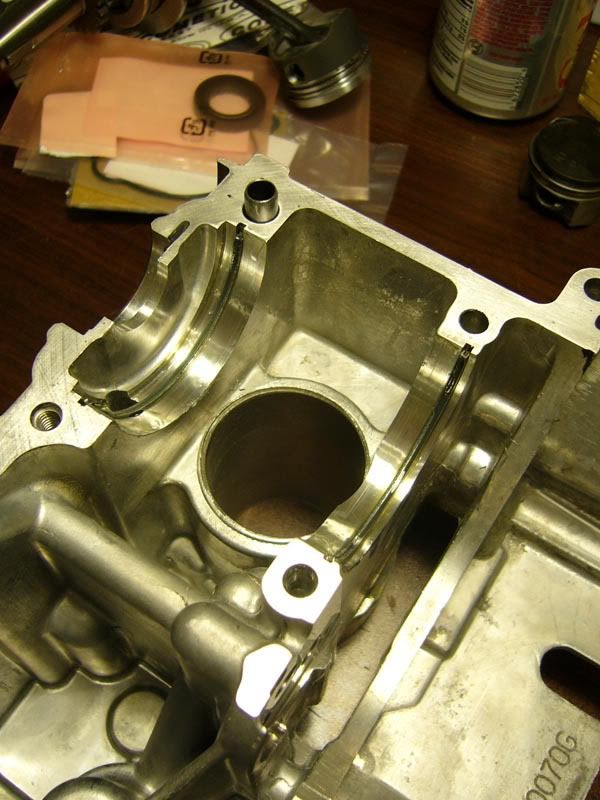 Getting ready to put the piston & crankshaft back into the cylinder head.. first by putting the crankshaft guides in place. 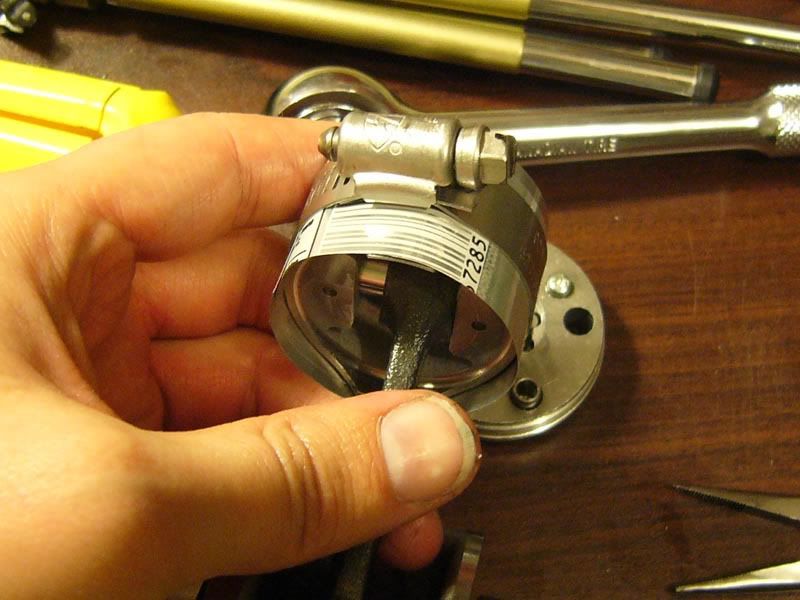 To compress the piston rings I made a ring compressor out of a pop can and a hose clamp. 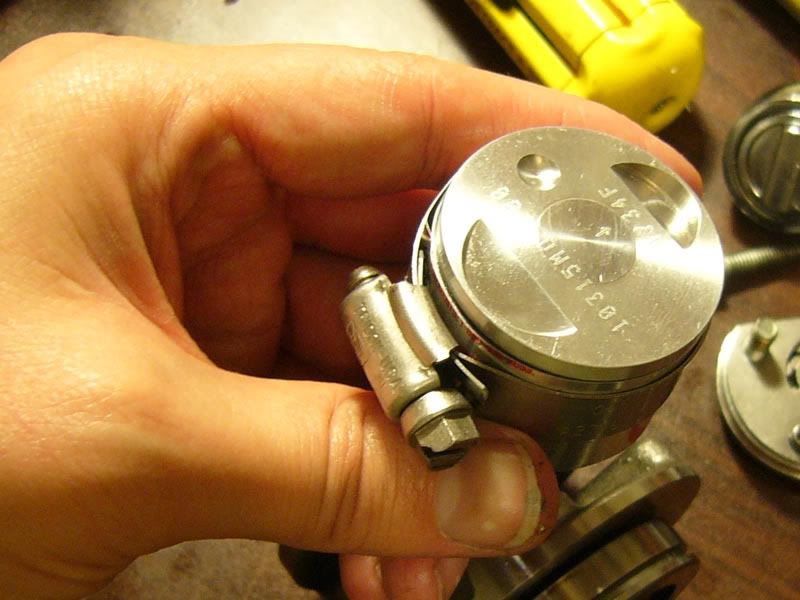 Ready to go in. It was a bit tricky getting the pop can skin around the cylinder, then fitting the hose clamp over it and tightening it into place. Had to tighten it the right amount to compress the rings, but not make it impossible to slide the piston out.. I also oiled the piston before wrapping it in the can, which didn't make it any easier to do. *chuckle* There's a few millimeters of bare piston poking out of the pop can in order to get it started into the cylinder. 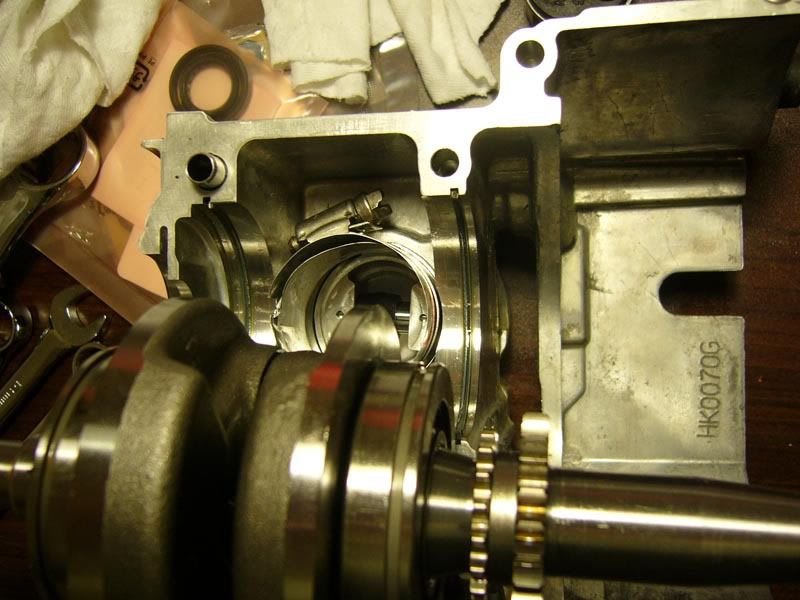 And it's in. 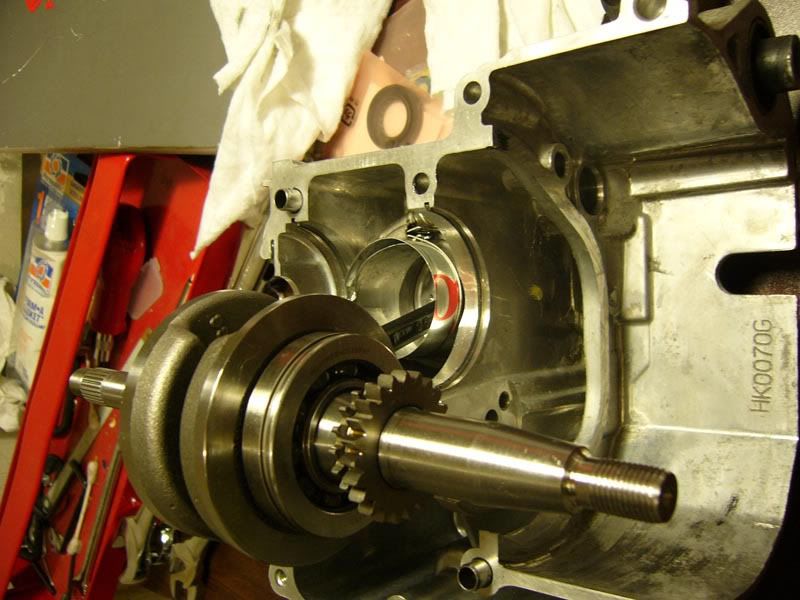 Though it did take 3 tries. 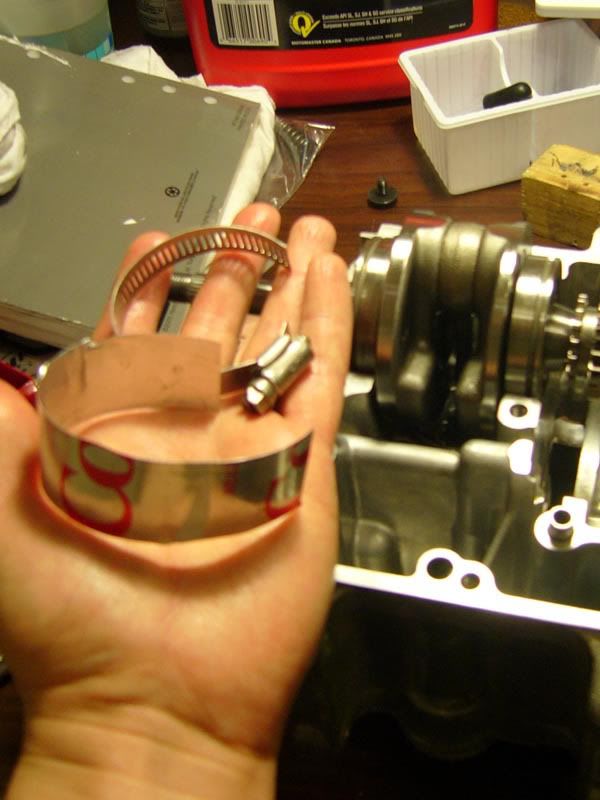 Bits of the ring compressor. I trimmed the hose clamp a bit to avoid having a hy00ge metal strip sticking out off of the end and getting in the way inside of the cylinder head. 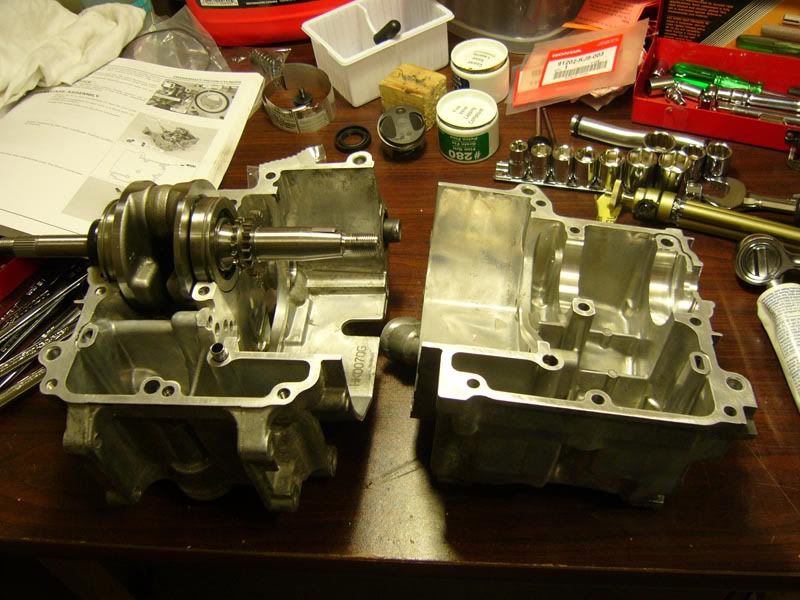 Two halves of the crankcase ready to go together. I had planned to take a photo after applying the liquid gasket. 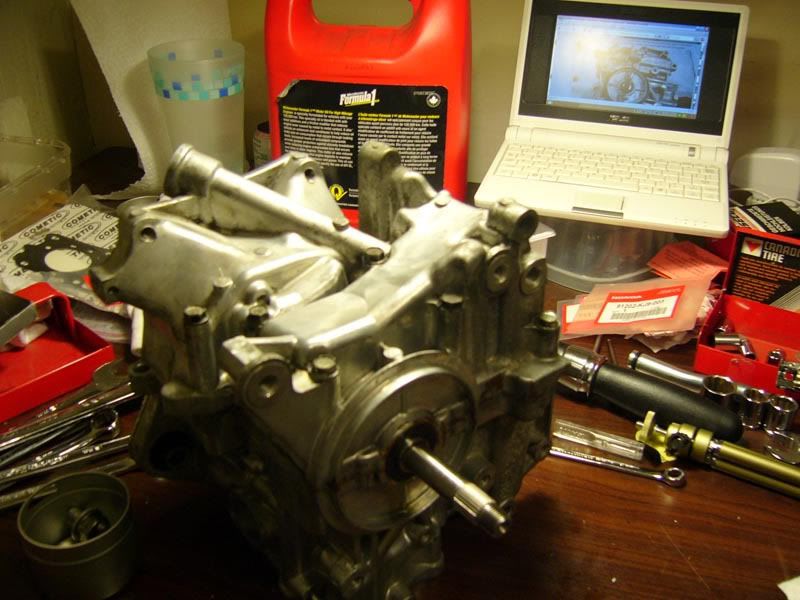 But I forgot. -.- 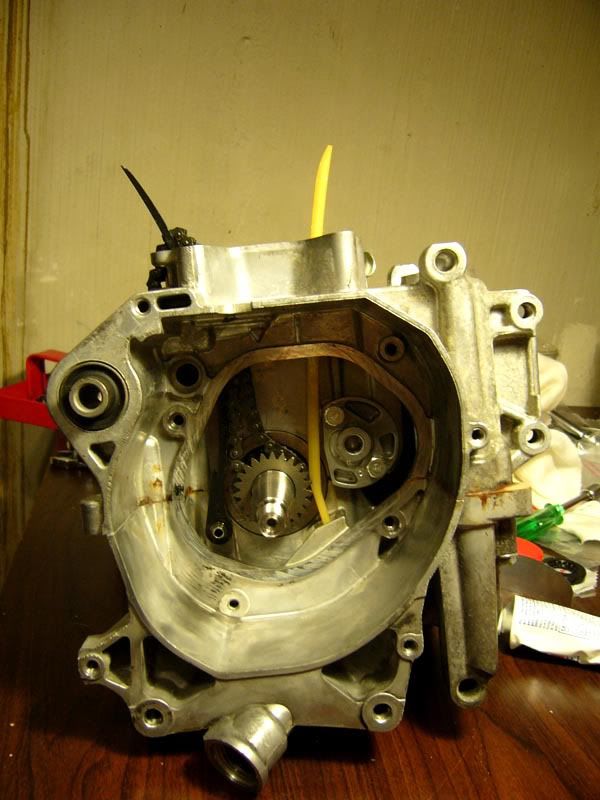 And here's where everything crashed to a halt. I'd gotten the chain and it's guides in, re-attached the oil pump and gear (not shown) and was bolting the stator plate on when I over-torqued the bolts. C'est la gurre. More to come. |
|
|
|
Post by andr01dm on Jul 30, 2008 19:27:52 GMT -5
AUGH!  Seems to say tighten all 6 bolts attaching the cylinder head to 12 Nm, doesn't it? 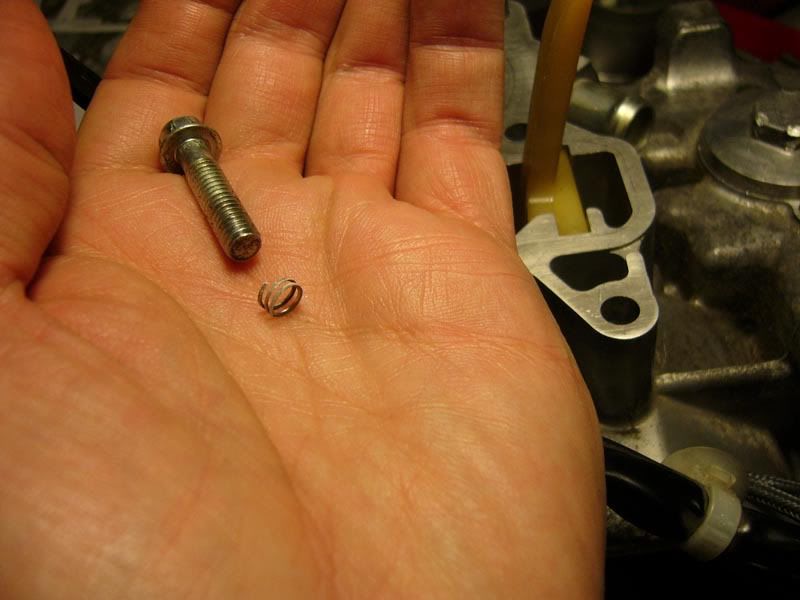 Apparently not. So now I have to drill out the broken threads from the bolt holes on the engine block, tap new threads and get some larger diameter bolts to replace the stock ones. So that's four bolts broken and now two bolt holes stripped, for those of you who are keeping a score. If it were at all sensible to do it I'd try to sue Honda for their poorly written service manual... |
|
sr50r
Ruckster
Posts: 281
|
Post by sr50r on Jul 30, 2008 20:20:34 GMT -5
Perhaps your torque wrench needs calibration?
|
|
|
|
Post by andr01dm on Jul 30, 2008 20:52:43 GMT -5
Perhaps your torque wrench needs calibration? No, it's new and it was properly set to 12 Nm.. worked perfectly on the other four bolts. The problem is that the manual should have specified something around 9 Nm for the smaller bolts, not make it look like 12 Nm for all six of them. |
|
|
|
Post by chanito on Jul 30, 2008 21:34:07 GMT -5
 Calm down, get a set of helicoils in 6 x 1.0 mm and fix the torn threads, do not use nm as the diference between 11 and 12 is too big and 13 will be too much, use inch/pounds, and wait until Friday as i will do a write up on proper head torquing procedure
|
|
|
|
Post by andr01dm on Jul 31, 2008 11:58:45 GMT -5
|
|


