|
|
Post by Ruckass on Nov 2, 2004 10:20:27 GMT -5
I'd like to shorten my spacer. Do i just take it to a machine shop and ask to have 1/16 inch taken off? I dont have a lathe at home and dont want to mess it up.
Ruckass
|
|
|
|
Post by abe on Nov 4, 2004 18:55:40 GMT -5
Yep ;D
Make sure you smile so you get a good deal.
|
|
|
|
Post by chanito on Nov 4, 2004 20:29:25 GMT -5
I used a brand new file and it work great, this is what i did, and i did a lot of tries and this is so far the best, hope that using this information will save you some time. I found that if you put both halves of the front belt drive together there is still a groove big enough for the belt not to ride far out en ought 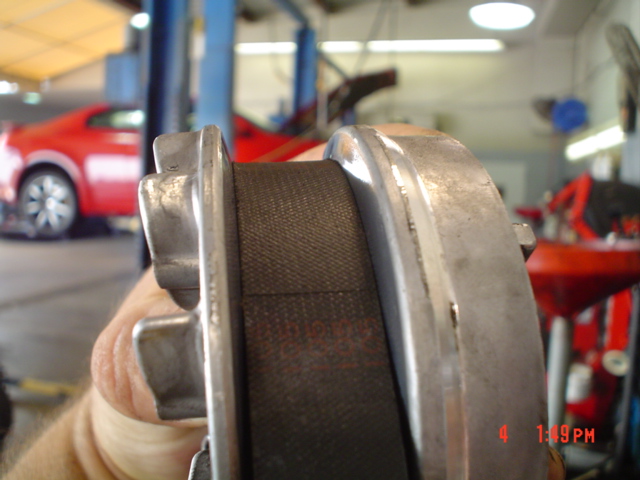 so i filed the nose 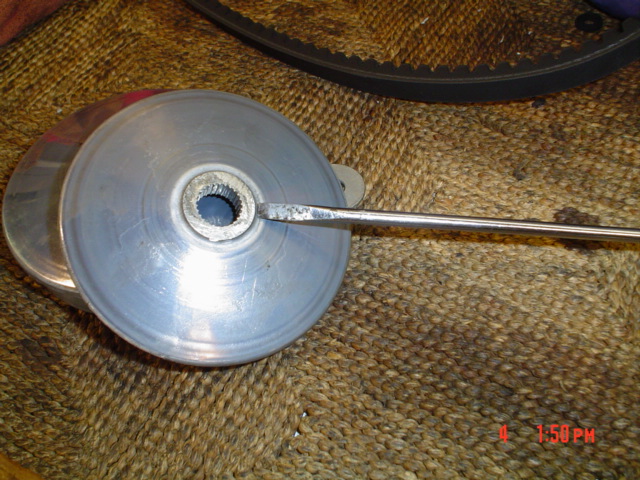 keep filing until the depth of the outer face is 22mm 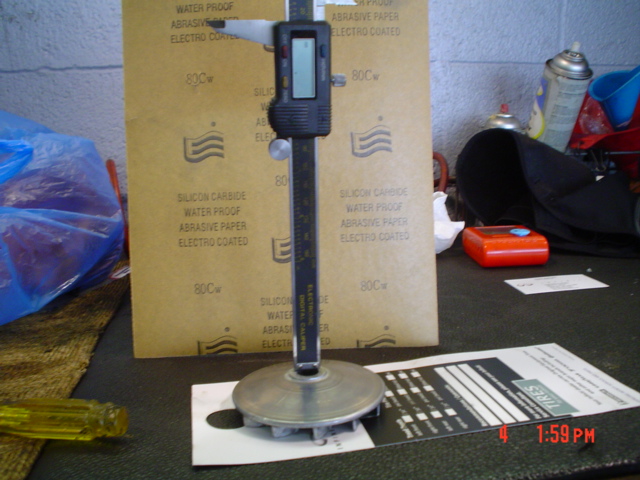 This will allow both halves to get closer so the belt ride further out 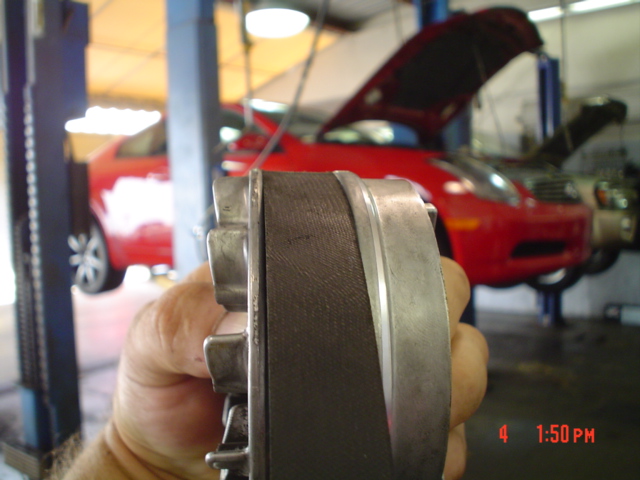 File the spacer until is 35mm long 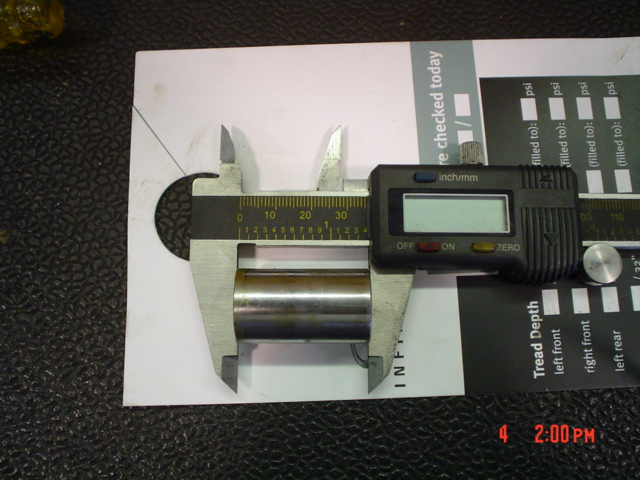 hope this helps, do not forget to lube the spacer, but make sure you do not lube the rollers or ramps, as this creates all kind of interesting behavior on the variator. |
|
|
|
Post by zoomerman on Nov 9, 2004 0:39:12 GMT -5
Hey Chanito,
I assume you've had to use a washer to make up for the metal you've removed on the spacer and the drive face nose.
From what I can tell, the washer will need to have the same inside diameter as the spacer.
If I just added another washer like the one already on there it would be pressing on (crushing/wrecking) the splines on the output (drive) shaft.
Your thoughts on this...
Everyone's thoughts on this...
zoomerman
|
|
|
|
Post by chanito on Nov 9, 2004 5:43:06 GMT -5
Ok this is what i did, i got a 9/16 flat washer, using a drill i enlarged the hole just a little bit so it was the same as the spacer, then i mounted that washer first then the variator. it works great. ;D ;D
|
|
|
|
Post by abe on Nov 9, 2004 6:00:28 GMT -5
Ya, keep those crank splines safe!
|
|
|
|
Post by Ruckass on Nov 13, 2004 13:26:12 GMT -5
when we say spacer, we mean the "Drive Face Boss" correct?
|
|
|
|
Post by Dandy Dan on Nov 13, 2004 14:17:25 GMT -5
Yup, that's what it's called on the 'fiche' on ronayers.com. I installed mine yesterday and i'm happy with it.
I had a friend grind it to exactly 35mm and I'm running 3, 5 gram and 3, 7.5 gram roller weights. I am very happy with the gearing. Running 3,5 and 3,6 gram weights was too light. I was hitting 9000rpm at 52km/hr (31mph?). With a 35mm spacer you won't need an extra washer either. Its close but i put mine on and took it back off to check the threads and its not touching them.
TIP: to loosen the bolt on the variator use an old bicycle tube and jam it in there. It works awesome.
Right now i have an opened up airbox (shimmed 2mm and a 85 jet) and a CDI and i'm cruising at 40 mph and can hit 45mph down a nice hill. (although i'm too lean in the midrange. gonna try a 90 jet right now)
|
|
|
|
Post by Ruckass on Nov 13, 2004 15:59:10 GMT -5
I got some tightening straps from Canadian Tire (cheap automotive store here). Same idea as an intertube. I also now use a torque wrench.
So your your drive face boss (spacer) is now only 35 mm long? Have you ground down the nose on the Drive Pulley Face too? Should I do both?
Lastly, what RPMs should the scoot be revving at at 30mph if not 9000?
Ruckass
|
|
|
|
Post by zoomerman on Nov 13, 2004 16:37:41 GMT -5
Regarding the idea of jamming something between the drive face pulley and case to remove the nut... I was doing this and recommended it, but now I think it may be bad and lazy. It may put too much side force on the output shaft, which might bend it or damage the bearings it rides on. Soo... I made a tool like the one made for the job. It holds the drive face still, via the holding holes, so you can undo the nut. I've seen someone else in here made one too. It's super easy to make, no drilling, no cutting and total cost less than 4 bucks. It's easy and you'll find once you start playing with the variator and spacer (drive face boss) you'll be tweaking that thing for a while. I've been in and out of the variator 9 times so far. My tip: Don't go chasing top speed, you'll lose that satisfing acceleration and hill climbing power. Unless you live and ride in the country where most of your time is spent at full speed; sacrifice top speed for rippin' around town power. ;D Go to the hardware store and grab the things in this pic: mypage.uniserve.ca/~hhgordhh/parts%20004.jpg(the odd looking black thing is a bike's brake pad, I made mine with random nuts and bolts) Ohh... and the part with .69 written on it is not strong enough, buy 2 or 3 of those pieces and bolt together or buy a thicker piece of metal. |
|
|
|
Post by Ruckass on Nov 13, 2004 18:56:17 GMT -5
Nice tool and no thats not a come-on. My strap is made to go around the circumferance of the drive pulley face and hold it while cranking the nut off. It works with no sideways pressure on the crank (output)shaft.
I agree with the advise of not giving up the take off power for the top end power, but I want BOTH! I'm gonna work on resistance things now, ie. windscreen, slicks, lowered seat etc. Then theres always the new camshaft, carb and port and polishing.
Ruckass
|
|
|
|
Post by chanito on Nov 14, 2004 18:04:08 GMT -5
I was wandering what happen to the pictures  |
|
|
|
Post by abe on Dec 4, 2004 17:00:06 GMT -5
I was wandering what happen to the pictures  Are they still on the server? |
|
|
|
Post by Dandy Dan on Mar 19, 2005 19:55:38 GMT -5
Just so it's clear to any newbies who may be wanting to try this mod I just wanted to clearly highlight the dangers so no one screws it up.
When you are putting the variator back on the crankshaft the second half consists of 4 parts that go on in this order: Big piece with all the fins (goes on lateral threads), smaller piece that the kick start uses (also slides on lateral threads), washer and nut. There are two problems you need to watch for when you shorten the spacer. The second problem also applies any time you take the variator apart.
1 - With the shortened spacer everything will slide farther onto the crankshaft but the washer (piece 3) isn't large enough to slide over the lateral threads. When you attempt to tighten the nut you'll mash the washer into the end of these threads and damage them which makes it tough to remove the first two pieces.
2 - Because the washer won't slide onto the lateral threads you can't properly tighten everything together. As a result your big piece with the fins will wobble on the threads and slowly wear em off. This can also happen if you just don't tighten things enough even if you don't change the spacer. Make a note of how much crankshaft was sticking out past the nut before you take things apart and make sure it's the same when you're done (or even more if you swap the spacer).
Problem two is much worse than #1 because it will completely destroy your crankshaft. I know this for a fact cuz I personally screwed this up and destroyed everything. Luckily I went crying to my dealer and they warrenteed it but they said the bill would have been 1200-1300$ Can. (1000$ US). To do this repair they need to completely remove your engine. It's about the hardest thing possible to fix.
Lastly, one other thing to watch for is that your nut doesn't come loose. I suggest using some blue locktight when you put it back on. If it wiggles off a bit you'll be experiencing problem #2. With problem #2 you can hear things rattling/wobbling in there. If you hear anything funny stop immediately and check things out. Don't even finish driving home cuz if something is wobbling on the threads you'll be doing permanent damage. I just thought it was the roller weights when it happened to me cuz they had flat spots in them so I blissfully destroyed my crankshaft.
So remember: use locktight, get things tight and get a bigger washer that fits over the lateral threads (you'll need an outer diameter of about 2.4mm or less and an inner diameter of atleast 1.2mm (if I remember right).
Also there are many means of getting the nut off and on but I believe a impact gun is the best. You can get the nut off in two seconds and back on just as quick and there's no worries of it not being tight enough. If you don't have one rent one for a 1/2 day for about 15$.
|
|
|
|
Post by redryder on Mar 21, 2005 17:28:55 GMT -5
So, if I am reading this correctly I can shorten my spacer to 35mm and will not need to add any additional washers to protect the shaft?  |
|
|
|
Post by chanito on Mar 21, 2005 21:02:20 GMT -5
Since i did this i think i will try to explain as much as i can, first, if you follow this and grind the spacer and the nose you will need to put a washer, a 14mm is the right one, however i could not find one so i got a 9/16 and drill the hole just a bit larger so it will fit in the shaft, then install the variator, the washer will go before any thing else, that is you will install the washer, then the ramp plate, the spacer, the movable drive face, the drive pulley face, the ratchet plate, the washer and finally the nut, so there should be two washers, one that came with the factory variator under the nut, and a new on with a slighty larger center hole, under the whole variator, even though i have an impact gun, i allways torque the nut, i have a hoder that fits so i hold the variator and tighten it to 24 ft lbs. But if all you do is grind down the spacer then you should not need a washer, however better safe than sorry and use one anyway.  |
|
|
|
Post by Dandy Dan on Mar 21, 2005 21:03:38 GMT -5
The thickness of the washer isn't the problem. It's just that when you shorten the spacer the variator slides farther on to the crankshaft but the hole in the stock washer isn't big enough to let it slide on farther over the splines. Then when you tighten the nut you'll think everything is tight but really you just rammed the washer into the end of the splines.
Think of the stock washer like a wedding ring that's too small to fit over your knuckle. If you only want to put it on part way then it's fine (like the stock setup) but if you try to ram it on all the way you're only going to hurt your knuckle (the splines) and not really get it tight to the end of your finger.
All you need is a washer with a big enough inner diameter (hole) to fit over the larger diameter of the crankshaft with the splines. You could drill out the stock one but you'd be left with pretty thin walls so pony up 2 cents for a bigger washer (up to 2.5cm or 1 inch) and drill the hole to about 1/2" or 13mm.
|
|
|
|
Post by Dandy Dan on Mar 21, 2005 21:08:00 GMT -5
Oh we both replied at the same time. It was interesting to read how you do it. I like your idea of using two washers although functionally my way accomplishes the same end goal (get everything tight without wrecking the threads). All I'm saying is I replace the stock washer with one that has a bigger hole so it can slide on over the splines and get everything tight.
|
|
|
|
Post by chanito on Mar 21, 2005 21:39:29 GMT -5
;D My reasoning for the second washer was that by grinding the spacer i was moving the belt riding surface closer to the engine therefore sending it out of aligment so installing that washer was my own way of getting it back in line, anyway i checked it with the washer and with out it and could not see a diference  |
|
|
|
Post by chanito on Apr 17, 2005 17:56:14 GMT -5
I think we need to revive this thread due to the recent enquires about spacer shorthening  |
|